Why the 500?
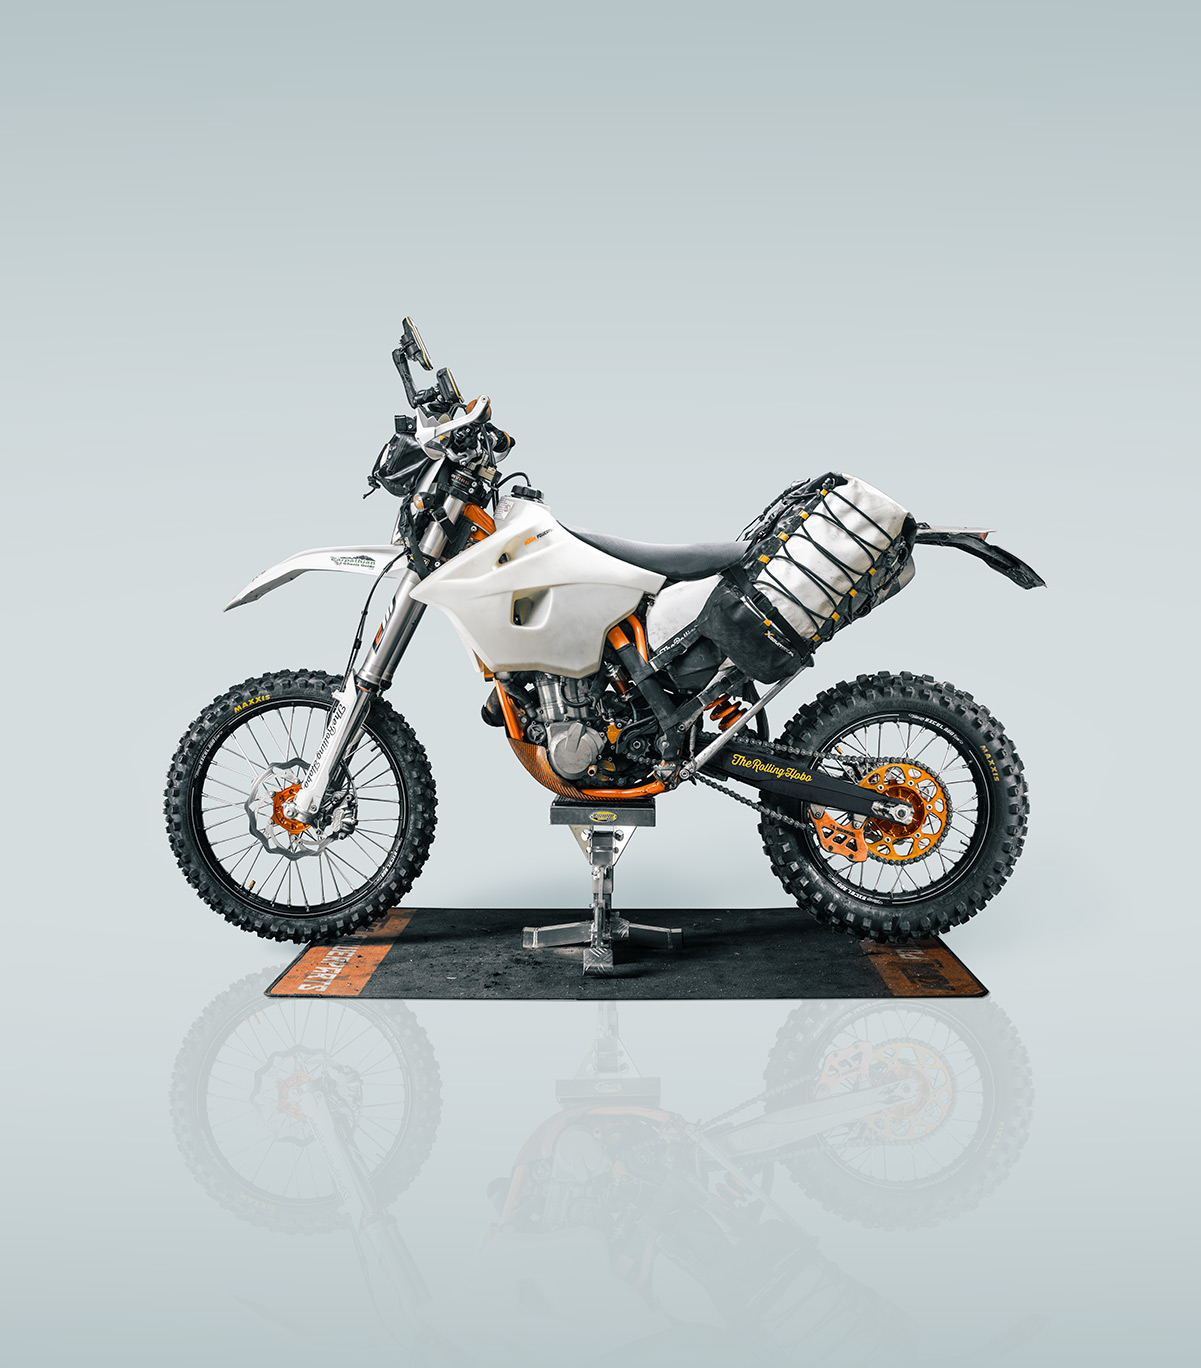
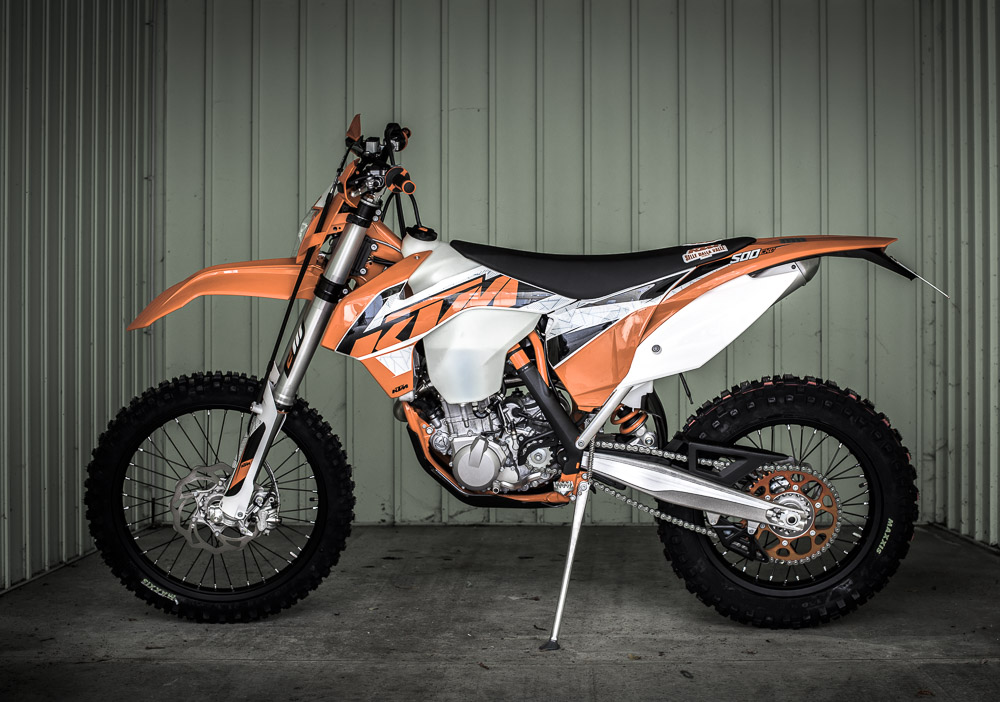
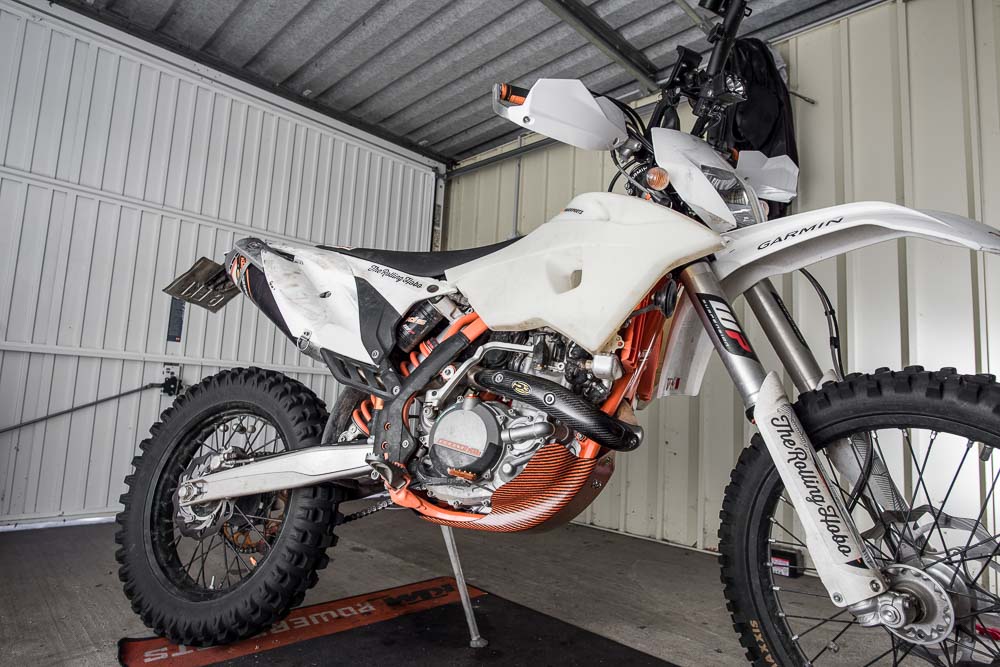
The KTM 500 EXC seems to me like the perfect bike for ultra light adventure enduro expeditions. After over 40.000 km on the KTM 690 Enduro R, I realized that the limits of what I could do on that bike had been reached. To be perfectly honest, I actually had been toying with the idea of a different type of bike since Eastern Dirt 14, where we’d been through some pretty rough terrain on our 690’s. There were four issues that I felt were definite advantages of the KTM 500 EXC.
Weight
The energy a rider spends on a difficult trail is directly proportional to the weight of the bike. The weight of the bike similarly affects the probability of spills and the energy spent on recovering from them and continuing the journey. Picking up bikes is energy consuming. Even with the 690, there were two or three instances, when I couldn’t pick up the bike by myself after a spill. All cases involved the bike being on a muddy trail. I was tired and could find no purchase for my MX boots on the slippery surface. I felt utterly helpless and embarrassed having to be helped with my “light bike”. The stock 500 EXC weighs around 112 kg without fuel, which is around 27 kg less than the 690.
Suspension
The 500 EXC has great suspension already in stock form. It needs very little modification to work well in adventure enduro. The PDS design is very simple and has a minimal amount of bearings down low in harms way. The bikes with linkage suspension have many more bearings prone to dirt and water, which results in more maintenance and more spare parts to carry.
Engine
The 500 EXC has a good engine, producing enough power for adventure enduro. It has plenty of bottom end grunt for cruising and explosive power higher up for when you need it for obstacles and whatever. What’s best is that the engine doesn’t seem to be prone to stalling even with lower revs.
Gearbox
The 500 has an enduro gearbox, so the first gear is nice and short. It makes life a lot easier with tricky starts on steep technical terrain. The sixth gear is tall enough to keep a nice marching pace on transits, even with an enduro final drive gearing.
Design fundamentals
The two main fundaments for the design of the build are intertwined. One affects the other and vice versa. The final build is a delicate balance of terror between the two.
Go light
The obvious and easy goal was to keep the bike as light as possible. This fundament of course also spilled over to equipment and gear selection. It’s been an interesting journey of rethinking and tweaking everything over and over again. I always fancied myself as going light on the 690, and compared to many it was true. However, looking back now reveals a completely different reality.
Keep rolling
The bike should be able to survive up to 20.000 km rides, and not just one. This is the interesting challenge, as there is very little real world data about this. I’m hoping that with the correct build and maintenance schedule it can be done. Time will tell.
The Build
Handlebars
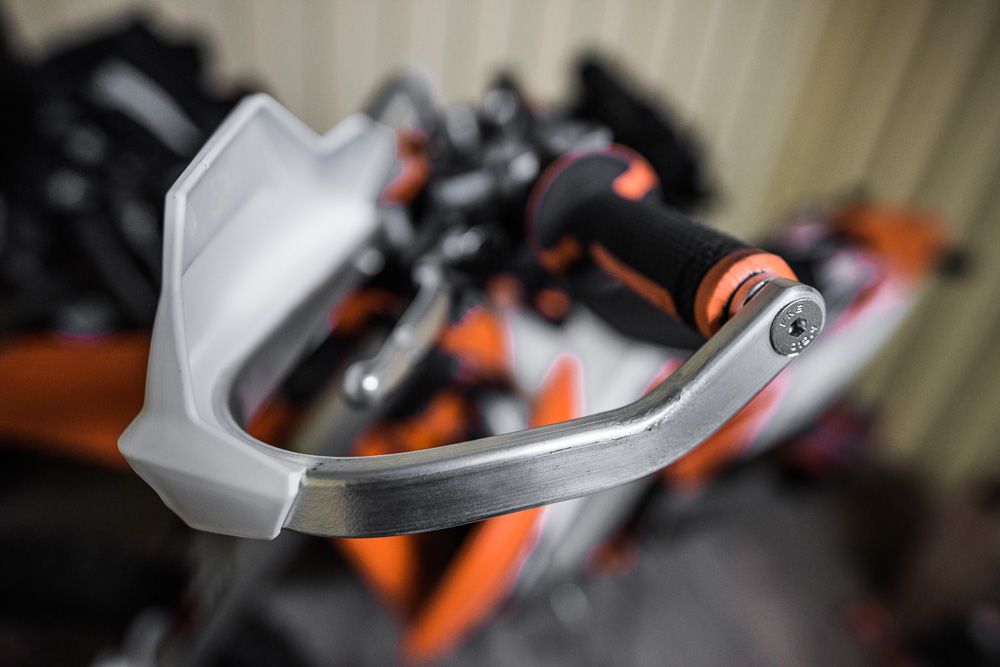
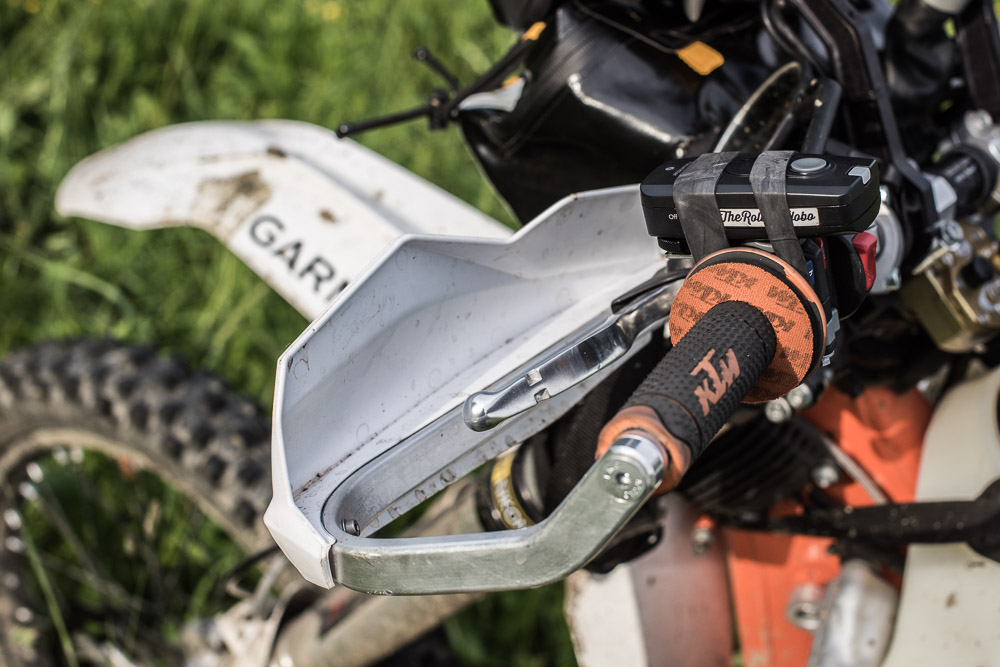
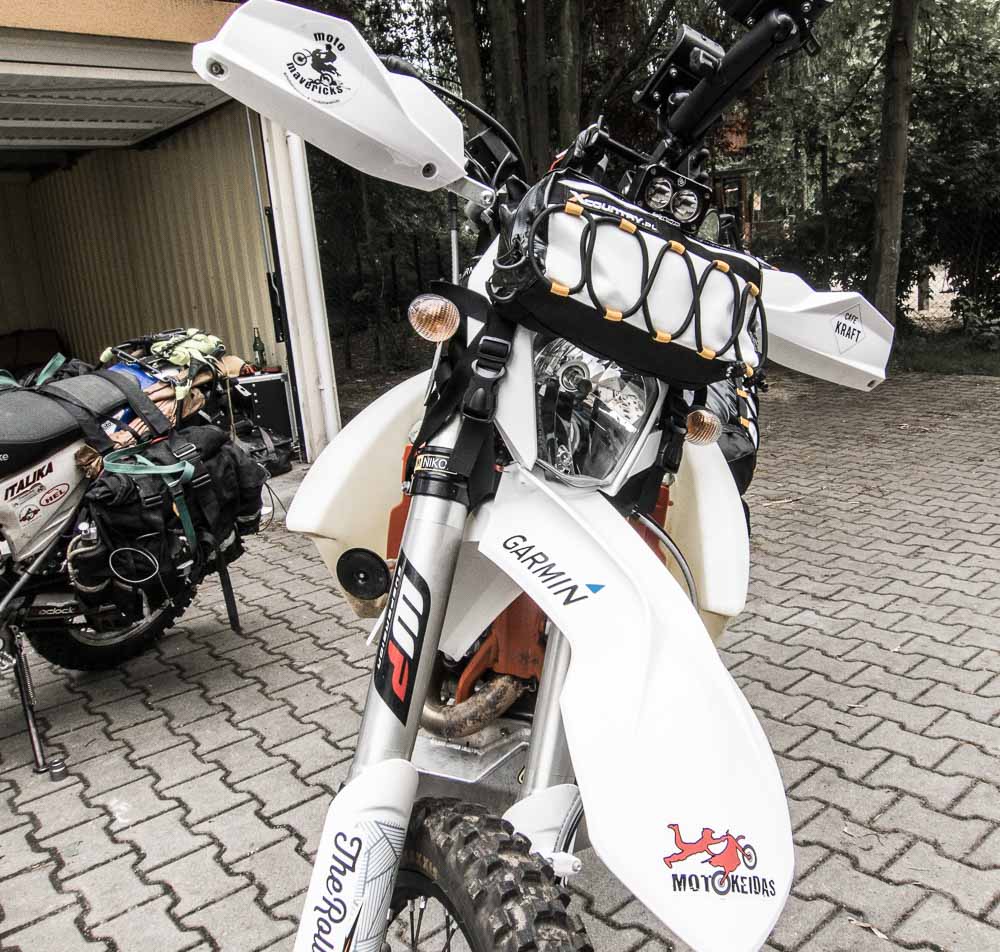
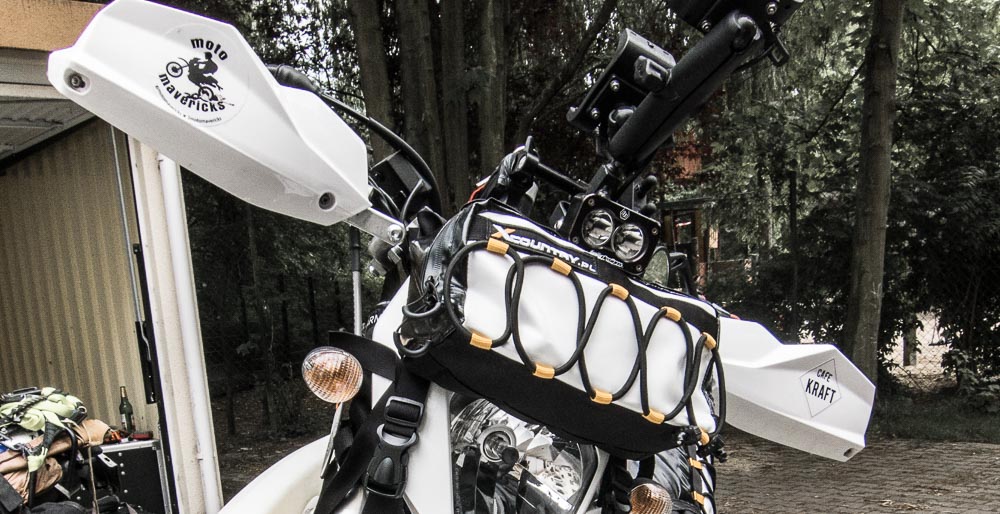
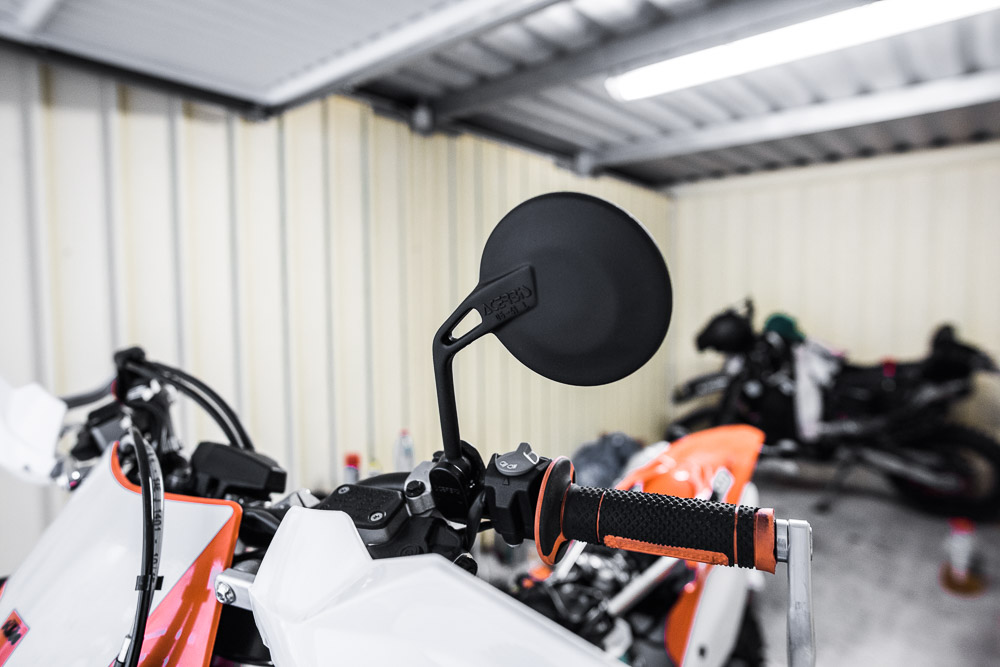
I prefer to use aluminium rail hand guards, instead of the OEM ones that are mounted from a single point. It’s not only for hand protection, but the rail also does a great job of protecting the handlebar, levers and throttle tube from damage in falls. The handlebar vibrates a lot, so instead of using the supplied sheet metal screws, I prefer to drill the mounting rail and bolt the deflector right through.
Even then I use Nyloc nuts or thread locker to make sure they don’t roll open in the vibration. I just cut the original closed grips to fit the rails, but a better option is to get a pair of dual compound open grips from KTM. I always use grip donuts, to avoid blisters on the outside of the thumb joints.
Levers
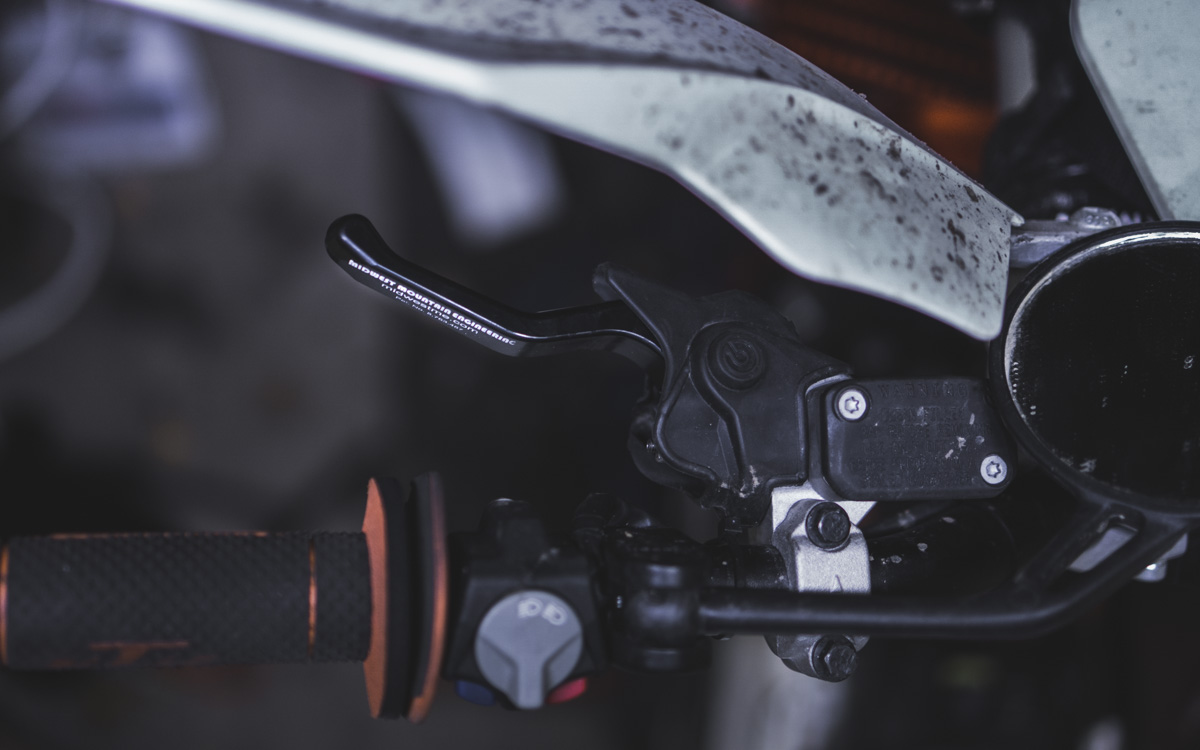
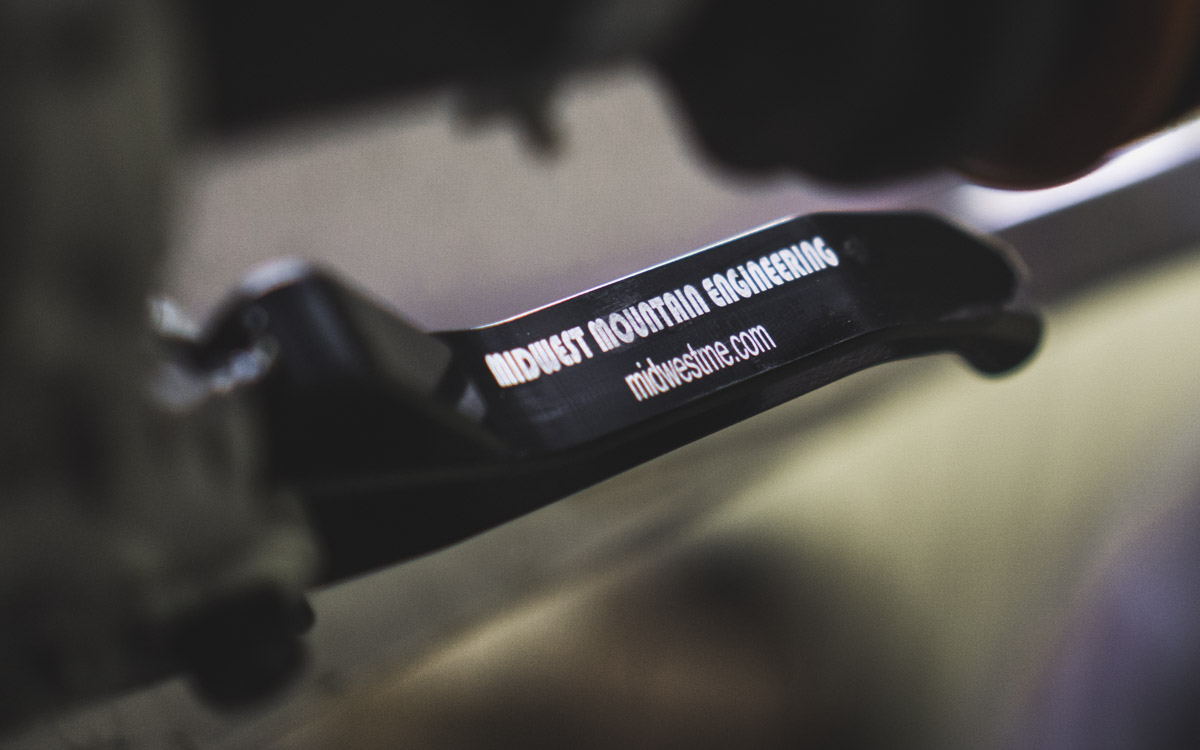
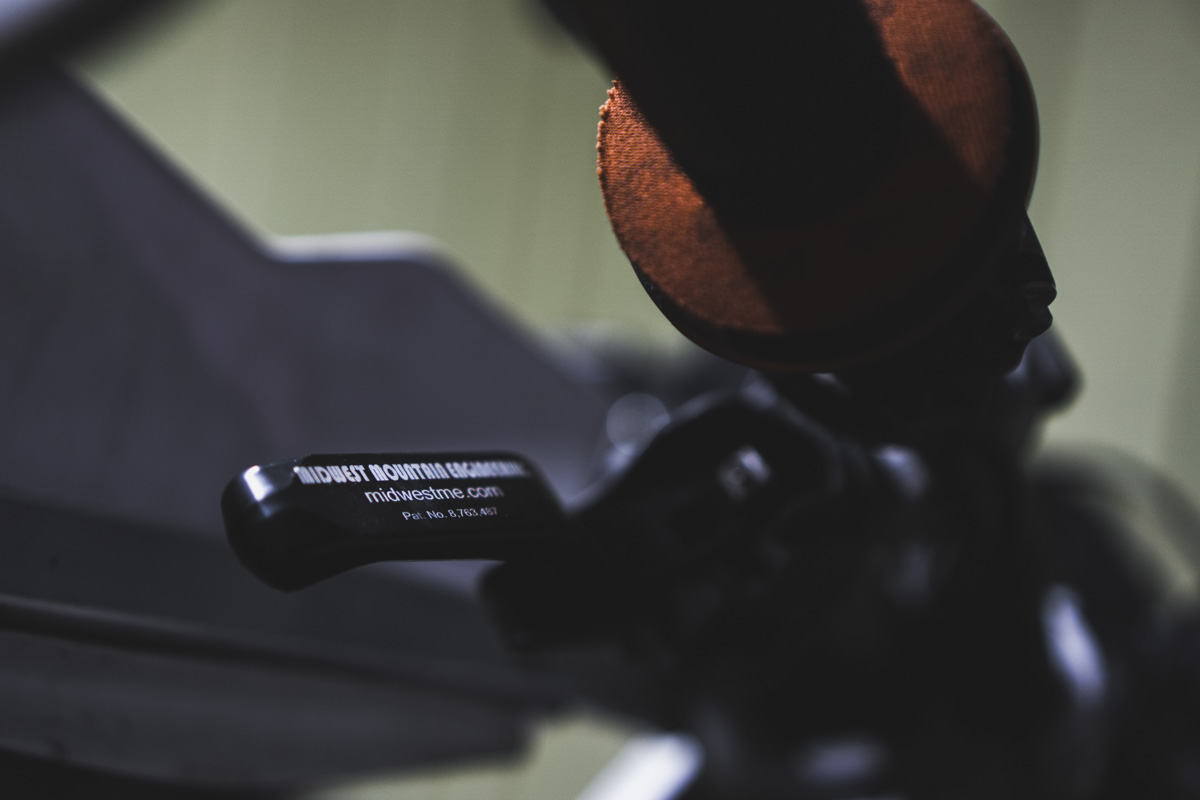
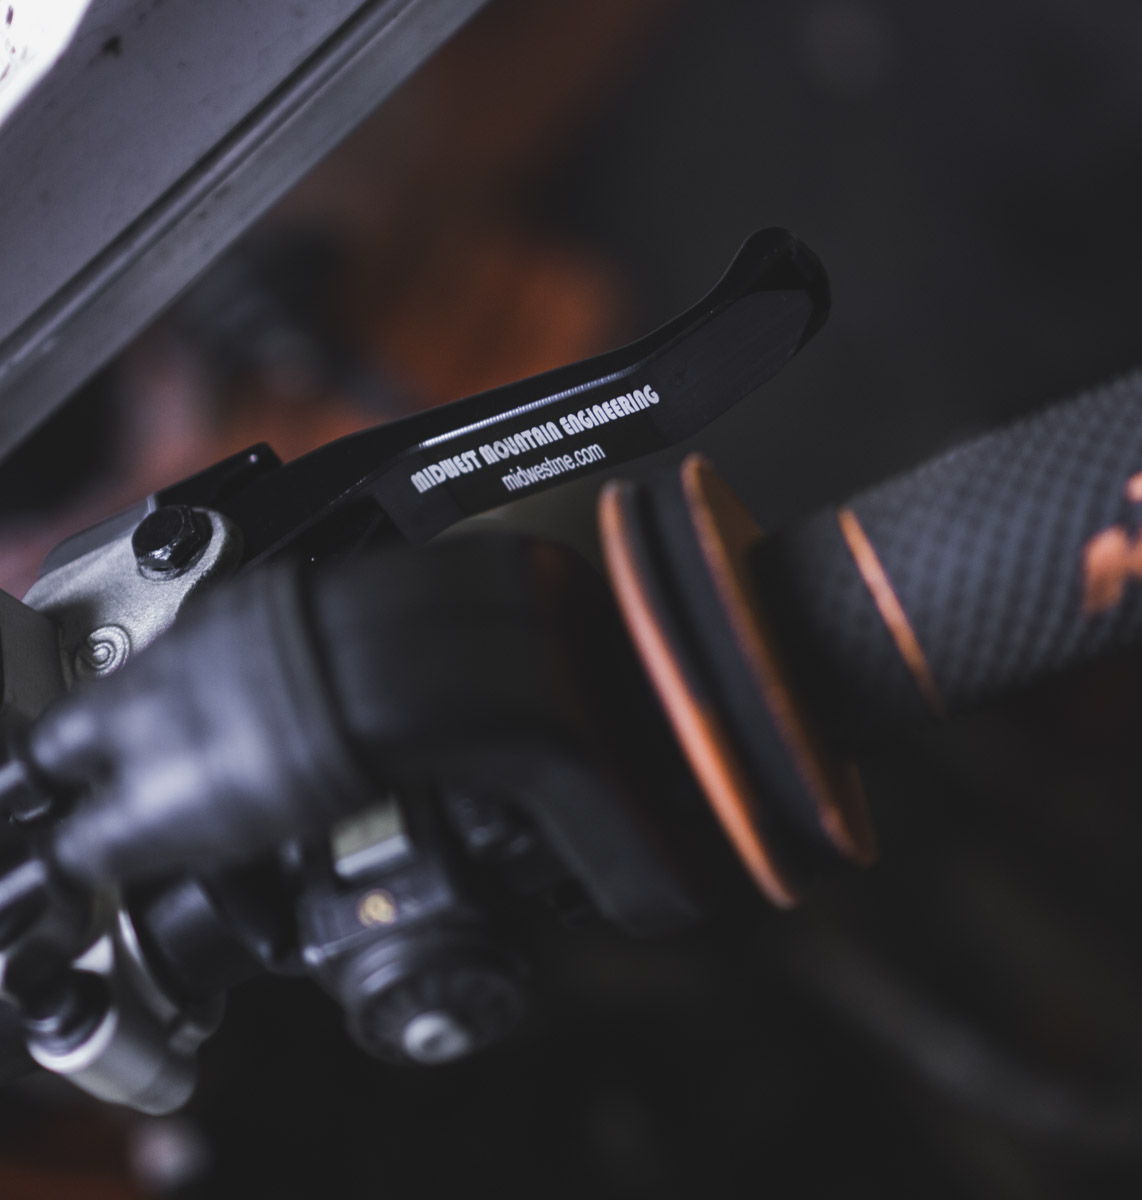
I went with Midwest Mountain Engineering’s Clever Levers to ease the strain of clutch pull on the finger joints on long expeditions.
Pedals
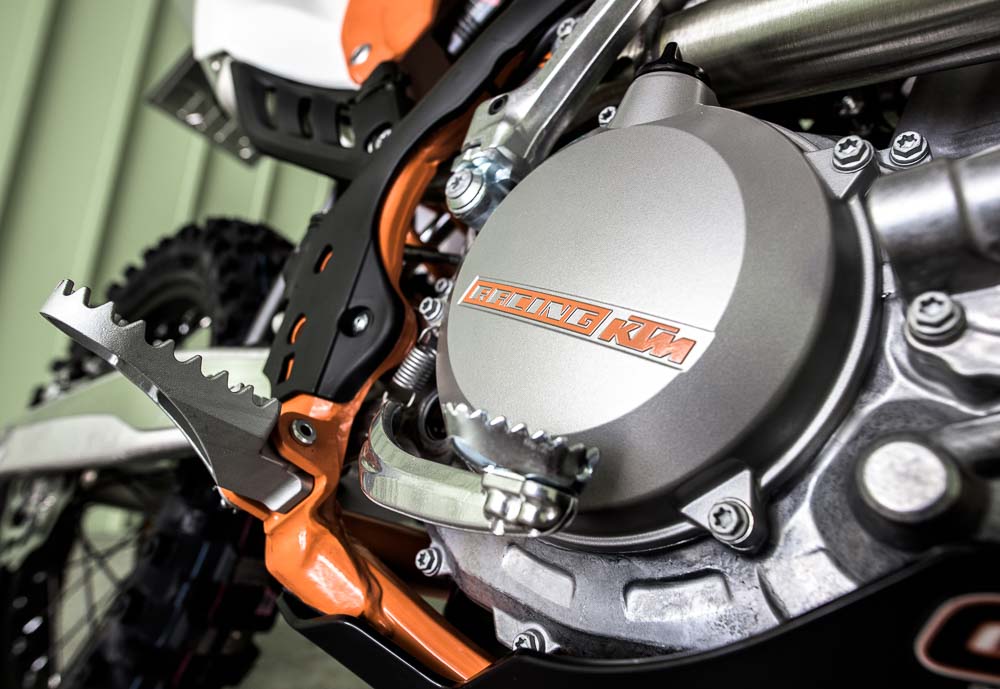
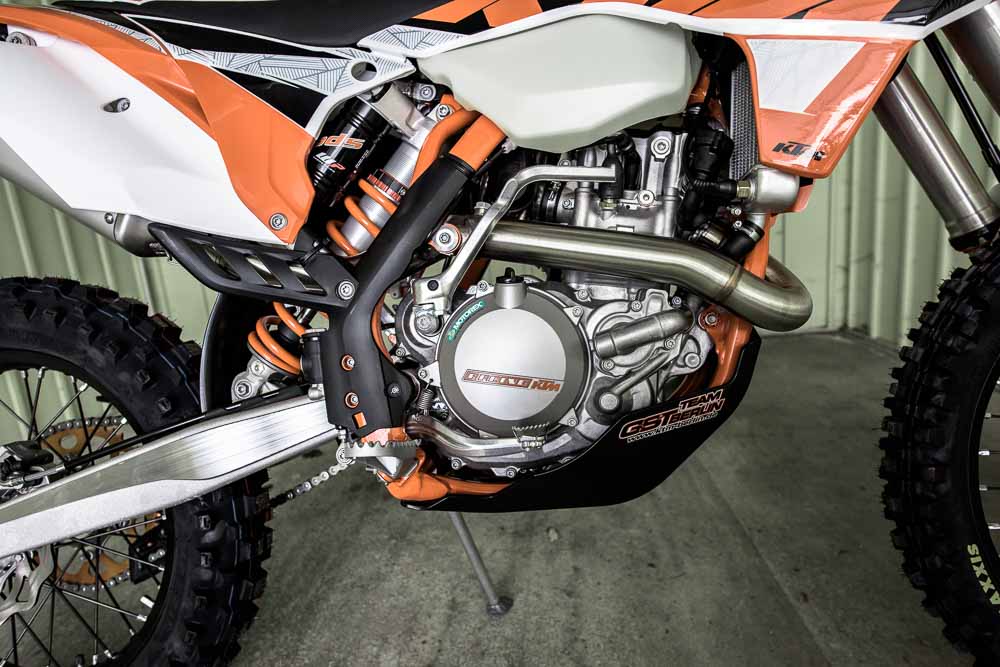
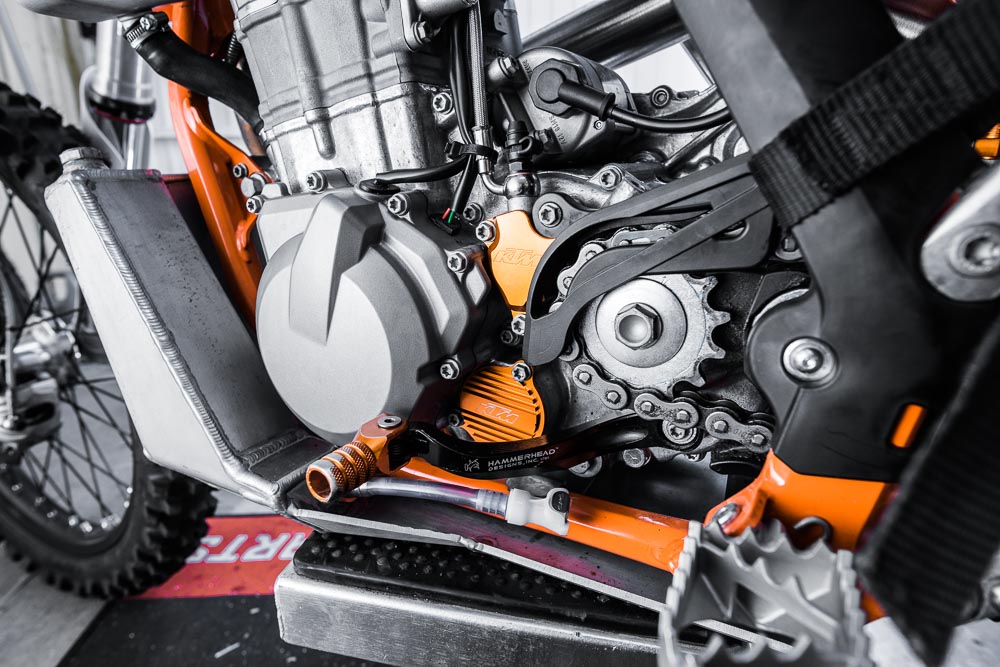
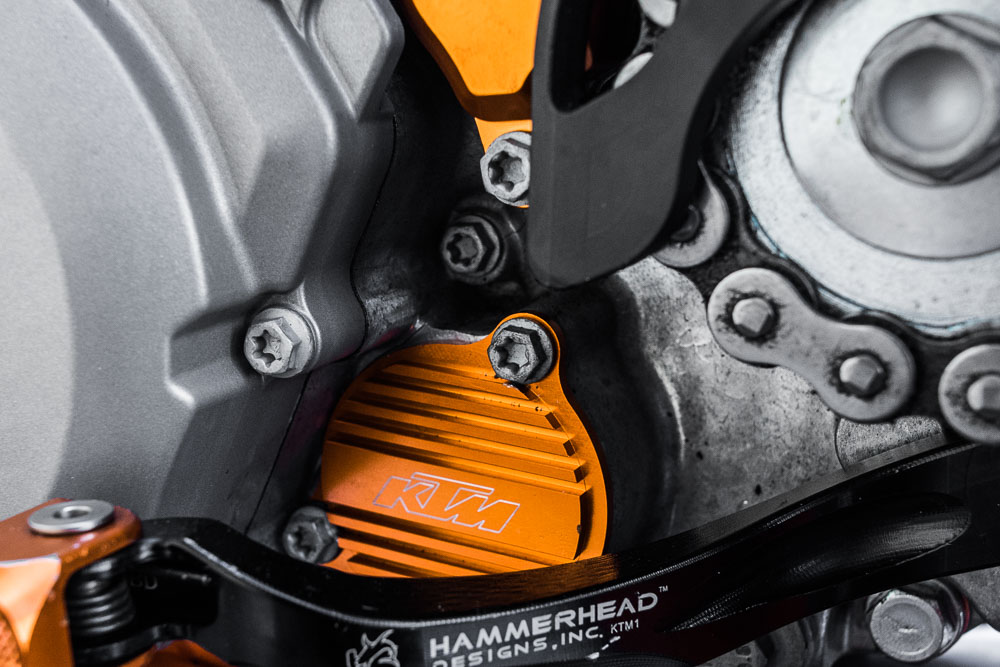
I have a pretty narrow skid plate, which doesn’t offer much protection to the pedals. To give them a better chance of surviving small tumbles, I went with Hammerhead Designs, which seem very sturdy pedals. The shifter is mounted on the engine with a single bolt, so it’s a good idea to make sure it doesn’t loosen and rotate off. Hammerhead produces a handy lock wire bolt for the shifter pedal which works like a charm. The brake pedal has the tendency to scoop trail debris between itself and the clutch cover. At worst, the jammed debris could break off the pedal. A security wire from the pedal to the frame will significantly reduce the risk of that happening.
CLUTCH
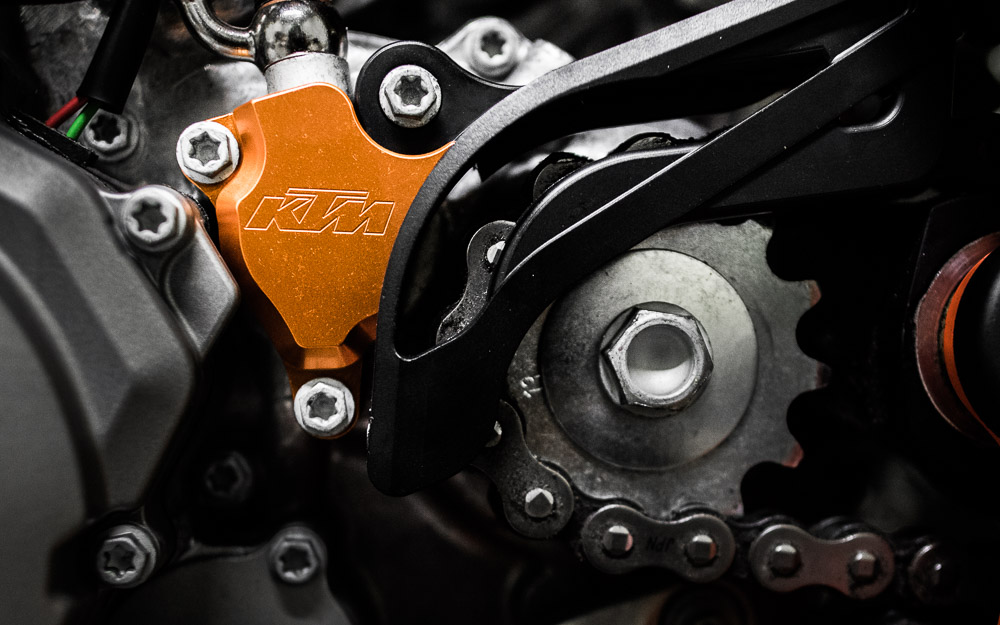
Apparently the brake lever tip teeth have a tendency of puncturing the clutch cover in falls. The P3 carbon clutch cover protector will prevent this from happening and also protects the cover from boots scratching it. Further back, the clutch slave cylinder guard should keep the clutch in working order after a snapped chain whiplashes though the front sprocket.
THROTTLE CABLES
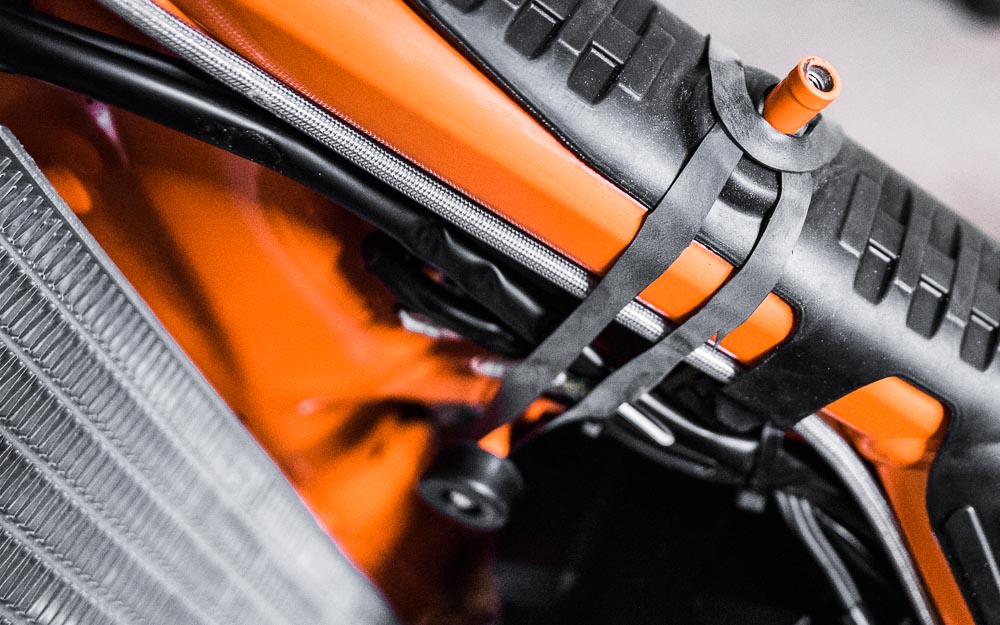
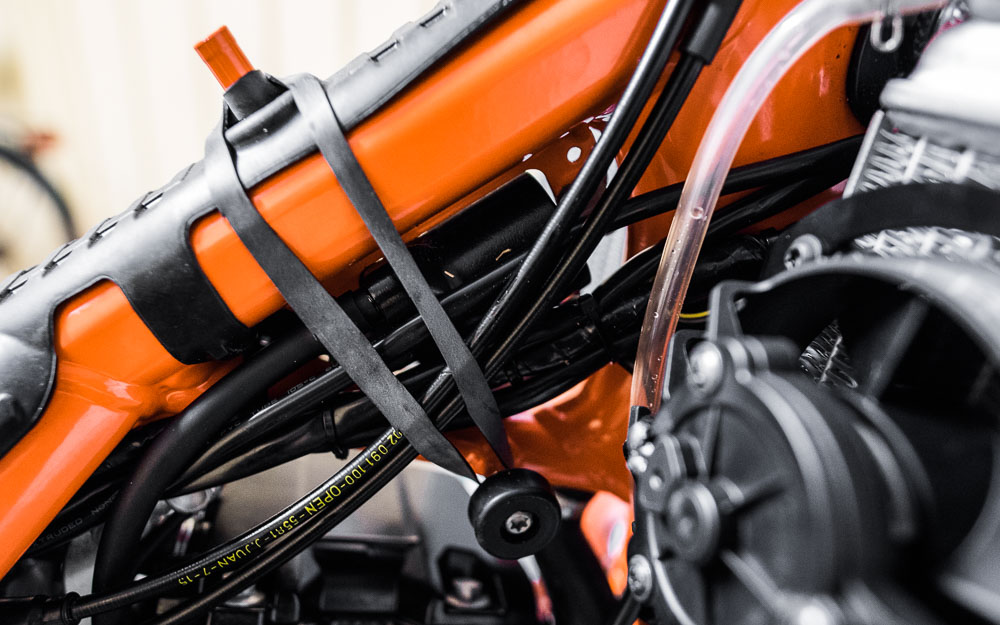
The throttle cables are somewhat exposed on the top of the handlebar, and the KTM metal protector will give them a better chance of surviving a beating. To make sure the cables stay where they’re supposed to while fitting the tank, a set of bungees will do the trick. I run a strip of inner tube on both sides of the frame, from the tank’s top mount to its side supports.
SKID PLATE
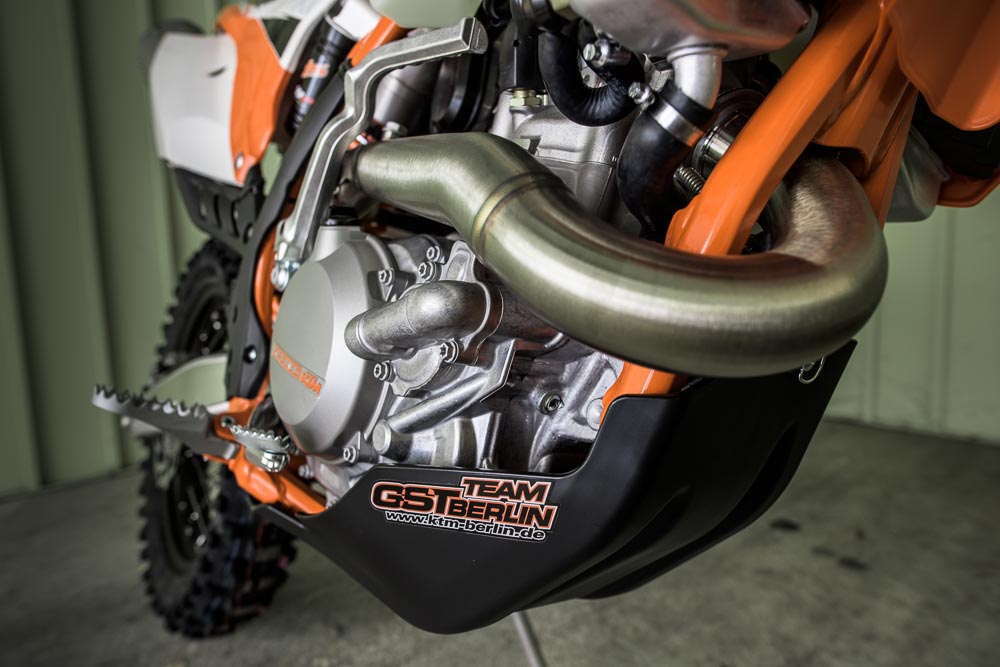
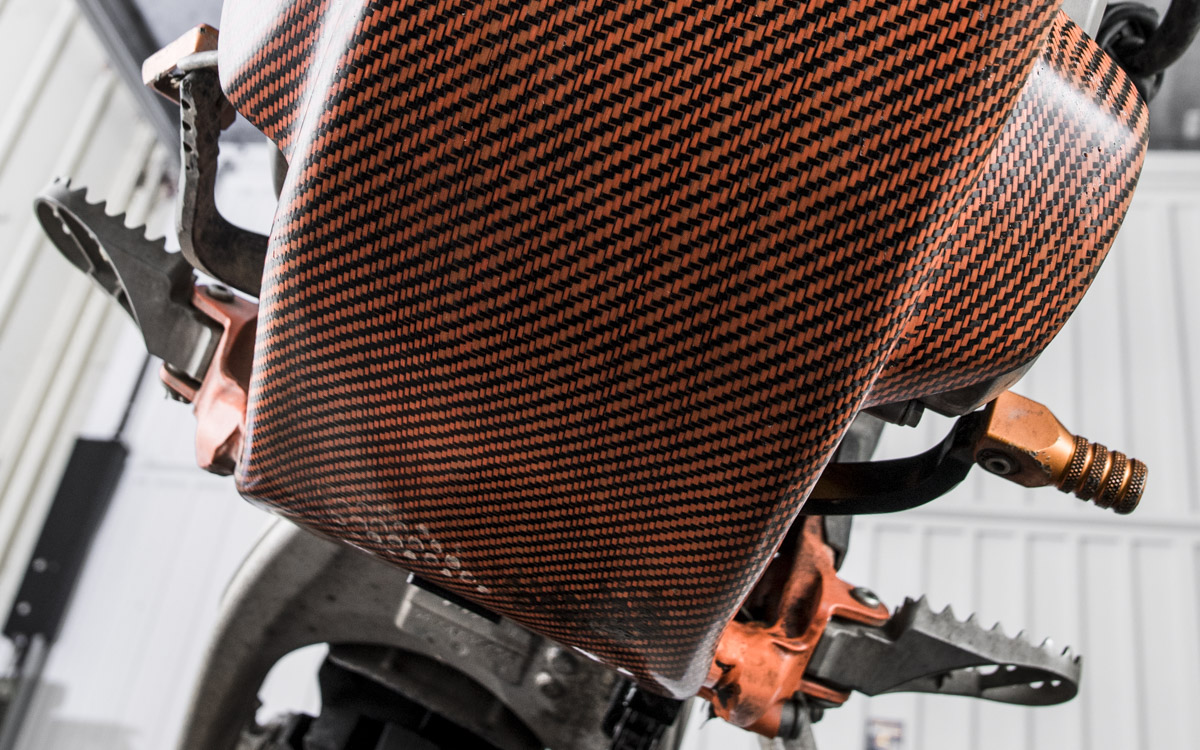
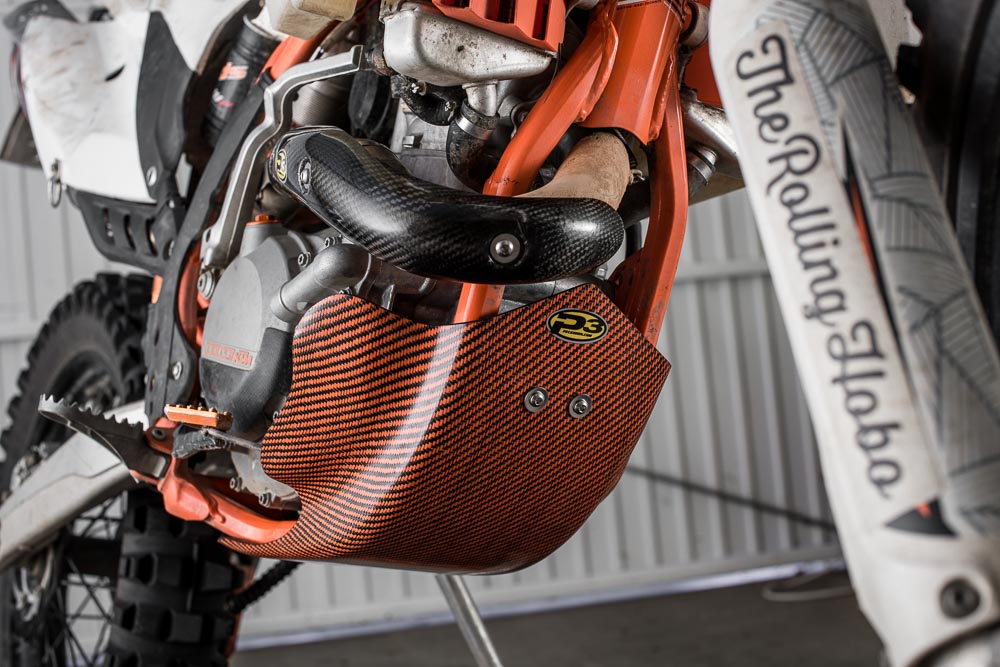
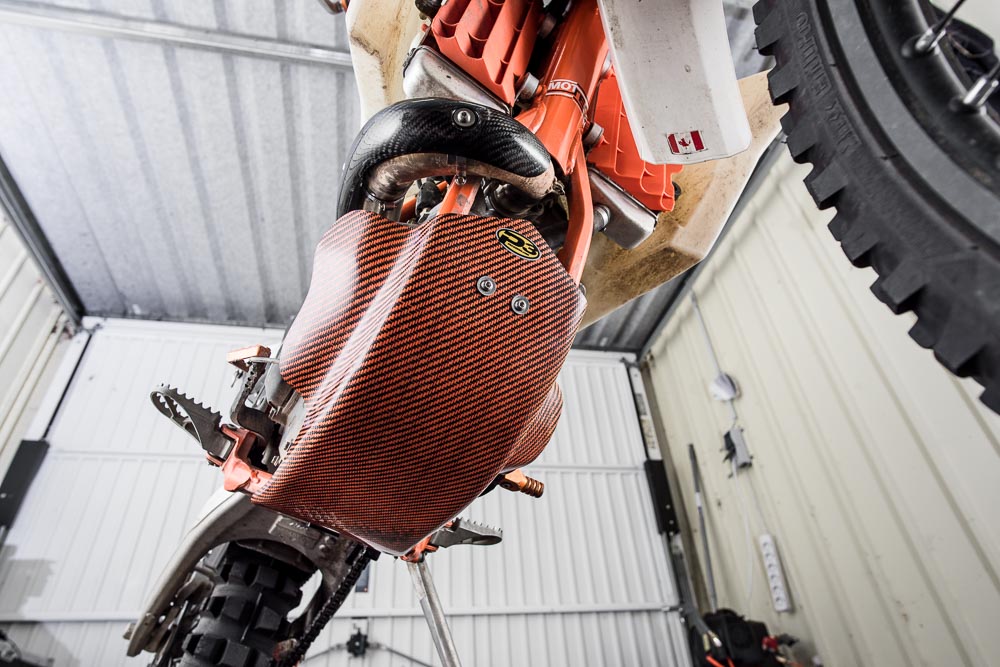
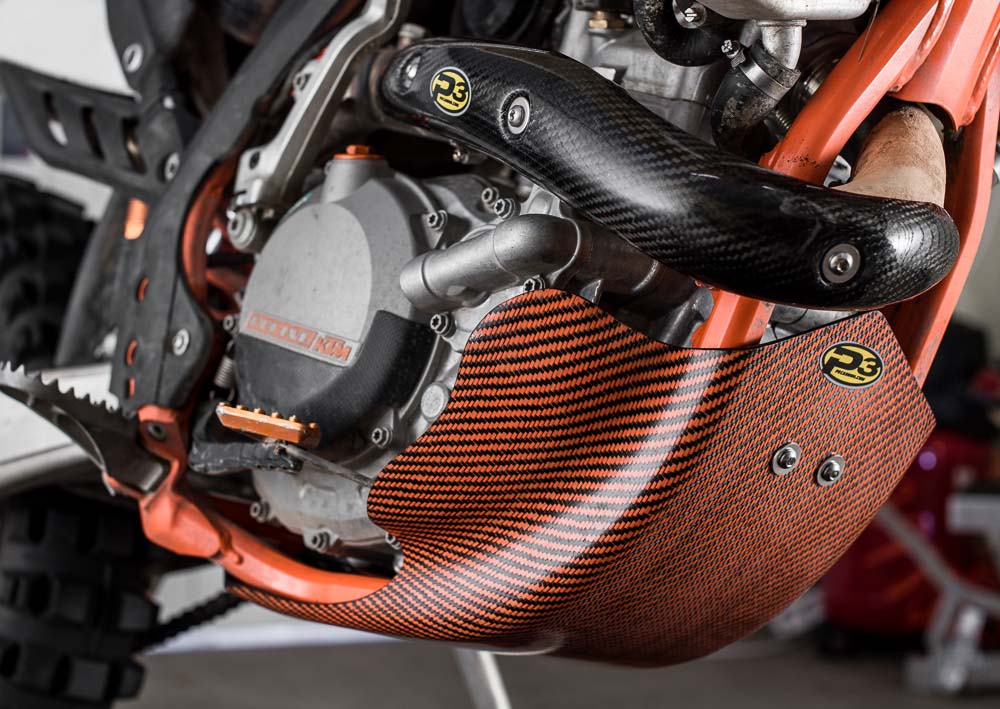
I originally decided to go the same route as I did with the 690; to carry engine oil in the skid plate for impromptu oil changes. The tank plate and oil added 6 kg to the bike, so it clashed heavily with one of the main design principles. Ergo the P3 Carbon skid plate. Not only is it light and strong, but it has to be the most beautiful skid plate I’ve ever seen.
EXHAUST
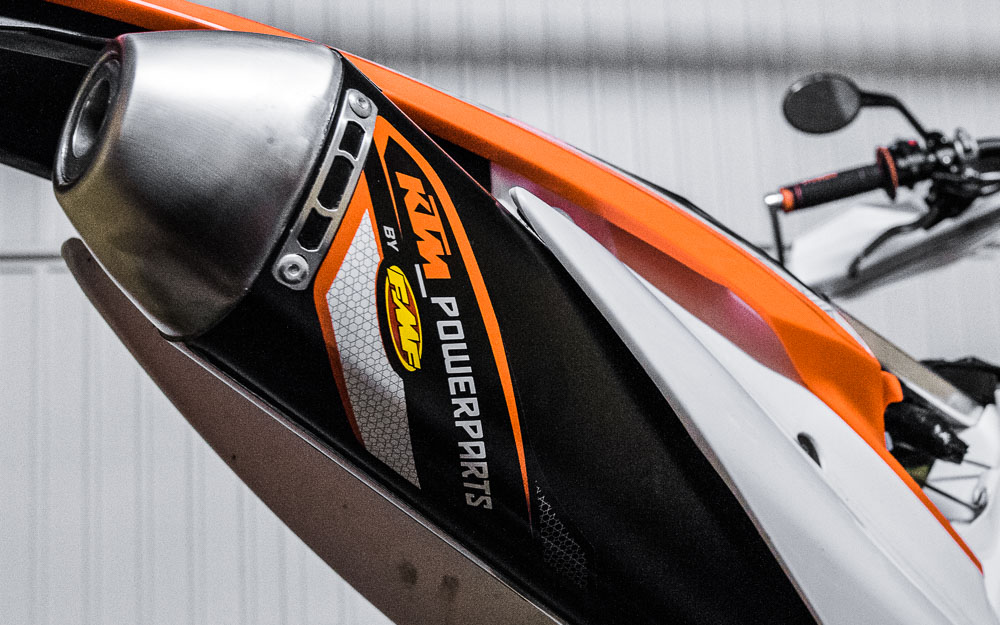
The factory slip on silencer worked fine, but I decided to go with the FMF Competition silencer. It’s a little lighter, which will make a difference as it sits high on the bike. It also adds a little torque and power throughout the entire rev range. To be honest, I somewhat regret not spending the extra coin on an Akrapovic, as their build quality is superior to the FMF.
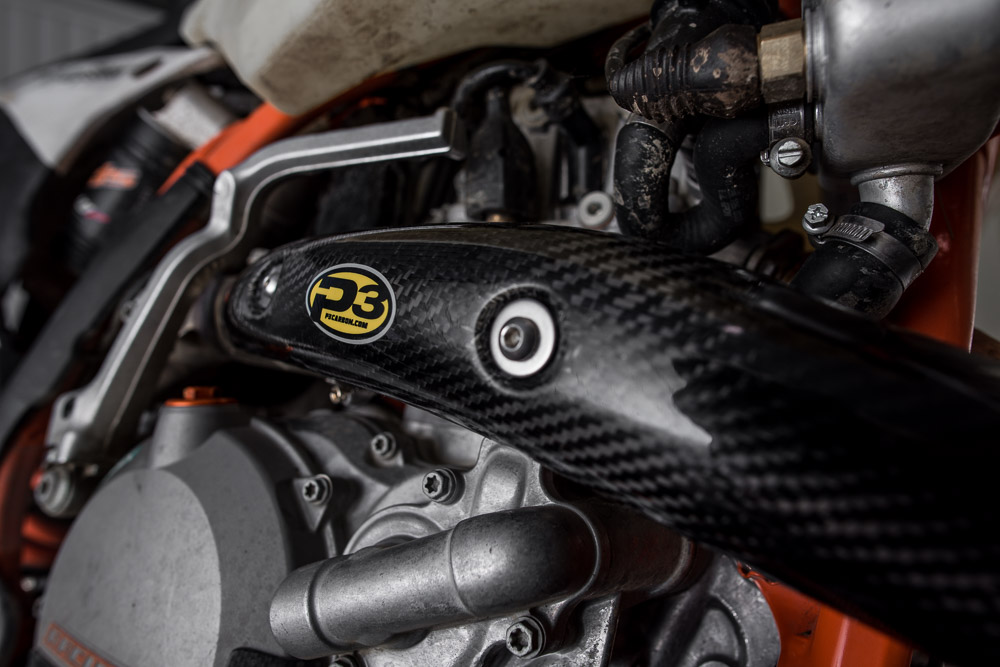
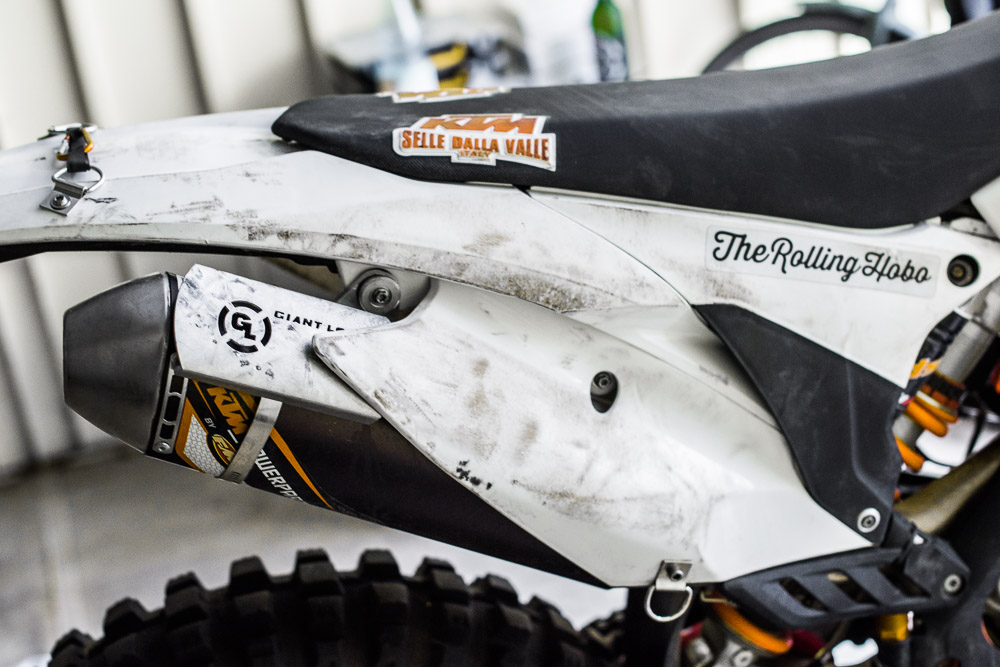
To keep my riding pants from melting, I fitted an SXS carbon exhaust guard. It was pretty small, so I upgraded to a P3 Carbon pipe guard, which is much longer and also protects the header section in addition to the pants. In the other end of the pipe I have a Giant Loop Hot Springs heat shieldto keep my luggage from melting on the silencer.
RADIATOR
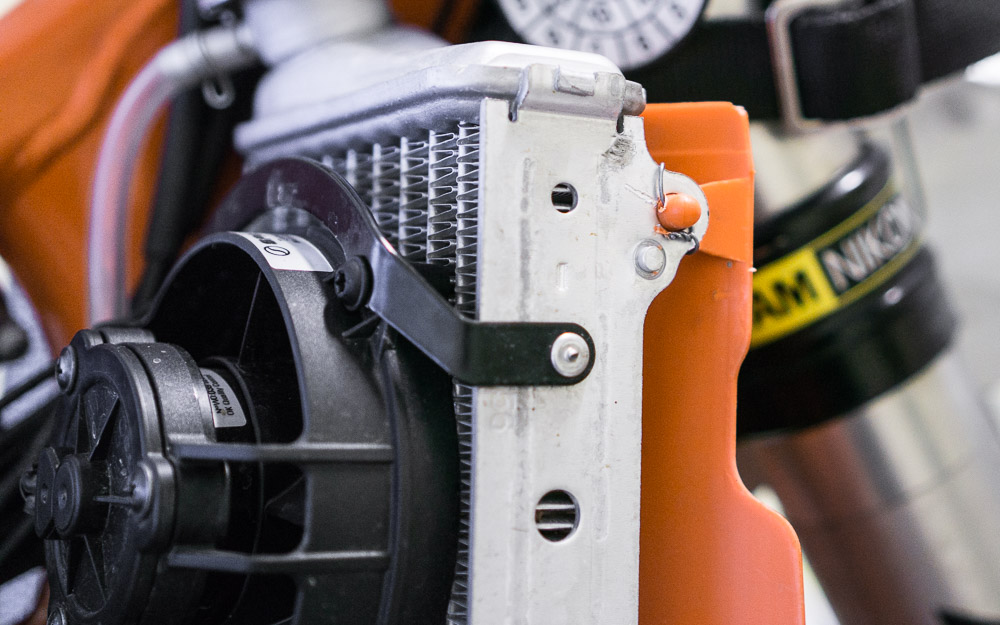
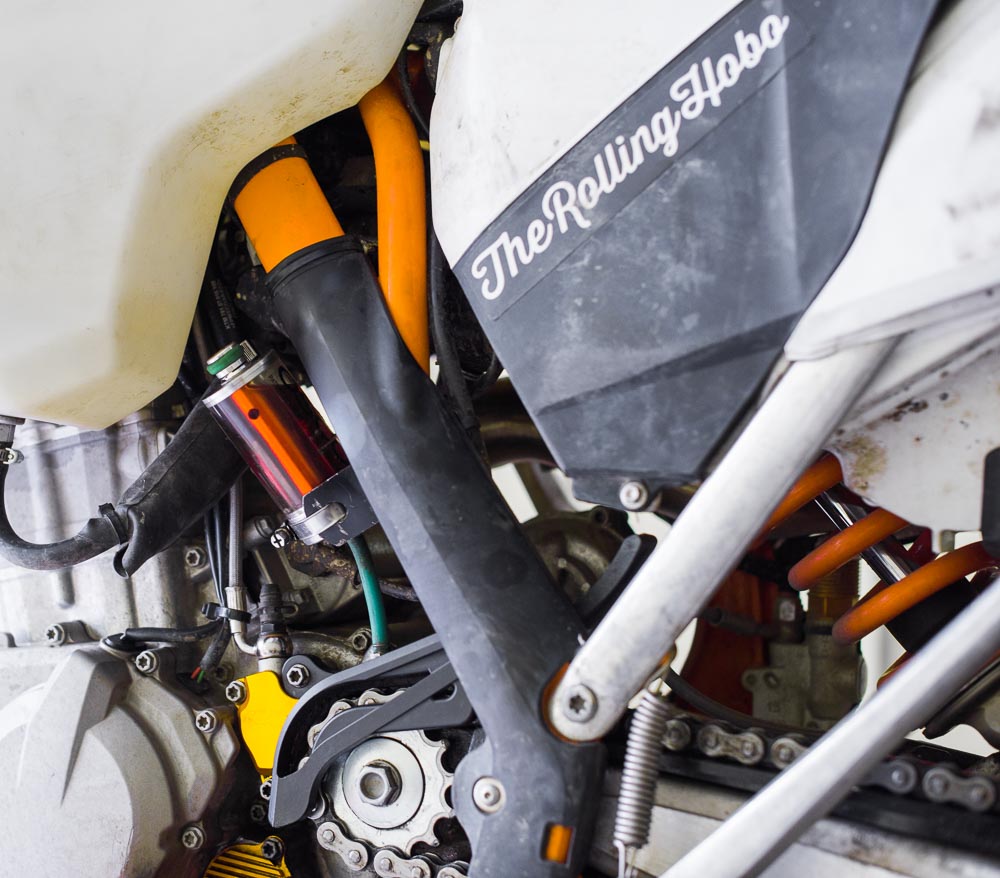
The 2016 KTM 500 EXC had a radiator fan already fitted from stock. If it hadn’t, I would definitely have installed one. I run a Trailtech engine temperature gauge on the radiator with the EZ-Install fin sensor, and the reduction in temperature is dramatic when the fan kicks in.
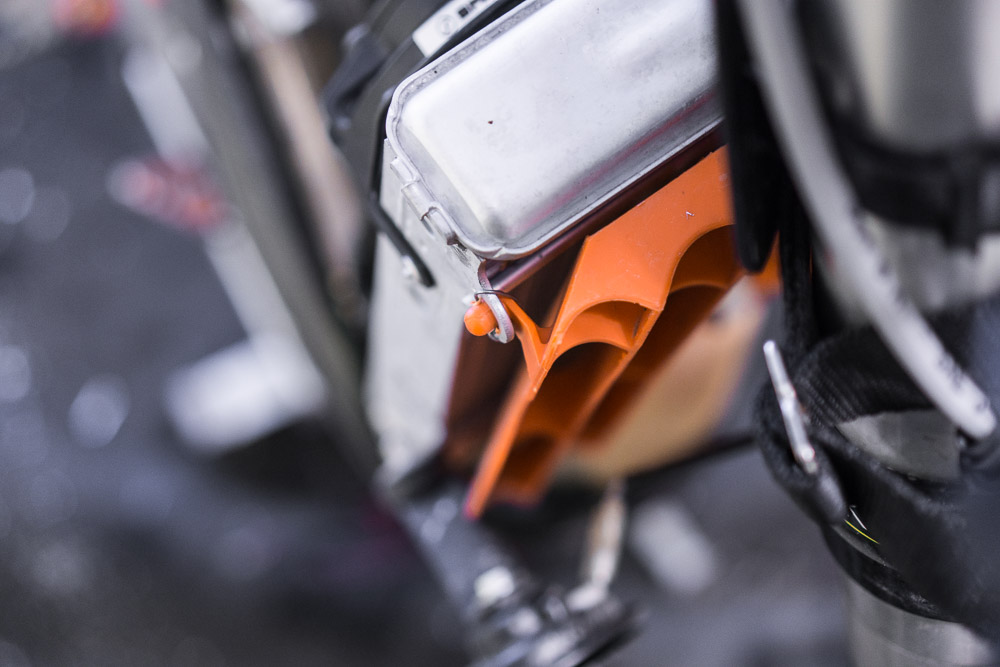
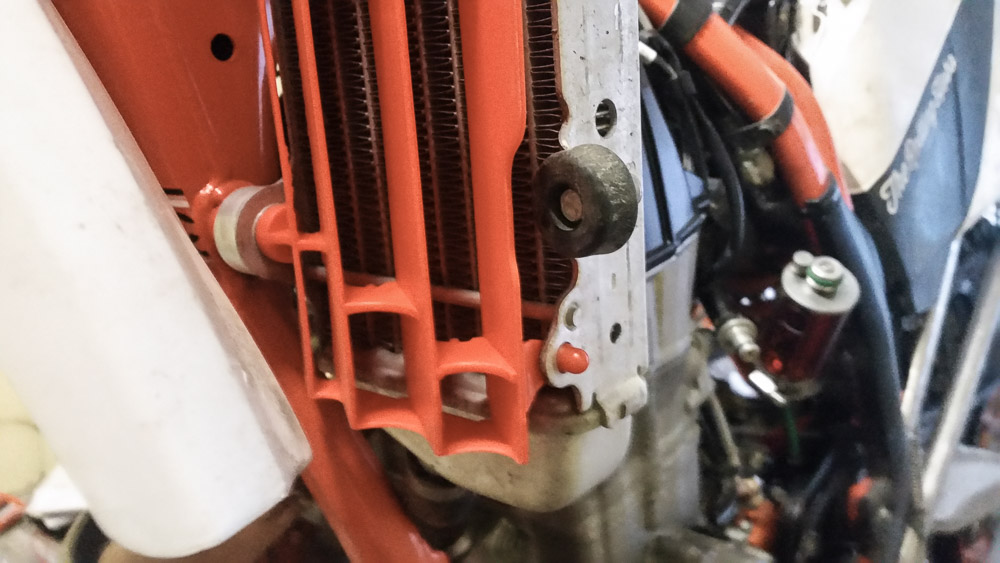
It’s a good idea to lock wire the radiator protector shrouds or they might fall off in the heat of things. With the 19 litre tank there’s no need for rigid radiator protectors, but the tank actually needs protection from the radiator tabs. Bolting some tank rubber bungs on the tabs will do.
FUEL
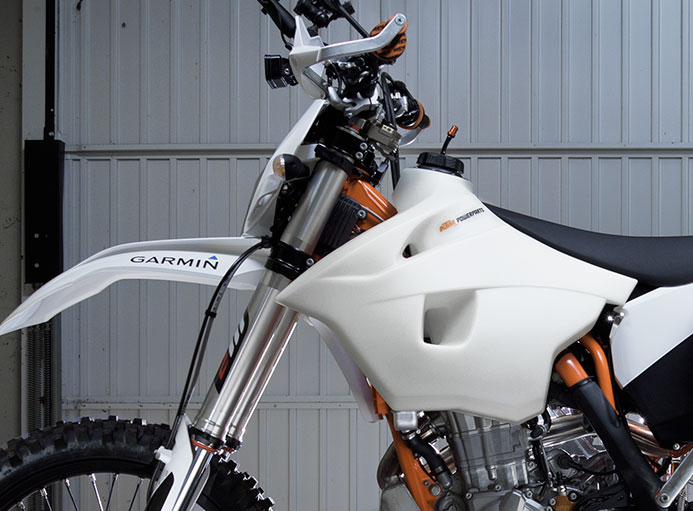
The bike has a single 19 litre KTM Powerparts fuel tank. It’s large enough for most of the time, but for sections where fuel is scarce, I’ll carry a collapsible bladder for the extra fuel. Having a single tank has its risks though, and destroying it somewhere far off would potentially have catastrophic consequences. So I’d prefer the fuel load spread into at least two tanks, but have yet to find a system that is solid in terms of design and within my budget. So I suppose I will work on some way of protecting the most damage prone sections of the tank instead for now.
I didn’t bother with putting an extra fuel filter or replacing the standard micro filter with a Golan or equivalent. Instead, I’ll keep an eye on the in-tank filter and do frequent changes of the micro filter. Every time the quick release is opened, the O-ring should be lubed with silicone grease before closing. If it gets too dry, the female connector will potentially catch on the O-ring an tear it, resulting in a fuel leak. I protected the the fuel tank quick release with a section of MTB inner tube. It’s tied in at the bottom, to prevent crud flying up into it. I left a small hole for draining water though.
AIR FILTER
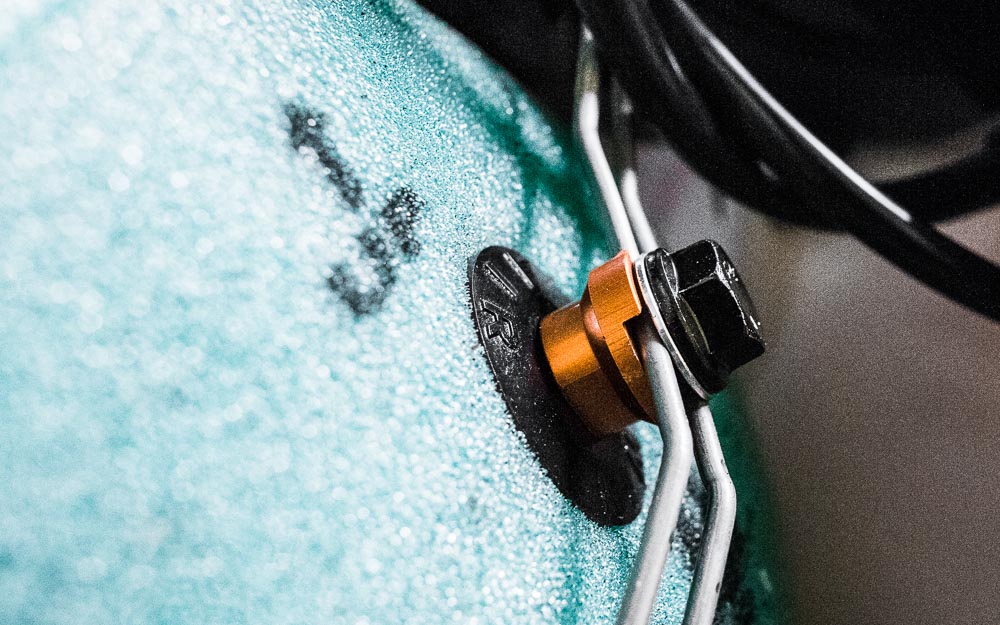
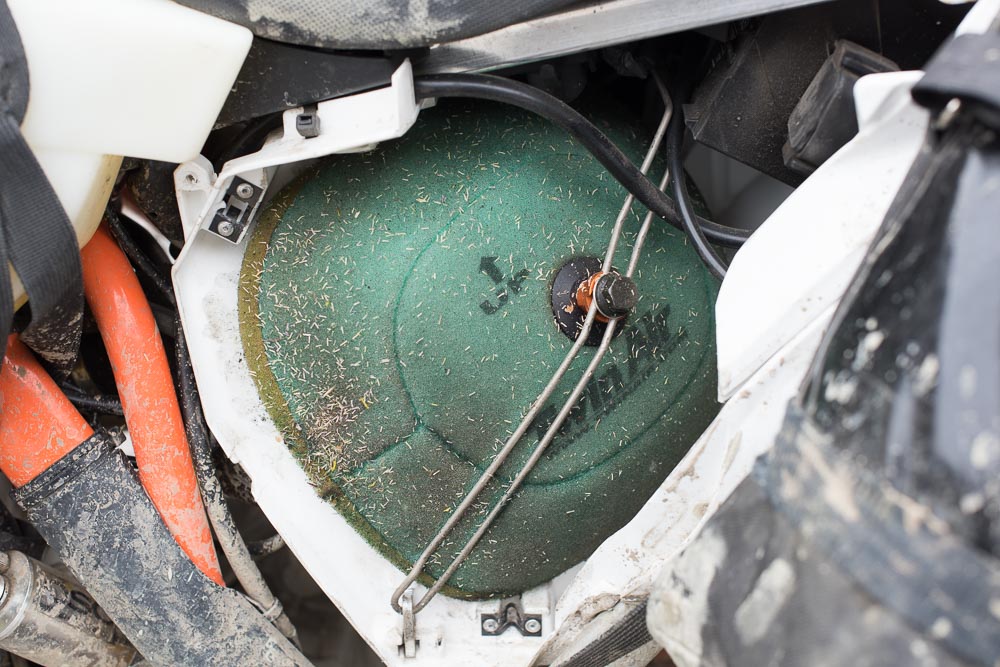
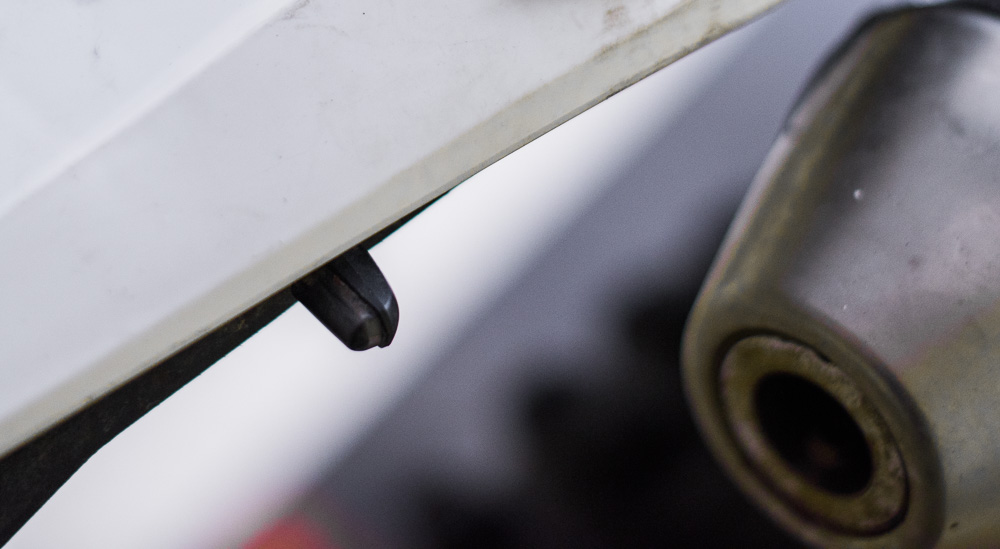
The air filter cover comes fitted with quick release pins. It’s handy for quick maintenance but also carries the risk of the cover coming accidentally dislodged by a boot or something else that catches on it. So I prefer it screwed on instead. I’ve also upgraded the standard air filter bracket stud to the factory version to avoid any malfunctions on the trail.
I use the standard TwinAir pre-oiled air filters. They can be washed out with normal dish washing liquid and then re-oiled. However, I prefer to carry several filters instead of washing and oiling one or two on the trail. This is because the weight of the liquids alone will be more than three filters. The preoiled filters are light and can easily be carried compressed into small ziplock bags.
The airbox and intake sit very low on the bike, which will be a problem in deep water crossings. The airbox actually has a drain hole in the bottom, which will let water enter through it freely. I have yet to solve this puzzle, but I suppose the answer will be somewhere between waterproofing the airbox and building a temporary snorkel for the intake.
FINAL DRIVE
I prefer to run the standard enduro 13:50 gearing with SuperSprox Stealth sprockets. I also experimented with 14:50, and while it tops out at 150 km/h fully open, I found the first gear too tall for technical stuff. The 13:50 is fantastic on first gear technical ground and will still roll nicely at highway speeds up to 110 km/h. I suppose for rides with long sections of tarmac, carrying a 13T and 14T front sprockets might seem appealing, but I find it a little counter-productive.
I’d rather not carry the extra weight for weeks if I only need it for one or two days. Also, with the standard chain, the 14:50 gearing will bring some rear tyres too close to the swing arm and start wearing out the mud flap. I run the chain with a quick link, and a TMD chain guide with replaceable bottom slide. I lube the chain with an OSCO chain oiler, and use whatever oil I have a t hand; mostly engine oil.
SUSPENSION
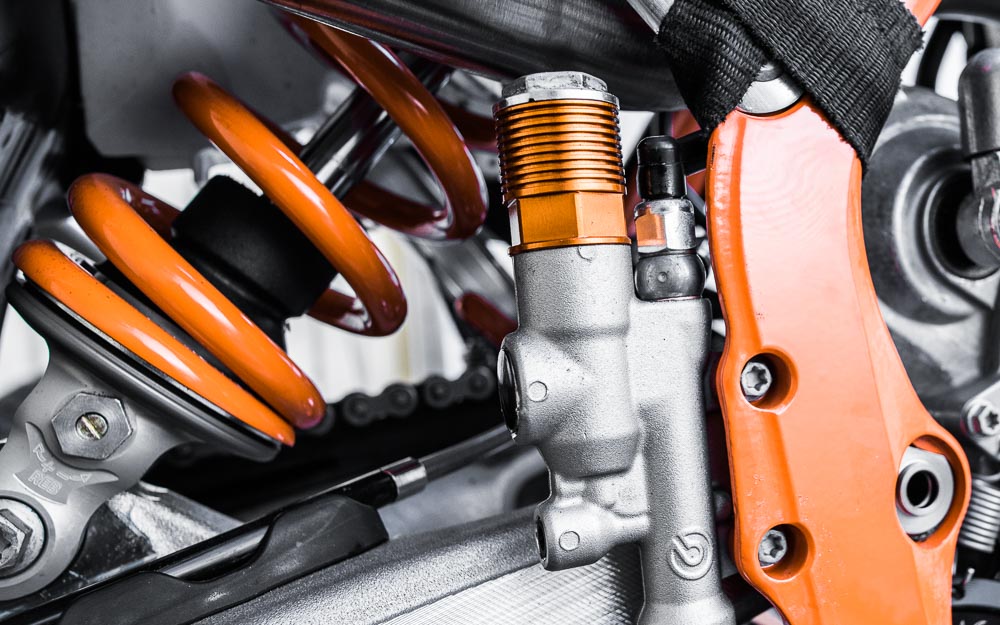
The stock suspension is really nice, and all I needed was a stiffer 80 N/mm spring in the shock to compensate for the luggage. Once the static and riding sags were set, the suspension seemed to work very well with a bit of trail tweaking.
I will most likely add a preload adjuster collar on the shock, as the OEM plastic adjuster rings will probably get eventually damaged if used frequently, which is the case with loaded/unloaded riding. The forks are still completely stock, but I added a set of fork bleeders.
WHEELS
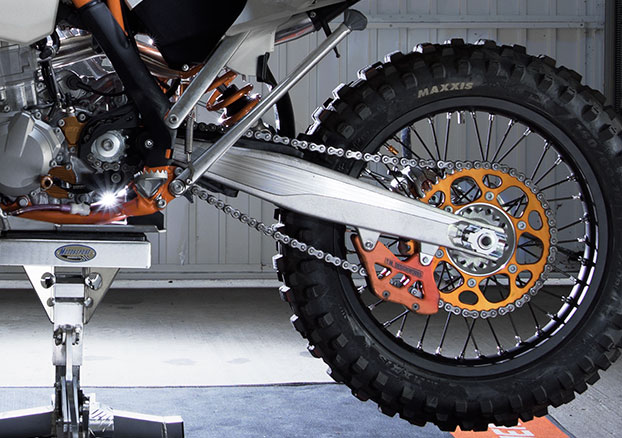
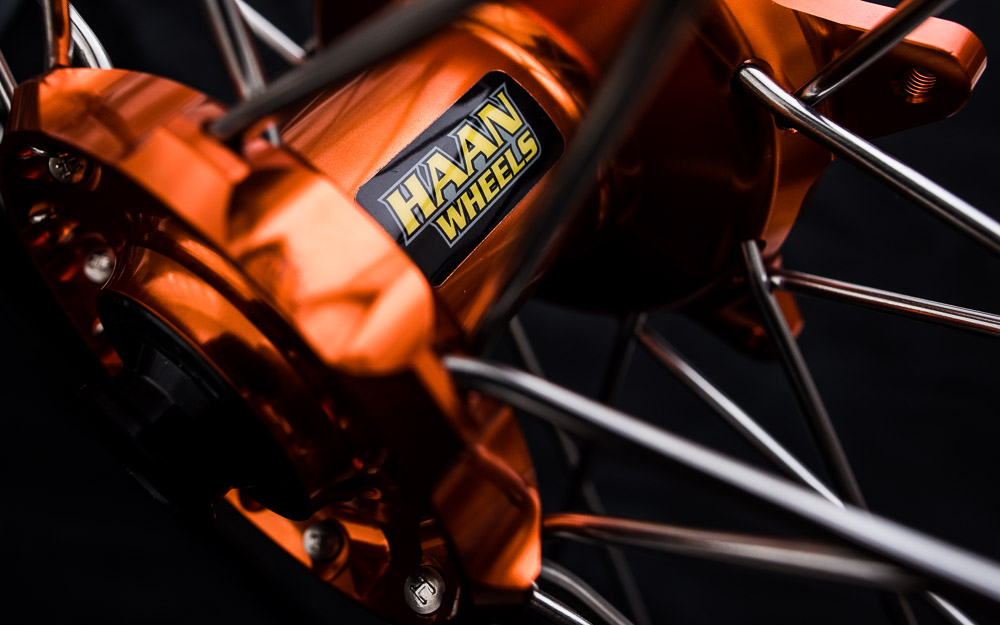
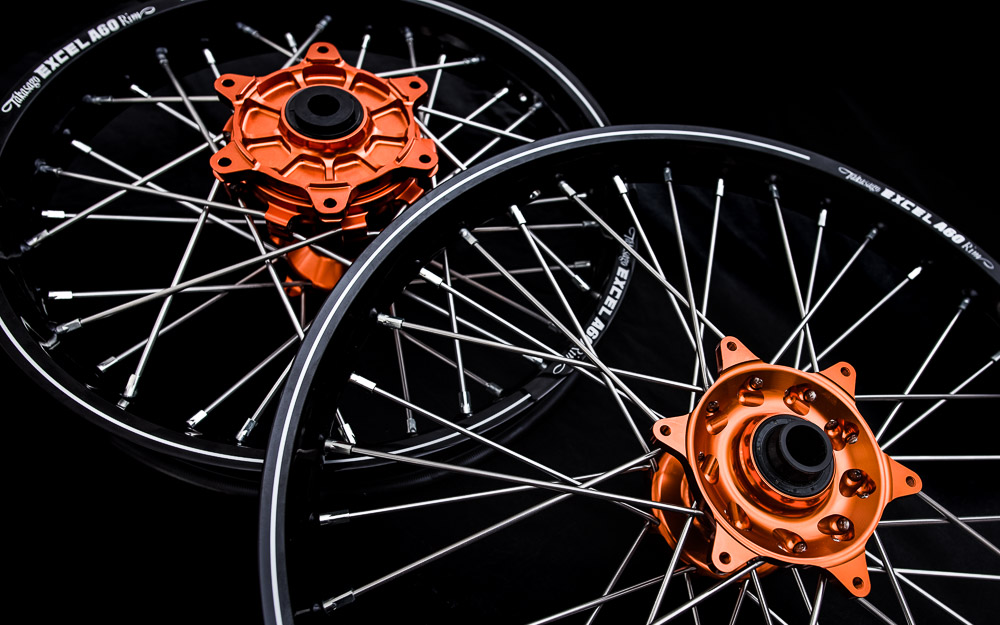
In stock form, the 500 has the rear sprocket bolted directly onto the hub. It’s fine in dirt, but on tarmac it may have serious consequences due to the lack of natural damping. The front sprocket may start to wear out the countershaft, causing it to eventually fail. A damped rear hub will counter this problem and also ease out the impact throughout transmission in general. I originally had a KTM damped rear wheel, which works fine. However, I splurged on a set of Haan Wheels hubs with a damped rear and Excel 18/21 A60 rims. They should be stronger and lighter than the originals.
I still mostly run Mitas C-02 rears, and have been really happy with the Maxxis OEM front tyre. Both seem to last forever under the 500. I still use standard tubes that can be patched up, and aluminium valve caps with integrated valve core tools.
BRAKES
I love a clean office and modified the front brake to run rally style between the headlight mask and front fender. It does not interfere with navigation equipment and thus far has never caught on anything on the trail. The modification can be done with the OEM brake hose, and needs nothing more than patience and a few zip ties.
The rear brake is fitted with a cylinder extender. It should cool down the brake fluid and extend its life, but the jury’s still out on that one. Another modification to the rear brake is fitting a thicker closed brake disk, to reduce wear on the rear brake pads. With the standard open brake disks, I’ve gone through brake pads in a single day of riding in wet and sandy conditions.
ENGINE OIL
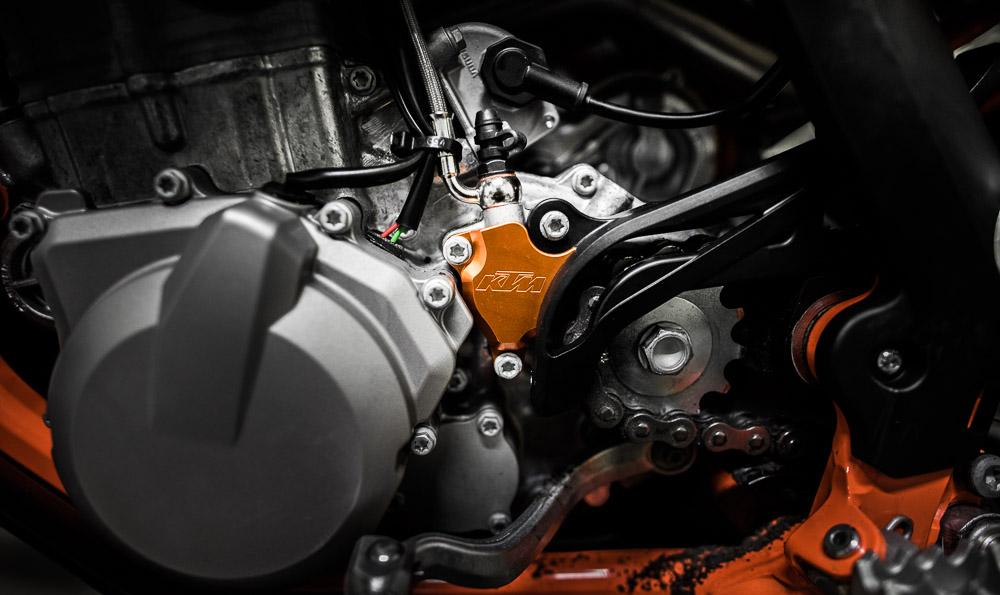
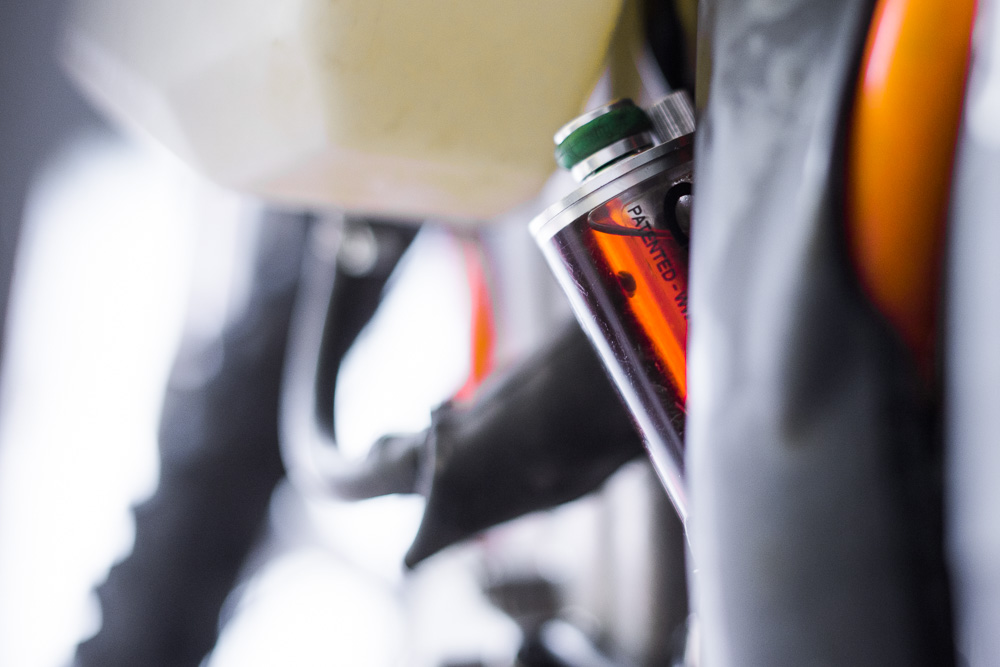
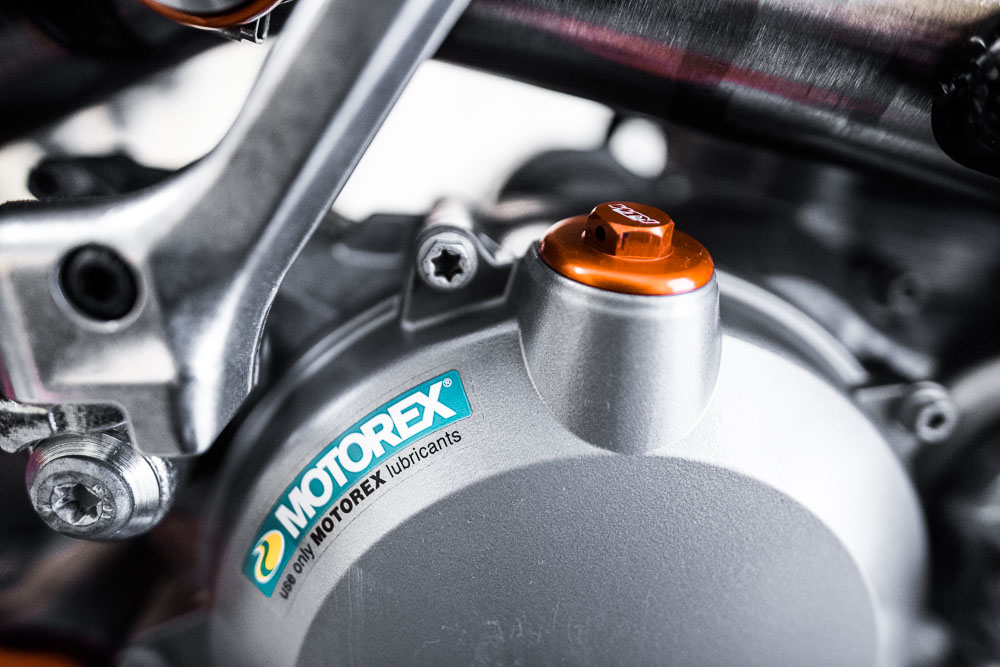
I replaced the standard oil plug with the factory version, for extra durability and a smaller chance of the plug loosening and falling out. Theoretically the factory oil pump cover cools the oil a little, but it’s in fact there because it looks cool. Guilty as charged.
The oil volume of the 500EXC has been debated until exhaustion, with different volume expansion methods from high volume clutch covers to external oil coolers. In fact I have a Twin Air oil cooler sitting in my garage, and despite the fact that it will add oil volume and reduce temperature, I never got around to fitting it.
The reason I left it out is that it adds weight and four wet connections i.e. fail points. It requires special oil filters that are hard to find even in Europe. Additionally, it adds complexity to the oil change procedure and requires verification of oil flow, which seems close to impossible to do with the 19 litre tank on. So in my view that’s a lot of extra hassle and risks for a little bit more of oil. I’d rather just do oil changes more frequently.
IGNITION MAP SWITCH
The ignition map switch is there to facilitate the change between standard and soft ignition maps. Most of the time I run on standard, but the soft map may be useful in technical terrain and if fuel quality is dubious or low octane.
ENGINE TEMPERATURE
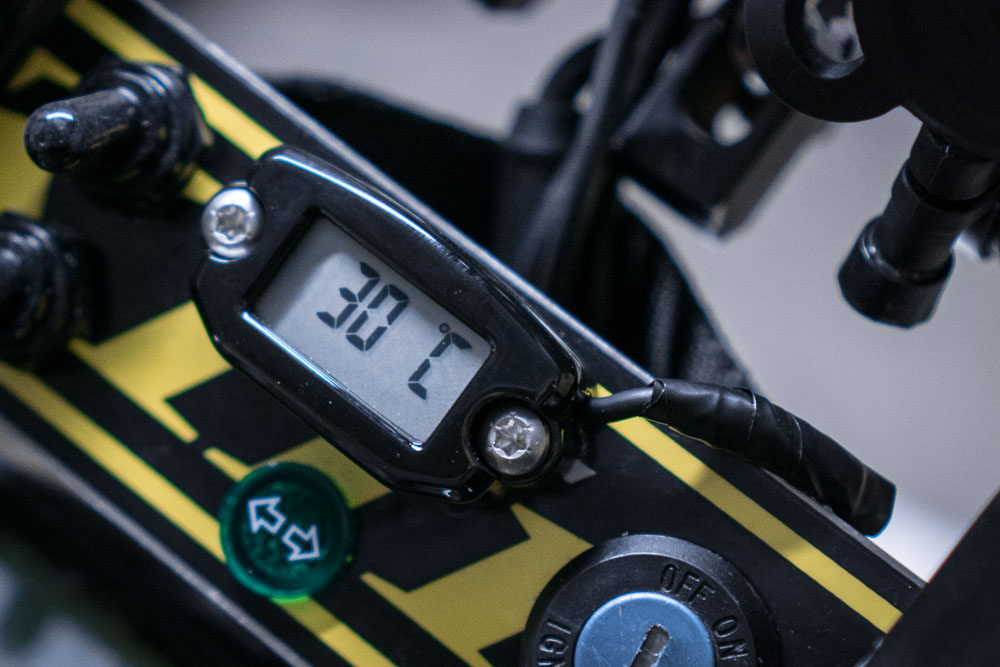
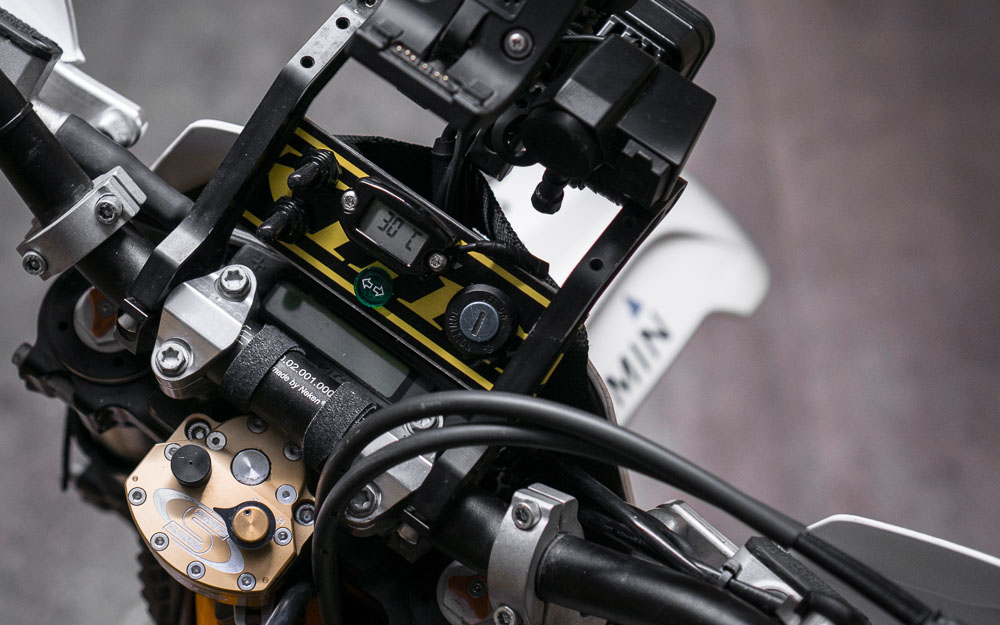
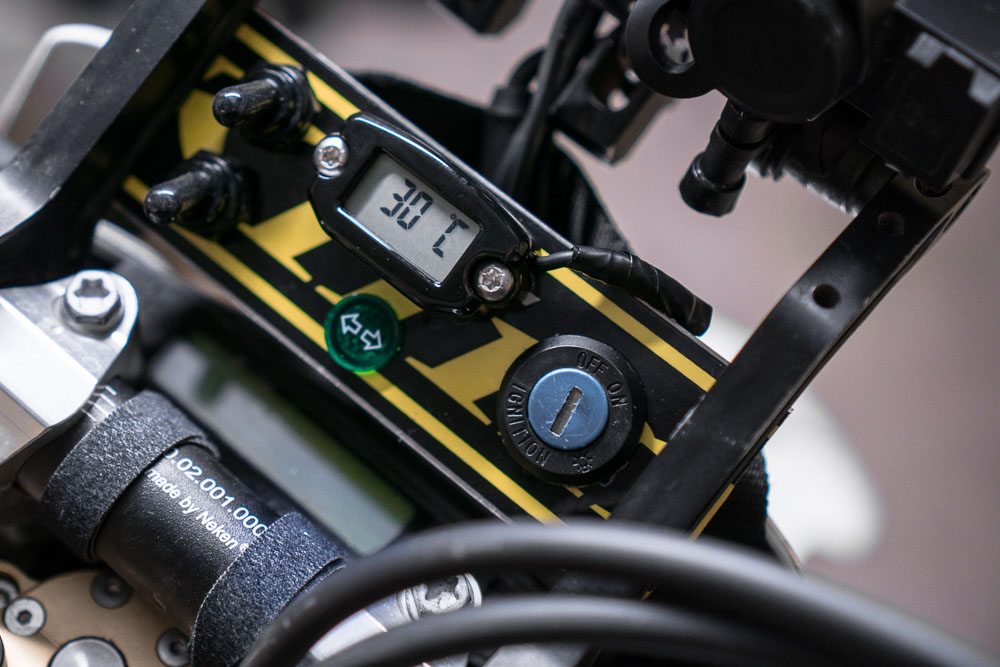
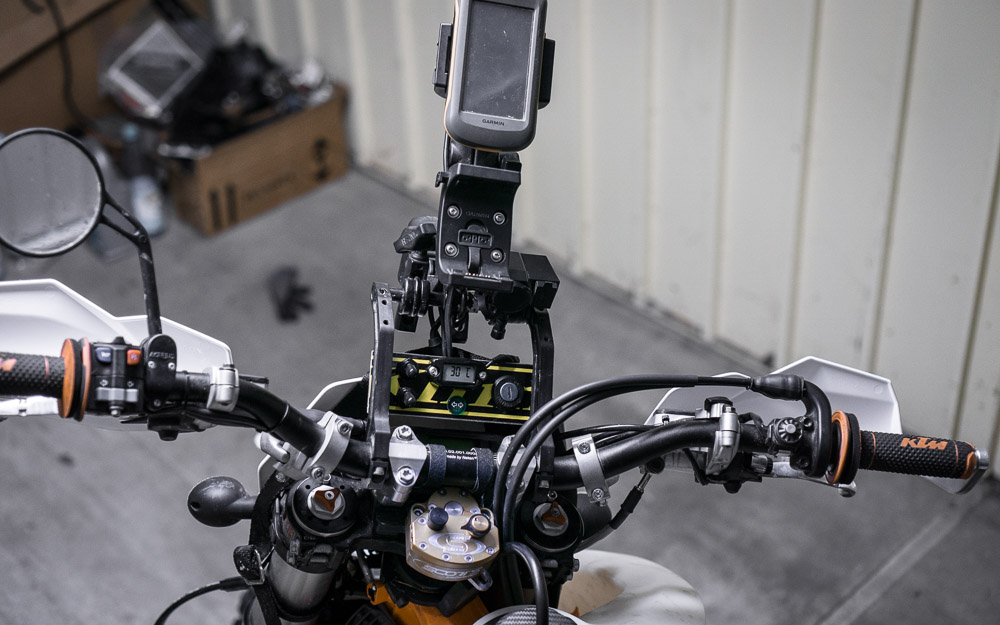
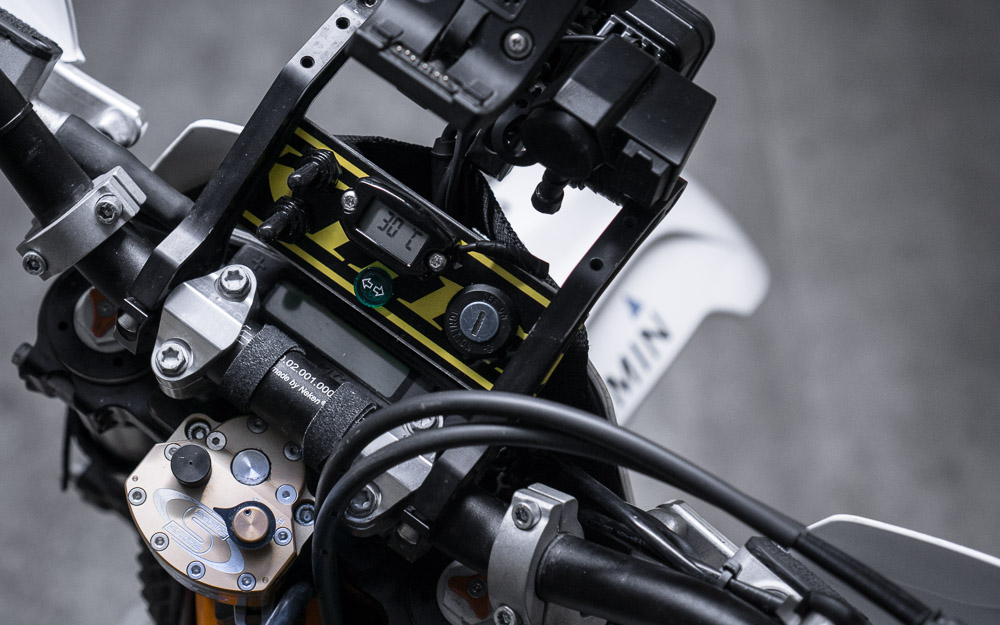
I fitted a Trailtech temperature gauge with the EZ-Install fin sensor. It’s really handy for keeping an eye on how the engine is doing in steep, technical and slow terrain. It continuously shows the current engine temperature and regularly flashes the highest reached temperature from the last few minutes.
WIRING AND COMPONENTS
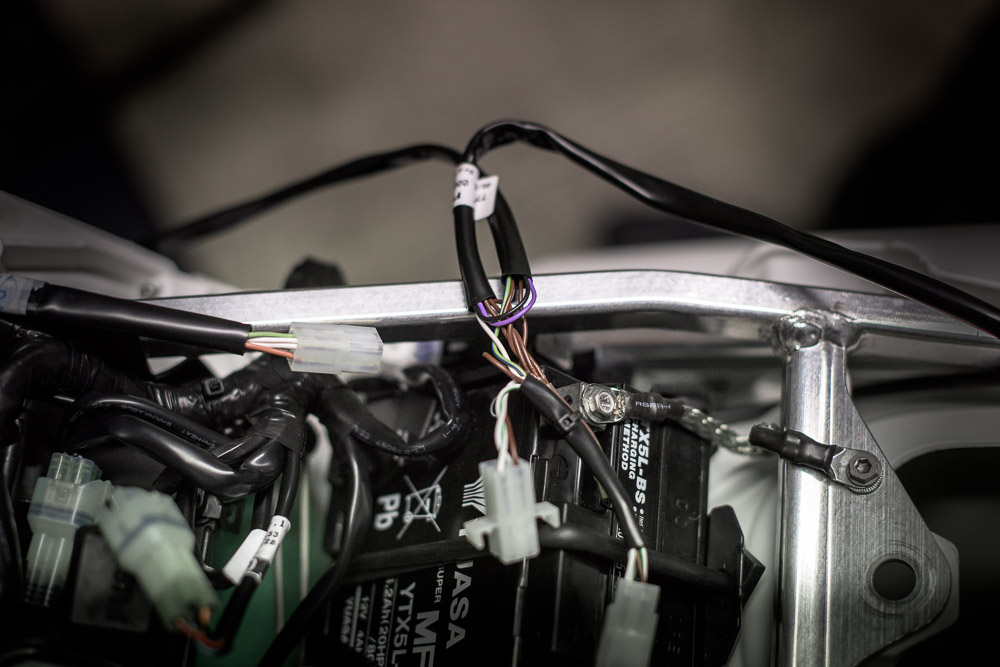
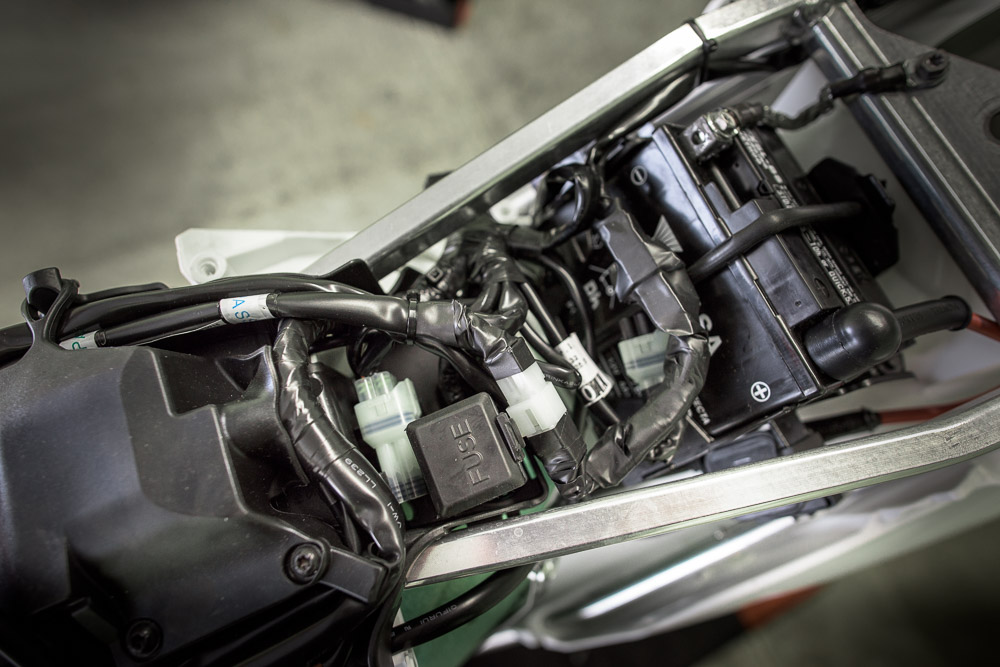
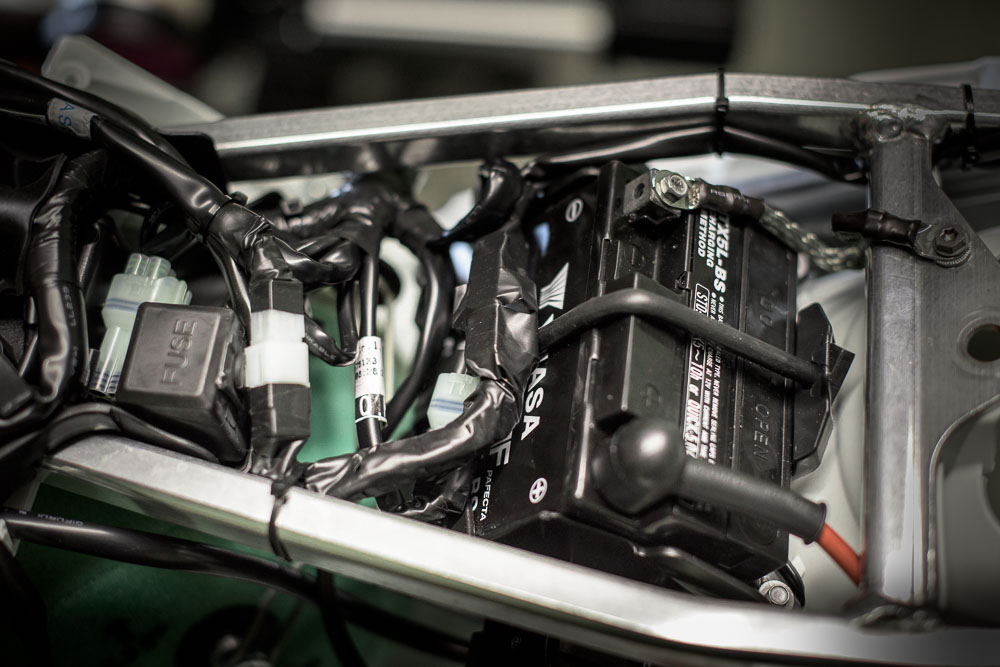
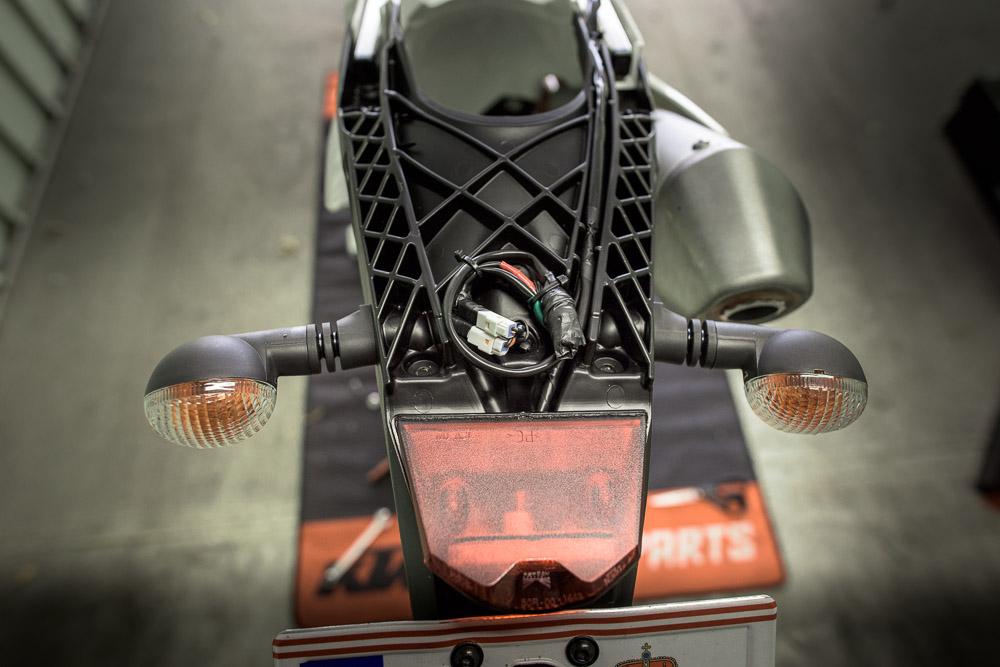
While the bike is new and clean for the last time, it’s a good idea to add little extra protection to the wiring. Dirt combined with vibration will quickly start eating away any two surfaces that move across each other. Especially so with the insulation of electrical wires, which in turn creates shorts which may turn out to be plentiful and hard to find. So it’s a good idea to make sure as little dirt as possible reaches the wires and that they remain immobile. Copious use of electrical tape and zip ties will work fine with a section of mountain bike inner tube for extra protection in high abrasion areas.
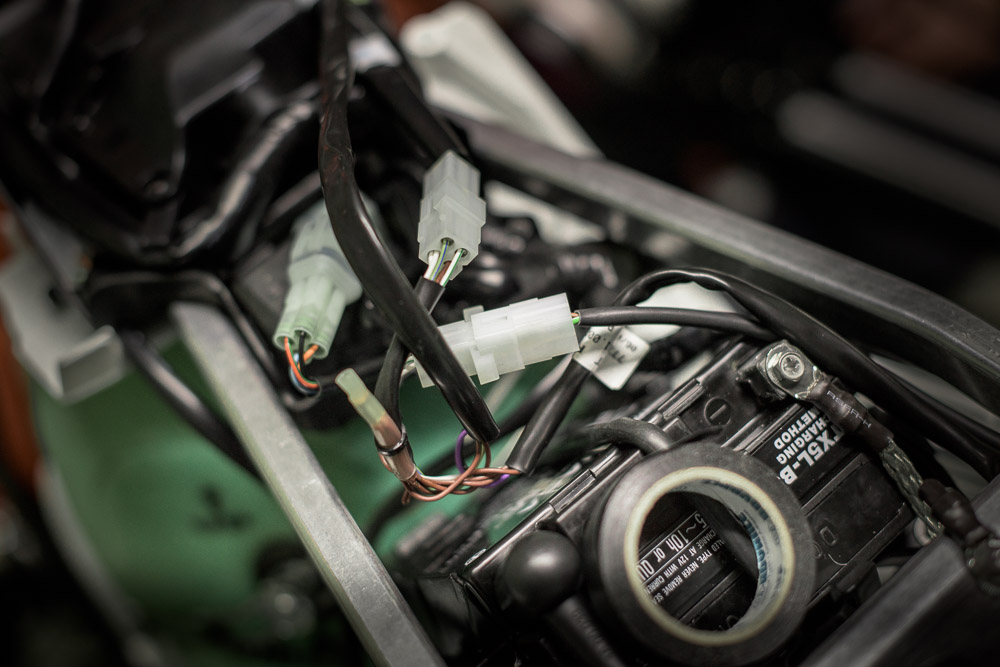
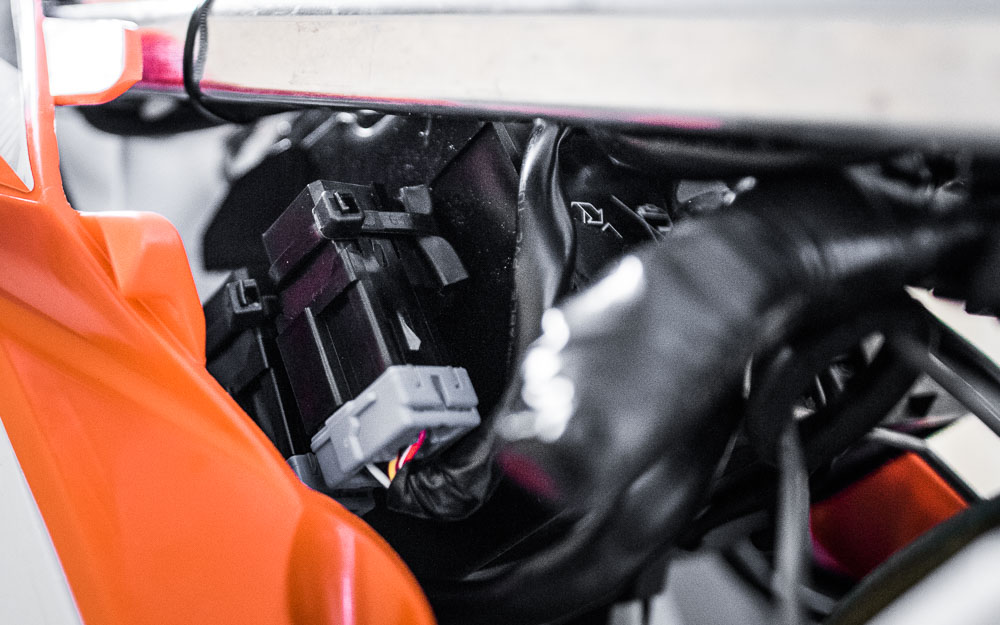
All wire housings are cut a little before the connectors to ensure efficient water drainage. I usually tape over the housings and connectors if they are mostly dry. If there is a risk of the connectors being submerged, I leave them open to avoid trapping water in the housing, which will eventually slowly seep to the connectors and corrode them. I spray all connectors with contact cleaner regularly to avoid any problems. The starter and fuel pump relays in the back of the bike should be secured to their sockets with zip ties as they can fall out when the going gets rough.
AUXILIARY WIRING HARNESS
KTM manufactures a handy auxiliary wiring harness, which I use for all extra instruments and power supplies. It’s wired directly to the battery and has a 7.5A fuse. I use it to power my navigators, LED high beam and 12V accessory power supply. I’ve added a main switch for it to kill power to the navigators and accessories when necessary. I used to connect all the accessories with connectors, but they’re bulky and prone to failure in the tight space of the headlight mask. So now I solder everything instead and the rats nest is gone. Instead the cables now tuck in nicely.
ACCESSORY POWER SUPPLY
I currently use a dual supply unit with a 12V cigarette lighter socket and USB socket. It’s mounted on the navigation clamps. I will most likely change it to a single USB as I have no need for the cigarette lighter socket any more.
INDICATORS
The stock bike came without indicators installed. It was an easy plug and play job essentially, but after already the first ride, half of the the exhaust side indicator was gone. So I went with some tiny LED indicators and a soldered LED indicator relay for the correct timing of the blink. I’ve extended the cable on the turn signal warning light to have it nice and high on the instrument panel. Otherwise I’d just ride along all day with the indicator blinking.
IGNITION SWITCH
The 500 only has a steering lock, but no ignition switch. It seemed rather risky, so I fitted a general ignition switch with closing loops in both key positions. When the key is on the on position, the switch closes the ignition loop and the bike starts and runs. In the off position, the switch closes the kill switch loop and bike stops and will not run. The ignition switch is mounted on my ghetto instrument panel.
HEADLIGHT
The Baja Designs SII LED spot is a beast for its size and weight. It’s also very reliable and packs enough power for my use. I will wire an extra switching relay into one of the accessory switches on the instrument panel to have control over whether to use the OEM head light or the Baja Designs SII LED spot from the original handlebar headlight switch.
SIDE STAND
The stock side stand is configured to pop up automatically when the weight of the bike is off it. I found it to be rather risky and luckily there was a replacement bolt in the bike’s accessory kit that sorted it out. I also tried the KTM big side stand foot, but found it impossible to fit onto the side stand. It’s just as well, though as it’s not really necessary.
NAVIGATION
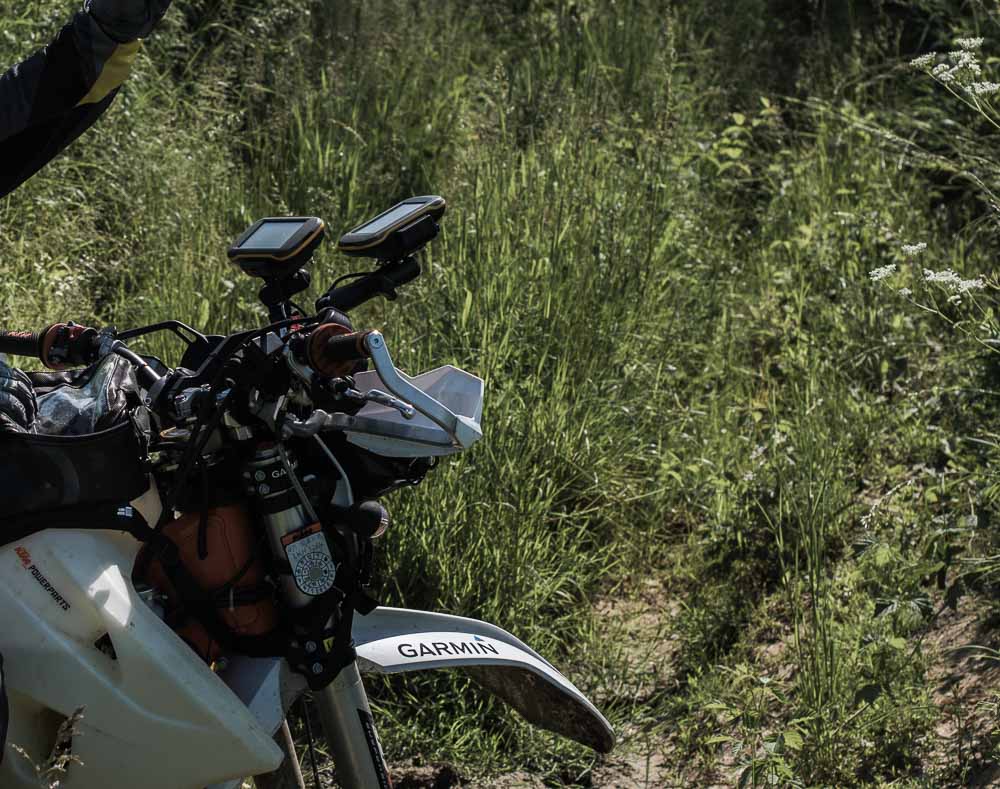
The bike has two Garmin Montana 600 navigators. There’s two because I ride solo a lot and like to have a backup in case something goes wrong. I lock the top navigator in portrait and have it tracking up with a static track on the map. The bottom navigator is locked in landscape and tracks north with a topographic overview of the area.
Both navigators are locked into powered Garmin cradles, which are held on the RMS Universal Navigation Clamps with RAM mounts. I keep the RAM mount of the top navigator loose enough to be easily swung back and forth between seated and attack positions without needing to adjust the tension bolt.
INSTRUMENT PANEL
The handlebar was starting to look like a Christmas tree, so I devised a ghetto instrument panel from 4 mm aluminium sheet. The mounting surface is roughly 120 x 50 mm and has holes for mounting the ignition switch, two waterproof accessory switches, the turn signal warning light and the engine temperature gauge. It’s all very Mad Max in it’s functional design, but cleaner, as my buddy Rafal noted.
LUGGAGE
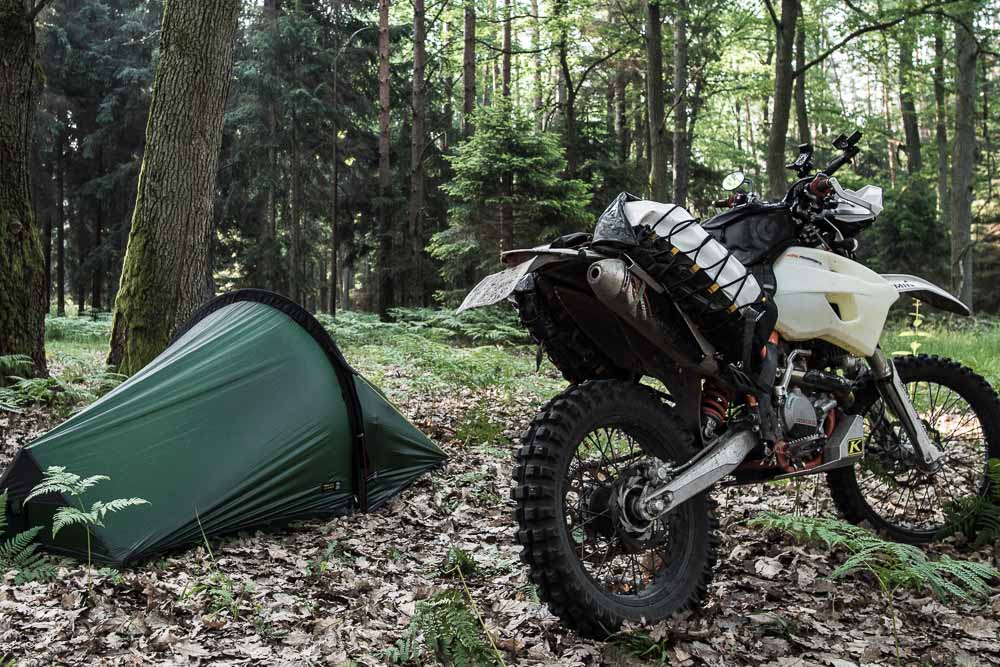
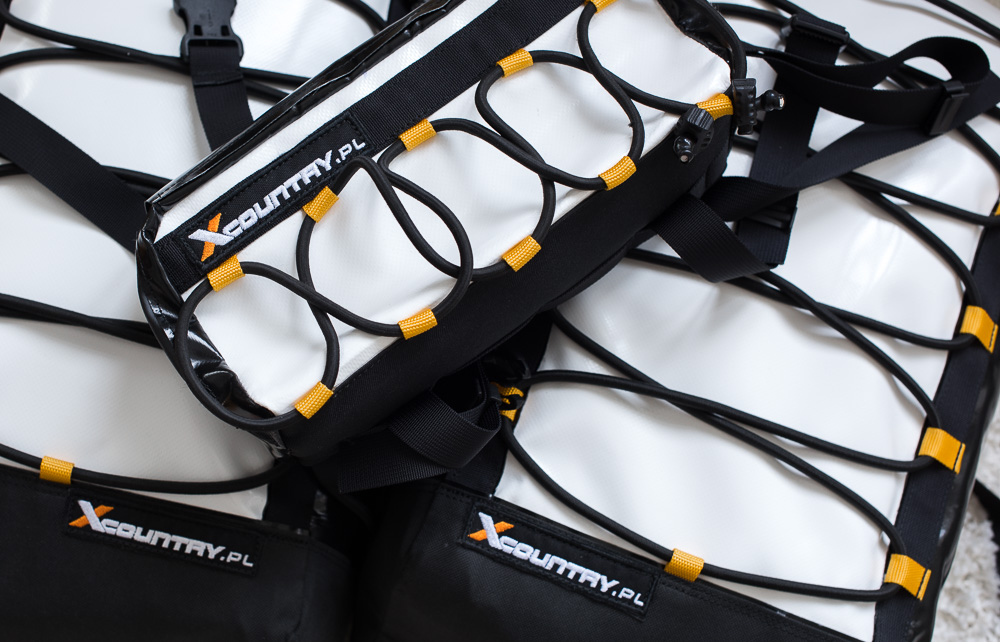
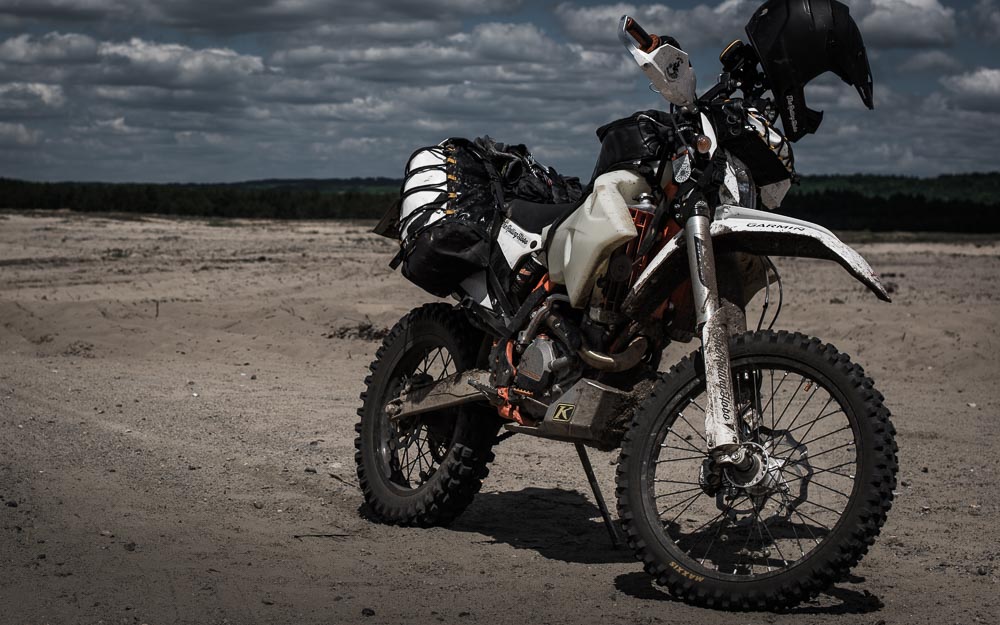
I currently run with 2 x 15 litre XCountry Hobo version panniers and a 3.4 litre XCountry Hobo version mask bag. So a total volume of 33.4 litres for luggage. I used to also run a Giant Loop Fandango tank bag, but found it too disruptive for body position and also to interfere with the venting of the fuel tank. So I ditched it and couldn’t be happier with the current setup.
The XCountry panniers mount on the bike without a rack, but need a tail mount point. I bolted some D-rings right on the tail fender with large washers, and so far they’ve been holding nicely. In the front the panniers are strapped right onto the frame. Even with the front and back connection points they still seemed to swing too much to my liking, so I fitted an extra D-ring on the side panels and run a strap from there to the top of the subframe. They’re now stable enough.
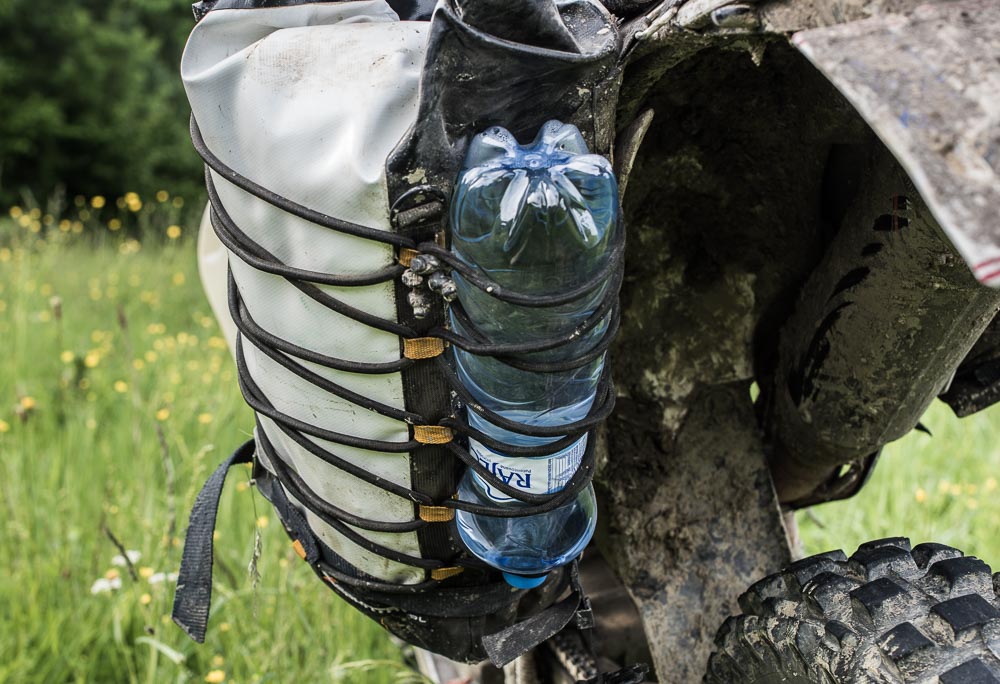
After looking into several different pannier setups, I must say that the XCountry panniers tick all the essential boxes for me. They’re light, waterproof, quick to open and close and sturdy. They are also easily expandable with the handy zigzag bungees on the outside. I regularly carry two 1.5 litre water bottles in the back at the end of the day before hitting camp.
BOLTS
Many of the aftermarket stuff such as skid plates have different bolt head and types than the rest of the bike. I usually replace all after market bolts with high quality stainless steel hardware. I make sure the head is a Torx key size that I need to carry in my toolkit anyway.
HAUL LOOPS
The tail can be easily moved around from the luggage straps or just by grabbing the tail, so I only fit a haul loop in the front. It’s another ghetto edition, made from 25 mm webbing and some hardware. It does what it’s supposed to and tucks away nicely behind the headlight mask
Full service history
Check spoke tension Anti seize chain adjuster bolts Check radiator fan Oil and filter change Replace air filter Change oil and filter Secure tank breather hose Replace oil and filter Replace oil and filter Rear shock service and preload adjuster Adjust clutch and brake levers Check suspension settings Replace oil and filter Replace oil and filter Replace oil and filter Replace oil and filter
Replace oil and filter Shock service Replace tyres, Michelin AC10 Install EnduroTech light mask Replace engine oil Replace Oil and filter Replace oil and filter Replace oil and filter Replace rear silencer bolt
Check rim lock tension
Check valve nuts
Check coolant
Check steering limiters
Stabilize and protect wiring
Grease axles
Grease steering stem bearings
Adjust handlebar position
Anti seize brake pad pins front
Anti seize in triple clamp bolts
Align forks
Rear sprocket 50-T
Weigh bike
Anti seize brake pad pins rear
Grease kickstand bolts and spacers
Grease countershaft
Front sprocket 13-T
Stabilize throttle cables to frame by seat bungs
Change oil and filter 1
Change oil and filter 2
Check valve clearances
Check valve shim sizes
Check radiator hose clamps
Secure starter relay with ziptie
Secure fuel pump relay with ziptie
Replace fuel prefilter
Adjust idle speed
Loctite kickstarter bolt
Loctite sprocket bolt
Loctite shock bottom bolt
Loctite chain guide bolts
Grease PDS hem joint (outside only)
Grease swing arm bearing
Mitas C-02 rear tyre
Headlight alignment
Electrical spray on all connectors
Full bolt check
Protect frame abrasion areas & recheck wiring stability
Check fairing screws
Tank protector rollers to radiator shroud tabs
MTB inner tube over fuel line quick release
Rear shock spring 80N/MM
Align forks
Tune suspension
Air filter change
Replace Hammerhead brake pedal tip bolts
Check valve clearances
Replace valve shim EX RIGHT
Check valve clearance EX RIGHT
Replace fuel prefilter
Replace air filter
Adjust idle
Front sprocket 13-T
Lock wire shifter pedal bolt
Loctite luggage strap bolts
Loctite panel bolts
Metzeler Unicross tyres
Replace air filter
Replace fuel micro filter
Check valves
Replace rocker arms
Fork service
Maxxis tyres
Replace rear brake disc
Replace coolant
Replace clutch fluid
Replace front brake fluid
Replace rear brake fluid
Grease rear wheel bearings
Grease sprocket carrier bearings
Rear tyre mud flap
Check the front brake linings
Check the rear brake linings
Check the free travel of the foot brake lever
Check the radiator fan
Adjust throttle position sensor
Balance Haan wheels
Check the steering head bearing play and grease
Check and grease the swingarm bearing
Check shock bottom heim joint
Replace shock bottom heim joint
Replace rear sprocket 50T
Replace front tube
Replace rear tube
Check the spoke tension
Change spark plug
Replace chain
Check valves
Check clutch steel discs
Check clutch friction discs
Protect subframe abrasion
Check clutch pressure plate
Grease all moving parts
Check all hoses
Check cables for damage and protect routing
Full bolt check
Replace fuel filter
Replace air filter
Replace oil and filter
Replace power relay
Replace front sprocket 13T
Tune suspensions
Check electric problem 12 V USB outlet
Replace air filter
Replace fuel filter in tank
Check valves
Check timing chain: excellent condition
Replace front brake disk
Check steering head bearing
Check clutch
Replace air filter
Replace fuel microfilter
Install DIY kill switch
Replace front sprocket 13T
Wash air prefilter
Mitas C-02 rear tyre
Replace air filter
Replace fuel microfilter
Wash air prefilter
Replace air filter
Replace fuel microfilter
Wash air prefilter
Check and adjust valves
Replace rear brake pads
Replace front brake fluid
Replace grips
Replace foot peg cotter pins
Front sprocket 14t
Replace clutch master cylinder membrane
Full bolt check
Replace spark plug
Dunlop D606 tyres
Replace oil sieves and caps
Replace air filter
Replace fork seals
Clean forks
Replace fork oil
Fork Service
Replace spark plug
Replace spark plug connector
Replace rear shock bottom bearing
replace timing chain
Ignition cover gasket
Oil and filter
Replace brake fluid
Replace clutch fluid
Valve clearance check and adjustment
Remove navigation clamps
Short arm for Garmin cradle
Remove lower Garmin cradle
Remove Baja LED
Remove 12V outlet
Remove relay and reconnect headlight
Medium fuel tank
Replace in tank fuel filter
Fix sidestand
OEM plastic kit
Replace rear indicators
Clean fork seals
Lube fork dust covers
Reattach valve case breather hose
Relocate temperature gauge
Navigator to handlebar
Oil and filter
Remove navigation panel
Remove navigation clamps
Clutch lever, orange
Brake lever, orange
Factory oil filter cover
Install mousses
Stickers on rim holes
Replace air filter
Lithium Ion Battery
Hammerhead brake pedal
Hammerhead shifter pedal
Hammerhead titanium pegs
Hammerhead side stand
Full titanium Akrapovic system
Install horn
Check headlight alignment
Check brake fluid levels
Check clutch fluid level
Replace front wheel bearings
Replace rear wheel bearings
Replace sprocket carrier bearings
RAM mount for fat bar
Replace swing arm bearings
Replace swing arm chain slide orange
Replace chain slide
Replace chain
Replace 13T front sprocket
Replace air filter
Replace air filter dust cover
Replace fuel micro filter
Replace footpeg pins
Replace fork oil
Replace white hand guards
Replace side stand bolt and other parts
Rewire navigator
Protect clutch hose
Tighten LED bolts
Secure LED ballast
Install rear indicators
Secure rear indicator wires
White tail section
Orange frame protectors
Seal steering lock from water to steering head bearings
White side sections
12V power socket kit
12 V socket with cable
Replace mask rubber straps
50T rear sprocket
Oil and filter
Haul loop
Bolt reg plate
Lube mousses
Wash and oil air filter
Replace rear tyre, Metzeler Six Days Extreme
Lube mousse
Relube front mousse
Replace rear mousse. Metzeler
Wash and oil air filter
Replace speedo battery
Replace rear tyre, Metzeler Six Days Extreme
Replace front tyre, Michelin Starcross
Replace front sprocket 13t
Check valve clearance
Replace air filter
Replace air filter dust cover
Replace coolant
Replace engine oil and filter
Service steering damper
Replace brake fluids
Replace clutch fluid
Replace con rod
Replace piston
Replace clutch cover gasket
Replace SLIDING GEAR 3/4 G. 08
Replace SLIDING GEAR 6.G. 08
Replace IDLER GEAR 3.G. 08
Replace IDLER GEAR 4.G. 08
Replace IDLER GEAR 6. GEAR
Replace SHIFT DRUM LOCATING ALU CPL.
Replace TIMING CHAIN 114T 08
Replace crankshaft bearings and seals
Replace counter shaft bearings
Replace counter shaft o-ring
Replace main shaft bearings
Replace ignition cover gasket
Rebuild water pump
Replace spark plug
Replace clutch damper rubbers
Replace clutch slave cylinder gasket
Rebuild clutch master cylinder piston
Rebuild front brake master cylinder piston
Replace steering head bearings













wow wish i could figure out how to do half of that stuff. my 500 has 12000miles on it an i think i could do 25000 in mostly stock use i ride dirtmostly as dual sport. these things further enlarged my understanding of what to expect sometimes.thanks for4 the info
Hi Greg, thanks for the info. Very good to hear there are people doing high mileage on the 500! Keep rolling!
I’m in search of a bike with great maintenance intervals.
How long you think I could go before doing valves on a ktm if I were to mainly use it on the street?
(The 10hr maintenance intervals are way to short)
In my experience the valve clearance does not drift much after the initial seating. I usually need to adjust them once per season.
What a fantastic build. I’ve just bought a 2015 500 and like you I am trying to turn it into a lightweight adventure bike. I’ve still got my 690 with Rally Raid kit but if it all works out with the 500 I will sell the 690. I’ve got a couple of questions if you don’t mind: can you remember which wire/circuit you used for a switched 12 volt? I am using a separate fuse box for my heated grips and road book but I’m not sure which wire to connect a relay to. Second question is do you carry engine oil in the panniers or externally? I use a Giant Loop Coyote but I’m a bit wary of oil leaking into the rest of my kit – maybe i should attach a small bag just for the oil onto the loop? Whilst I’m on the subject of oil I am hopefully shipping the bike over to the US next year to ride the Continental Divide trail – I was hoping to do the trip (approx 4500 – 5000 km) with just one oil change around halfway, do you think that is too far? Cheers Richard
Hi Richard, congrats on the bike! Looking forward to seeing what you build.
I used the auxiliary wiring harness (KTM 77711979000) for all accessories with a Y-distributor (KTM 77711979010) in the end of it. The auxiliary wiring harness is wired directly to the battery terminals and has a 7.5 A fuse. I just added a switch at the end of it and distributed from there.
As for fluids, I would never carry large quantities inside panniers. The only exception is minimal stuff like Loctite, and even that is triple packed into zip lock bags. IMHO the risk of getting camping gear or spare parts covered in oil or water is too risky. So I carry all fluids on the outside. I’d do the same with oil too.
The truth is that I don’t really carry any oil with me. Instead I try to organize it beforehand to locations or buy it on the way. In the end finding the oil is usually not the problem, but in fact what to do with the used oil. So oil changes are not really convenient to do in the field. And where you can buy oil, you will probably also find a place where to change it too.
It’s not so much the mileage as the hours. My oil was looking very good after 1400 km / 18 h and very dubious after 2200 km / 40 h. So I’ll be looking to do oil changes at around thirty hours and not worry too much about the mileage. But I’d imagine on the Continental divide ride I’d do two oil changes on the way.
Keep safe, keep rolling!
Richard, a tip mate. Don’t even think of shipping your bike to the USA it will cost at least 50% more than you have bee told by the time you take into account all the extra expenses involved. I took a 690 over in 14 and it was a nightmare, especially dealing with US customs, the nastiest bunch of tossers on this planet. Far far better is to do what I did in 15 which is to fly WITH your bike on Air Canada from Heathrow. It cost £1200 me and the bike to Montreal ( in your case it would be Calgary right at the top of the Continental Divide) but only £800 back from Vancouver.
Literally by the time I had collected my luggage from the carousel my bike was waiting for me in the cargo area a short taxi ride away. All I had to do was pay a 5 minute visit to the charming ladies in Canada Customs (OMG what a difference to the anal US bastards) and I was on my way . Strangely when you reach the US border because you have come by land the US Customs don’t even look at the fact you are on a UK bike, they just stamp your passport.
I promise you that to get to the USA and back with your bike will cost at least as much by ship with massive extra hassle when you take all the REAL costs like extra nights in motels waiting for it to released, Customs charges, port charges, taxi fares to the ports which are miles away from the Customs offices etc etc. Ships are often delayed for weeks.
Lastly don’t forget to get your EPA exemption certificate from the States in case the Cops stop you. It is easy to get online just Google it. Have a great trip. BTW have you considered doing the real Trans America Trail which only become a trail in Mississippi then crossing the rockies and dropping down to the bottom of the CD trail and back up to Calgary to fly home with your bike? You could fly into Montreal with road tyres and cut down through the Smoky mountains like I did in 15?
This is a super helpful post. Thanks Charles!
Hi Thanks for the reply. I don’t really want to keep oil inside the luggage, another option is this: http://scheffelmeier-metall.de/KTM-EXC-450-500/Rally-bash-plate-with-bolt-on-tool-box-for-KTM-450-500-EXC::116.html , he will make a bottle that bolts to the bash plate instead of the tool box. I’ve got a collapsible bowl that I can drain the oil into and then transfer to the empty bottle to dispose of at a later date. Or like you suggest try and plan places to stop along the way.
I should get my suspension back today, I have adjusted for my weight and the weight of luggage – hopefully I can get out this weekend to see how it is. The Haan wheel should be here next week, then I might get a Highway Dirt Bikes Rallye light tower and fairing and a Globtrottin’ lightweight rack – depends how much money is left!
Cheers
Thanks so much for the thread! A lot of people post blogs that simply inspire and inspiration is great motivation but it doesn’t get people any closer to their goals. This post has gone further by educating and enabling! I’ve been saving for a 500 exc and have pages of research and amature plans on what I’ll do to make it a light adv but this information has taken my planning so much further.
Thanks for helping me complete my build plan! Time for me to draft up the final budge, finish saving, learn to modify a few of the things I’m too inexperienced to do and then pull the trigger. Still about a year off from getting where I need to be but I feel like I finally have the road map on how to get there.
Seriously, thanks
Ben
Excellent post.
Thanks!
Sergio.
Thanks for all the great information.
I adventurized my 2016 500EXC and did the Continental Divide Ride north to south at the end of July. I started from my home in Surrey BC Canada and rode 2 days of paved highways to the start of the ride in Whitefish Montana. Rode 11 days of the CDR to Antelope Wells New Mexico. Then 3 days of Interstate highways via LA back to Surrey. Kept highway speed to 120 km/h. The weather coming back was HOT!!!.
The CDR ride was fantastic. Bike performed perfectly. No issues at all. Three oil and oil filter changes on the way (Whitefish, Colorado, then at the end of the CDR before heading home). No air filter service was needed. I was at the front of the pack!!!!
Both new tires at start. The rear tire was replaced in Colorado. The front tire replaced in Arizona on the way back home not because it was worn but because of the noise produced by the cupping wear pattern from all the highway miles. Extremely loud on the highway.
I didn’t carry tires or oil. Lots of motorcycle service locations along this route.
I brought my camping gear but only camped once. Next time I will skip the camping gear and run a little lighter.
Used a custom wider firmer seat to make the highway miles bearable. Lynx II fairing for highway comfort and fantastic lighting.
The interstate miles were pretty hard on the bike’s drive train. Next ride I will consider one-way U-Haul rentals to get the bike to the start and back from the finish. I used stock sprockets and chain. Rear sprocket is aluminum and wore quickly on the interstate. The chain guard and chain guides were all worn through by the end. The sprockets and chain were also worn out from the highway miles and speeds. I kept chain well oiled.
On my first pre-trip test ride the stock side stand collapsed. I replaced it with an aftermarket one that is much stronger.
The 500EXC is the perfect bike for the CDR; fast and light.
Hi Mark, sorry for not replying earlier! I appreciate you taking the time to write extensively of your experience with the 500.
I’ve noticed the same wear issue on the standard sprockets on the 690; the Stealth Sprockets last much longer, and apparently the Ironman sprocket is the bomb! I would also recommend the TMD chain guides as they have replaceable bottom slides, which I replaced after 20.000 miles. Which side stand did you go with?
It’s from Promoto billet.
It is made from aluminum and much stronger than stock, especially at the attachment point to the bike. My bike is lowered a bit and Promoto shortened their stock stand for me a little for an extra fee.
Mark,
I am 5’6″ and while I can tip toe my bike I am really considering lower my exc “a bit” also. Can you tell me what products you used and what the end result was for you? Are you still glad you did it? Thanks!
Hi Mark, I’m 180 cm with really long legs so I have not lowered the 500. Unless I’m mistaken, you can start by getting a lower seat and then continue further by shortening the forks and shock…
Hi Daniel;
For the lowering the bike I bought the Terra-X kit to lower the front and rear. Terra-X is in Australia and they shipped to Canada for me.
I installed the rear lowering kit only. It was easy to install the spacer inside the rear shock and the spacer is removable to bring the shock back to stock if I ever sell the bike. Tools are included.
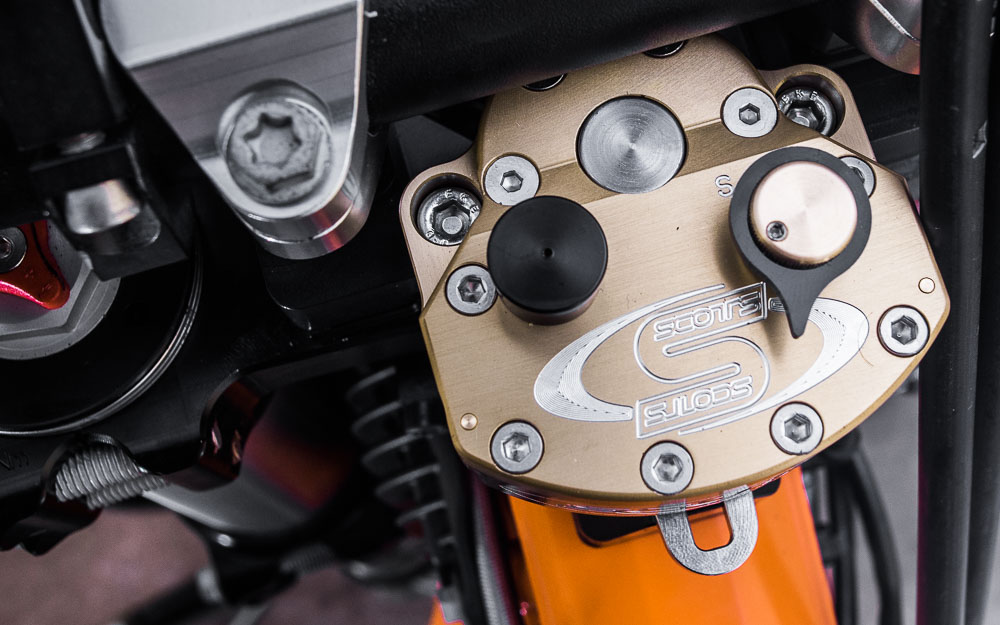
I did not install the front lowering kit. The reason is that after I installed a Scotts undermount steering damper I noticed that I had space to lower the forks in the triple clamps an inch without hitting the handle bars. This is not possible on the stock arrangement because the handle bars prevent lowering the forks in the triple clamps much. I was worried that the front tire might hit the fender on big bumps but it has not happened yet.
The Fisher seat I bought is the same height as stock but has different foam densities along its length. The density is low at the front and firmer at the rear. When I’m at a stop with a foot on the ground, my butt is at the front end of the seat and the low density foam compresses a lot and is lower than the stock seat would be. When riding while seated on a paved road, my butt is on the firm wide foam near the rear for comfort and support.
I even went so far as to add a half inch to the soles of my boots to get more height but that was a bad idea. You get used to the height after while.
Hi Mark,
Could you let me know the make and model of your wider seat and comment on whether you considered it value for money? Same for the aftermarket side stand?
Cheers.
Hi Rupert
Sorry for this late reply. I just noticed your question now. My side stand is from Promoto Billet. The stock side failed at the pivot point when I parked the bike on a side hill with all my luggage installed.
My bike is lowered an inch at the front and rear so I requested that Promoto Billet shorten their stand 1 inch for me. It was an extra cost but worth it in my mind because the stock length would not have worked for me and it would cost more for me to have it short end locally.
My seat is from Fisher. I am very pleased with it. The chap at Fisher (I think his name was Nate) was very helpful. The seat is quite wide and firm at the back and narrow at the front. It is not as comfy as a cruiser bike seat but a huge improvement over the stock seat and the Seat Concepts seat for highway miles.
I’m fortunate that this is my only hobby and I am able to afford to buy good quality accessories (but don’t tell my wife) so the side stand and seat are good value for me. Please contact me at mdlafferty@shaw.ca if you want photos or more details.
I just got back from the Washington, Oregon and Idaho Backcountry Discovery Route (BDR) trails ride. It was great.
Hi Mark. I am hoping to ride the CDR next year so long as I can organise a reasonable fee for shipping the bikes from the UK to Calgary and San Francisco back to the UK. My main concern was oil changes whilst doing the trip but it sounds like there is no need to worry. Did you just use a decent quality oil or did you use the specific oil that KTM recommends? Cheers Richard
Hi Richard;
To get to Calgary, try Air Canada, At one time they had a special deal where you could fly at a discount price on the same flight that your bike was on.
I’ve always used the KTM recommended Motorex oil.
You can email me at mdlafferty@shaw.ca if you want to talk about the CDR.
Good luck on your ride!
Mark
Just wanted to thank you for the great information. I sold my 690 3 years ago and miss the adventure side of things (3000 miles in 6 days West to East US coast), even though racing a KTM 300 has been a blast. I was getting the itch to go back to a 690 but loved your insight on the KTM 500. My only concern is the amount of highway miles it seems we have to do here in the states to get to the ‘good stuff’. Reading Mark Lafferty’s insight was good to hear as well. Gonna make a plan and hopefully the 500 will be close to a reality in a few months.
Jeff – marshy19
Hi Jeff, and sorry for not replying earlier. I seem to have missed your comment during the end of the year chaos at work and the holidays. Anyhow, many thanks for your kind words. I fully agree with the issue with highway miles. I somewhat suffer from the same thing here in Berlin, and will not do any more long tarmac transits unless I absolutely have to. IMHO the 500 is no less comfortable than a 690, but it just seems a waste to have to do a full service after a long transit before hitting dirt… Luckily there should be affordable road transport available. Have a great year and wishing you good luck with the 500!
Thanks for your info on the build, I ordered the GPS holder from RMS , how difficult was it to reroute front brake cable and wiring ?
Hi David, the brake rerouting is really simple. You can use the original brake line, but you need to cut off the hard plastic sleeve. A utility knife will do, with about 1-2 mm of the blade out to avoid damaging the brake line inside the sleeve. Once you have the sleeve cut off, just add ziptie the brake line to the bottoms of the triple clamps, running the line below the headlight. It’s a good idea to add some protection between the brake line and the clamp to avoid abrasion damage. MTB inner tube works well. You’ll need to adjust the angle of the banjo on the master cylinder, but you can do this without having to bleed the brakes if you’re careful.
Best of luck!
Thanks for the information, I will work on that tomorrow
Looks like a great build. I just found the site while thinking about ADV riding on my FE501. I did almost all the same mods you did already. Short of the wiring clean up. Might have to clean her up and do that. I am interested to read more about how the bags and packing works out. I find the FE a little finicky at high speeds. How does it ride with all the weight? Have you weighed the bike (maybe i missed that somewhere if listed). Cheers and thanks for the write up.
Hi Nicole, and thanks for your input. The 501 is a really nice bike, although I do prefer the 500 EXC over it. One factor is the PDS on the KTM vs. the linkage on the Husky.
As for the luggage, I’ve been very pleased with the Xcountry Hobo edition panniers so far. The tie into the bike nicely, but do need some D-rings on the tail fairing. I also added another set of D-rings on the side panels to prevent the bags from bouncing around too much. Seems to work and so far all the plastic fairings are holding up to the extra load. I only carry about 6 kg of gear per bag even on multi month expeditions, so the added mass is not huge. I can fit all my gear nicely into the double 15 litre panniers, and have a small mask bag for extra goggles, electronics and charging. I don’t use a tank bag as it restricts body position too much IMHO.
The 500 is very stable at speed. Then again, I’ve only run it at 150 kmh on sandy roads and it seemed very nicely planted on the surface. I think this boils down to keeping luggage minimal and the centre of gravity low. The steering damper helps too. Not that I usually run it that fast though. In fact I’ve since changed the 14:50 final drive to a 13:50 to better suit the enduro type trails that I ride on. For rally type stuff it’s definitely too slow, but that’s not the riding I go for on the 500.
The mass of the bike is currently as follows:
Adventurized bike: 122 kg
Panniers and mask bag: 2.5 kg
Luggage: 13 kg
19 litres fuel: 14.5 kg
Fully fuelled expedition weight: 152 kg
When you refer to the sleeve are you referring to the black sleeve that both the speedometer cable and brake line are in or the clear coating on the brake line?
Sorry I just want to make sure
No worries David, it’s better to be safe than sorry 😉
You only remove the black plastic sleeve that’s on the brake line. Do NOT attempt to remove the sleeve from the speedo cable.
Hello again,
still moving towards my Africa trip and debating over 690, 701 and 500. I think the 500 would be great, but i’m a little worried about the low octane fuel I might come across. you have any thoughts on that?
cheers,
Clay D
Hiya Clay, unfortunately I have no info on the 500’s reaction to low octane fuel. My strategy is to switch into the soft ignition map with dubious fuel. Also, I try not to run the fuel tank completely dry of higher octane stuff; instead try to blend it gradually and top up on high octane when you can. If it’s any consolation, the 690’s had zero issues with 80 octane fuel while running on the bad fuel ignition map. They felt sluggish of course, but no knocking or other mechanical issues.
Hobo, is there any other place to purchase xcountry bags? I’ve tried contacting them via email and have been unsuccessful so far. Thanks.
Hi Dave, I’m afraid not. They seem to be a rather rare delicacy. I’m working on trying to get a batch of the Hobo bags produced, if people are interested. I’ve been really happy with them and it would be nice to get them widely available…
I would be interested in such bags, should you produce them.
Hi Sam, XCountry makes the bags. You can buy them from their site
Hi!
Thank’s for your great blog, i have been following it for a good while.
I’ve just ordered a 500 exc 6-D, and planning to do some adventurizing, a lot inspired from you! 🙂
A silly question.. would you mind putting a link to those tiny led indicators and relay?.. I have searched, but keep ending up unsure of what fits or looks as nice as yours.
Thank you and keep up blogging 🙂
Regards, Jocke
Hi Joakim, I’m 99% sure they are these:
Joakim. Biltema have some small, cheap and cheerful led indicators that don’t melt on the 500, but are cheap to replace when you break one off.
http://www.biltema.se/sv/Bil—MC/MC/Belysning/LED-Miniblinkers-2-st-2000020855/
Been doing fine on my 500 so far.
Excellent write up and photography, as usual.
Would you mind posting a close-up photo and description of how you mounted the S2 Pro driving light? I’m doing a KTM 500 bike build and would like to benefit from your experience.
Hi Bob, please bear with me. I’ll send you a pic during the weekend.
Thank you. Following your lead, I bought the same dash components as you and am anxious to learn how you assembled all the components on the Rally Management Services Universal Navigation Clamps, the handle bars, etc. I especially valye that you’ve made it work under heavy, prolonged vibration – vibration will kill nearly anything.
I considered alternatives like those below but your solution may work better:
https://www.highwaydirtbikes.com/index.php?app=ccp0&ns=catshow&ref=HDB_Rallye_Lite
https://www.highwaydirtbikes.com/index.php?app=ccp0&ns=prodshow&ref=KTM_LC010
https://www.motominded.com/collections/ktm-2016-xcf-2017-250cc/products/squadron-xl80-kit-2017-ktm
Hi Bob, the clamps work very well with the 690 and 500. The clamps that connect to the handlebar are very sturdy and create a great connection, and I didn’t even bother with Loctite. The main issue to cover is adding Loctite to the threads of the minuscule needle head hex screws that prevent the mounting cross axle from rotating on the clamps.
The Montana cradle connects to the crossbar with the RAM axle clamp mount, but it requires an adapter as the axle is too thin for a good connection. I made a ghetto version from 20 mm aluminium rod, but you can also buy a plastic one from RAM. I prefer the aluminium, as it allows for higher torque on the clamp bolts.
The LED light is connected to either of the threads, exposed from the clamp bolts on the RAM mount. You can use the original Baja bracket:
But I fabricated a longer version for more clearance between the bolt head and the wires. You may need to cut the exposed threads a little to make sure they don’t touch the light.
Wow – thank you so very much! Extremely helpful!!! Thank you for taking to perfectly illustrate your implementation for me and others. This is exactly what I needed!
Your commitment to quality work is always on display – even your “snapshots” are beautiful!
Hi Hobo, Thanks for all the great information. Now that you have experience with both the 500 and 690, what rides will you utilize the 690 for? Thanks Dave
Hi Dave, and sorry for the late reply. I’d say the 690 would be great for fast terrain, which doesn’t get too technical. Rally type stuff…
Awesome.
Thanks for your review!
I am just playing now more and more with the idea,
to get a lighter bike for dirt tracks beside my 640ADV.
What bash plate did you originally have before you switched over to the carbon? Do you still have it?
Hiya Jim, it’s a Twalcom rally H20 tank / engine guard. Yes, I still have it but will most likely sell it.
Let me know how much you’d want for it. I might be interested! You can email me at
Fishing4adv@gmail.com
E-mail sent.
Hi Hobo, living in Gerrmany, maybe this is a off-topic question but, living in Germany, does the annual inspection (TÜV) give you any kind of trouble because of the after-market parts and mods?
Hi Andre, my bike is not registered in Germany, mainly due to the complex registration process and tight yearly inspection.
Do you always change the oil filter with the oil when on the road?
Hi Dave, yes I do. I know some riders do it with every second oil change, but I prefer to change it every time if they’re available.
Thanks Hobo, I am also using a 2016 500 EXC for adventure riding and in the process of setting it up. I actually had 2 different 690’s starting with the first year they came out and came to the same conclusion that you did. I did the Colorado BDR on a 690 and am now going to do the rest of the BDR’s on the 500. I do not camp, so I am thinking of using Giant Loops Mojave bags with a backpack and a Wolfman Enduro light tank bag which is much smaller than a GL tank bag. I live in Bend where GL is headquartered. they are great guys! I read your tool post but i think it was focused on the 690. If yo have any updated tool lists for the 500, I would appreciate a link. Thanks!
Hi Dave, sounds good. Do you have the 19 litre tank? How does the WM enduro tank bag fit on it? Any restriction to body movement? I’ve had the GL Fandango and found it too restrictive for my taste. Plus I don’t need the extra space any more as I carry a mask bag…
Here’s the list for my 500 EXC toolkit and consumables. There’s an update coming up soon though 😉
I have the Acerbis 3 gallon tank that allows you to keep the side panels. The WM fits on with a harness in the same manner as the Fandango. Around the steering head and back to the frame with quick release clips. It’s about 2 inches shorter and much thinner than the Fandango so it is less restrictive but if I am only riding for the day in more technical terrain, I prefer to have nothing. Thanks for toolkit link. I was specifically looking to see what you did for newer smaller 17mm front axle bolt and I see you have the ratchet adapter for the motion pro combo tire levers. Excellent kit. Thanks! Any spare parts you insist on?? Fuel Injector or ????
Just as a note, I use 1/2″ socket on the 3/8″ Motion pro with an adapter. The adapter gives just enough clearance working comfortably on the axle or sprocket and there’s no need to carry an extender. As for spare parts, I do carry an injector, an extra pump and clutch plates among other things. The full article should be up before I leave on Thursday for the Crimson Trail.
Thanks! I want to steal your idea of using the KTM Accessory Harness for my GPS. Can you explain what male connector you use for the KTM style 2-pin female connector?
You can either remove the connector and solder wires right onto the accessory wires or get a KTM Y-distributor and build from there. The Y-distributor part number is 77711979010.
I’ll be using the Baja Designs lights in a similar setup.
Any chance of writing some instructions for electrical idiots like me, on how to wire the lights/relay… and still use the stock high / low beam…?
😉
Ride: 2007 450 EXC
California
Hiya, I’ll see about drawing up the schematics.
Awesome , cheers!
Jeff
pretty new to all this adventure riding so bare with me:
Love this bike and the thought of owning one but have some worries as a newbie
How many miles before oil and filter change? are there any other maintenance issues if i go on a multi day trip?
Hi Robert and welcome to the legion of dirt 🙂 On the 500 EXC I typically replace the oil and filter every 25 hours of use. So during the last six week expedition I did seven oil changes and replaced the air filter every time too, along with the fuel micro filter. Other than that, the other thing to watch out for is valve clearances.
Where can I buy one of those oil tanks?
Hi Sean, it’s from http://www.twalcom.com
BTW I’m selling mine, so drop me a line on the contact page in case you’re interested.
Please email me, I’m very interested in your tank, sean.strandfeldt1@yahoo.com
Email sent a couple of months ago 😉
Been enjoying your blog and accounts on ADVrider for some time. Thank you for all the hard work documenting all this stuff.
I was wondering how the Carbon bash plate is working for you. Still happy with the protection it affords?
Hi Michael. I like it a lot. No damage, no complaints.
Thank you!
Great write up. The commitment to answering comments has helped out a bunch too. I just bought the RMS clamps for the front end and the bonus is they’re on sale right now.
Fantastic information Hobo. I was going to drop the hammer tomorrow and trade my 17 350 XCF for a 690 but now I’m thinking 500 EXC! I currently race a 17 300 Six Days and a 17 250 XCF. The 350 has outgrown my interest in the woods since the 300! Did you do any ignition mods or air filter boot changes? I’ve heard the motor is really clogged up because of emission issues. Thanks agains for fantastic pics and fine attention to detail.
Thanks David. I have the previous model (12-16), and I took out all restrictors and the it’s now in full race trim, so now problems in breathing. I believe it’s a different case for the current (17->) models, especially in the US. Sorry I can’t be of more help…
David – I have the USA 2017 500 EXC and found that it benefited from may modifications. There is a lot of useful information on YouTube. IN summary, removed the intake reeds and replaced with a velocity stack, used larger and more streamlined fuel components from the tank to the engine, replaced the muffler with a Q4, and, perhaps most importantly, replaced the ECU with the Vortex ECU. I replaced the rear sprocket with a larger one for more control in dirt. I went with a 52-tooth and DID racing chain and the bike will still exceed 100MPH on highway – plenty fast on knobbies! Tons of other mods including Woody’s A6 wheeln, Haan hubs, heavy spokes, better suspension, large fuel tank, etc., etc. Took it into the mountains of Mexico for a week and it was great on tar and in dirt. Just needs a lot of work to turn this capable USA-based KTM enduro into an ADV bike.
I absolutely love this build and your blog. It has definitely inspired me with less is more. One of the pictures you posted of the 500 with panniers looks different then the Xcountry panniers. Are they the Xcountry with a rain fly or completely different. The reason I ask, they look like they set up higher on the bike for a little more room for standing.
God bless you, be safe and I’m looking forward to me Crimson.
“If your not living on the edge, your taking up too much space”!
Hiya Scott and many thanks!
The older picture of the 500 had a pari of Ortlieb dry bags with a DIY harness system. It worked OK, but would have needed further development. They were fairly hard to access, so I ditched them for the XCountry Enduro bags.
You’re absolutely right about the cramped space with the XCountry bags; they come right to the limit. If all goes well, Mirek from XCountry will do a new shorter set of the Hobo bags for this season. They’re shorter and smaller, as I finds the double fifteen litres too big for my stuff.
Keep rolling, keep safe!
Noticed as part of your maintenance you replaced the rocker arms at ~109hrs… Can you tell us what happened or was this precautionary?
Thanks for your feedback, your effort and info on your blog, and safe trails to you!
Hi Dan, I thought I heard a noise from the engine and changed the rocker. Made no difference whatsoever. Instead, the EXC clutch gets progressively louder as the the damping rubbers harden and there is a little play. Keep safe, keep rolling!
Hey hobo
I’m just seeing how the bike went on fuel
How many miles/km did you get to a tank,
Before using you fuel bladder,
Cheers
Paul
Hi Paul, the bike consumes a little under 5 litres per 100 km, so on the 19 litre tank the range is around 350 km I would say.
It looks like you have non-stock frame guard protection. True? If so, could you tell me where you got those?
Hi Michael, the black plastic protectors on the frame are stock. Or did you mean something else?
Thoroughly enjoyed reading this, my plan is to buy a 500exc in South Africa and ride it home to Kenya this has given me lots of ideas of what to put on the bike. One thing I would say is maybe to use 3m self vulcanising rubber tape instead of insulating tape as it seals better and doesn’t leave a mess when it’s taken off.
Rolling Hobo,
Thank You for the excellent site and sharing your wealth of knowledge. Based on your stories I have also adopted a go-lite philosophy. I have a WR450 that I have set up similar to your 500 and I have been debating a cush hub. (My Ducati and BMW are now a bit lonely)
Most on-line resources say it is not necessary for the smaller bikes. Although I see the Australians who cross large spaces, sometimes put them on the WR – which is very popular there. I read that you have installed a Haan Cush Hub. I am curious as to your experience with it. Is the ride smoother? do you feel it is necessary to protect the gearbox? and have you had any issues with it such as more maintenance on the rubbers?
I believe I am getting some additional protection from the D606 tires and perhaps even the Rekluse Clutch which I installed to make up for only having 5 gears. I have the bike geared 15 – 47 which works great for me.
Thanks – Kevin in Colorado
Hey Hobo,
Earlier model years of the 500 EXC have a kick start in addition to electric start. I’m wondering why you wouldn’t opt to have that kick start as a backup in a pinch. Have you ever hit a point where you have needed it? Also, do you carry a jump-start battery?
Thanks
The kickstarter is a standard feature on all 500 EXC’s up to 2016, which is the year I have. 2017-2019 has it optional and 2020 onwards it’s not available at all. To be honest, I’ve never really needed it, but I do like to have it for some reason.
Hi there, thank you for all the work you put into this documentation! Very useful for me and many others. Can you add a link to where you have gotten the mini LED indicators? Are they’re still alive ? 🙂
Hi Oli,
The rear indicators are tinted Shin-Yo Sparks from Louis
Still going strong.
Hi Man, excellent build and web page! Gave me a lot of ideas and support for my build, thank you. I have one short question, why did you choose 500cc when KTM make more less same bike also with 450cc where difference in engine is not big i believe? I am asking as here i Slovakia is can only find second hand 450cc and no 500cc, do you thing there is much difference this 50cc between them? Thank you and all the best to you. Tomas
Hi Tomas, The 450 and 500 are essentially the same bike, except that the 500 has a longer stroke and more bottom end torque. The tuning AFAIK on the 450 is more top end heavy. Some of my friends ride on 450’s and it works for them fine.
Hi , fantastic info, thanks a lot, tommorow i will purchase a ktm exc 450 six days 2013 edition and i am really happy.could you please tell me which ktm rear wheel dumped hub did you use, before getting the haan’s, thanks a lot
Hi Nikolas,
Congrats on the 450!
For the rear wheel I used KTM PowerParts:
REAR WHEEL CPL. DAMPED 2,5X18″ (#5841000124430)
BUSHING FOR REAR DAMPED HUB 06 (#54610416500)
SPROCKET SUPPORT CPL. (#5831005024491)
I would definitely recommend the Haan wheels though. Amazing quality.
Hi Hobo, I am in progress to rebuild my 450-EXC to RTW way and looking to replace OEM rims and hubs with Haan wheels.
You are recommending Excel 18/21 A60 – do they have a cushion drive in rear hub?
And what about rim width? Front standard 1.6 width, rear 2.15 (as wide as possible?
Thanks for response
Hi Frank, the A60 is the rim by Excel, so damping depends on the hub. Haan wheels can build the wheels with bolted or damped hubs, depending on requirements. I imagine RTW always contains a lot of tarmac miles, so I would recommend a damped rear hub to avoid wearing out the counter balancer shaft splines. The splines should be well greased either way to minimise wear. Unfortunately I don’t remember the width of the rims; I think the rear was not standard, but better ask HW directly, as they’ll know what to lace up. BTW, the A60 rim can sometimes be hard to get, so another good option is the Excel Takasago, or DID DirtStar which was standard on 690’s at some point.
Thanks Hobo. I asked HW which rims to pick for my 450 and add cush drive for rear wheel and they returned that for front is the 21 x 1.85 and rear is 18 x 2.15. Just have to go with Takasago as A60 are not available for while.
So width solved 🙂
Someone with experience of using an reusable stainless steel oil filter ?
Did you ever figure out a snorkel or how to waterproof the airbox?
Hi Sam, not yet. I have not been on tour anywhere with deep water in the last four seasons. Could be that I’m avoiding water tho 😉
Here you have a solution for deep water crossing by Alexey Garagashyan:
https://www.youtube.com/watch?v=X5R1ndAWUdA
https://www.youtube.com/watch?v=Z8iGdWbxAvE
Enjoy
Awesome, loving the creative problem solving! Many thanks for sharing this Ivaylo.
Rolling Hobo,
was reading through your maintenance info on your ktm 500 and noticed that you replaced your top end and many other parts recently in prep for your next adventure.
was wondering if it was absolutely necessary or you just replaced it for precautionary measures for your trip?
thanks man, journey on.
Hi Jimmy, at 455 hours and 21 k on clocks the engine was still running nicely, but I felt that I didn’t want to risk another season with it in its current state. Judging by the parts, it was a good decision as there was wear and tear. The bike feels snappier now, so clearly it was time to do the rebuild.
Hey Hobo (pun intended)!
Thank you for your fantastic write ups! Both adventure and technical. I learned a lot from your posts and I am very much thankful for them. You was also the first I saw to adventurize the five-hundy. I shook my head when I first saw this. This was several years ago… I have seen many more since then. And progressing similar offroad oriented evolution route myself I totally am on the mindset of having the 500EXC for around the Europe adventure machine when I am done with travelling around the world. Currently travelwise on the AJP PR7 and very happy with it and supplemented with Beta Xtrainer for proper offroad stuff training. Anyways… to the point of this comment….
I noticed you still successfully use the OSCO oiler and I am contemplating it for my soon-to-start trip to Africa (covid postponed). What caught my attention after reading the manual is the point about not shortening the tube between oil canister and the nozzle because of dripping speed. I assume it has to do with the vacuum driven mechanics of the OSCO. But you obviously shortened it drastically on the EXC500. Did you do any modification or it still works properly with the shortened tube?
Thanks a lot! Looking forward for the Kyrgyzstan report!
Hey Robert, I guess the longer tube create more flow restriction as opposed to smaller one, which slows down the oil delivery. How, I don’t know, and was never too concerned about it. I guess a looser spring would have the same effect on a shorter hose?
Wonder if you take issue with the 500 vibration?
If so any solutions you have implemented?
The 2016 500 vibrates more than the 2013 690 I had. But I’m really not that bothered by it. Having said that, during expeditions my fingers become numb and lose feel, but they recover in a week or two off the bike. Another reaction is that the skin on my fingertips peels off after the expedition, but not sure if it’s due to sweat, the vibration or both.
I tamed the vibration in my 15 500’s handlebar by adding the Barkbuster VPS guards with the barend weights (these are key). These followed the install of 230 gram bar inserts made by Tokyo Offroad. Together the buzz is pretty much gone. Mark IV Pivotpegz seem to have damped the buzzy feet problem.
Thanks Jim, will look into it.
In general, wax is better in dry, dusty areas and oil is better if you ride a motorcycle in the rain quite a lot as I do. For my bicycle, it’s the opposite, I rarely ride in the rain and sometimes ride gravel, so I use wax as it flakes off and takes the grit with it.
Anyone got thoughts on the new Honda CRF300L? I’ve got one but am seriously thinking of getting a KTM 500 2017+ for weight savings. Fully loaded with camping gear and 2 gal of extra fuel, a KTM 500 will weigh as much as my CRF300L with nothing on it and only 2.5 gal in the stock tank. Plus the CRF300L doesn’t seem like it has the nuts to do the riding I want to do on hard cord exploring RTW, mostly off road. My only remaining concern are the vibes of the 500 KTM. Has anyone gotten these under control, even the dealer is like, well…be ready for them that’s all we can.
I run flex bars and a Renazco seat and they don’t bother me much. Yes, at highway speeds on tarmac (70mph) it does get annoying but you can’t have everything and light. Actually the main reason I notice it in the highway is because it’s so boring. High speed on dirt roads and I don’t notice it a bit.
I also have a highly modified suspension. Don’t know if that helps though.
Thanks Michael, for RTW I’m happy to do long distance freeway worthy travel via truck or tow since I don’t want to ride on highways (just to minimize accident risks) except when necessary for relatively short distances, and I guess I could find a way to deal with those brief periods. Thanks for the input, anyone else feel differently, that the 500 is too buzzy vibey on dirt or gravel?
David, I added Barkbuster hand guards with bar-end weights as well as internal handlebar weights (from Tokyo Off-Road but similar to Faast’s weights ) as well as Mark IV Pivot Pegz. These mods reduced the strong vibrations to where they’re no longer intrusive.
whoops (the oops kind not the kind we all love to ride), I just saw only a few comments above you wrote that same answer as a reply to someone else … Well, your success in minimizing vibration below intrusiveness on your bike is great to hear. I assumed there are so many bar dampening solutions that there must be one that works and I am happy to try yours and even flex-bars additionally if necessary. And, now if you feel like you got the pegs solved, and I’m not doing that much tarmac anyway, only the seat remains even if that’s an issue. So, I’m now only inches away from walking away from the CR300L that I quickly attached to and getting a KTM. Then, hopefully I’ll have zero lingering regrets about putting valuable time, $, and energy into building out. Jeeze, I just got the CRF300L 600 miles ago, oh well, live and learn. Thanks for your comments all !
Hey, I just saw other posts about the Pivot Pegz on a forum where some guys were saying they didn’t really solve the problem but what fully did for them was just simple gel sole inserts in their boots. Whoo’da thunkit. Previously on the seat I was thinking of putting a gel pad there. I’m the guy that will track down a bike’s electronics down to the milliampere drain to figure out why it won’t start, having forgot to first check the kill switch. Anyway, another tool in the vibes toolkit.
They seemed to make a difference in my case, the vibrations through the pegs no longer bother me. The gel pad will probably help. I noticed a difference if I use a sheepskin over my Seat Concepts low seat or use my Seat Concepts standard height seat, which has more padding. Try the Barkbusters and their bar-end weights for a start, I’m guessing you’ll really like the result.
I did it, jumped the CRF300L ship and got a 2020 500 EXC !
I love it. I was a bit over concerned I think about the vibrations, having had too short of a test ride at the dealers to know really what to expect. I got used to them quick. The power also was not the monster it first felt like (well it can be in the high revs). But in low revs, it’s totally manageable and smooth, I love this bike, I’m selling my 300L immediately and investing my time now in adventurizing this bike! Thanks everyone for your advice and to the Rolling Hobo for this excellent page!
Hi Dave, sorry for the late reply and welcome to the dark side. May the 500 serve you well!
Anyone on this ever have an issue with injector on the trail? It’s tucked next the frame so tight I’m afraid I might have to drop the engine to get at it if it gets clogged.
Hi Sam, I’ve never had a problem with the injector thus far, but always carry one under the seat for emergencies.
Thanks great thank you. So you did no engine rebuilds (apart from rocker arms and cam chain)?
Hello Mr.Rolling Hobo ! When running the 13-50 sprockets, do you skip 1st on the street and start in 2nd ? I recently switched from stock 15-45 on my 09 EXC and still find 6th a bit useless for me. I tried 2nd gear starts with the 14-50 gearing but thought that was slipping the clutch too much, creating too much heat for the bike. But also found starting in 1st kind of annoying because it’s now so short, should I go shorter and make that 1st gear into a tractor gear for when things get really technical and start in 2nd ?
Thanks !
Bonjour Mr Holo Bonjour à tous
super l article sur la prépa du 500 ktm exc
Je cherche une moto plus light que ma 1200 gs adv pour faire du TET et voyages au Maroc
Sachant qu aujourd’hui je roule en off road avec la BM mais j hésite entre un 500 ou une 690/701
Mais j ai peur que les distance en 500 soient limitées et je crains qu’une 690 soit pas beaucoup moins lourd que la GS … avez vous un avis la dessus ? Merci
Hey Hobo, what a fantastic article and a great discussion from everyone involved! Even after nearly a decade, the insights you shared are still incredibly relevant.
I encountered a tough break on my KLR650 during a backcountry trip across Washington, Oregon, and Idaho in the US. I hadn’t anticipated the oil consumption, and within a week, the engine seized in the middle of Idaho on my way back to Vancouver, BC, Canada, where I live. During the journey, I was already contemplating a switch to a lighter bike. My friends, who ride DR650s, have been encouraging me to join them, and I’ve also been considering the DRz400S for its lighter weight.
After reading your article and all the valuable feedback in the comments section, I’ve decided to focus on the KTM 500 EXC. I might even reach out to Mark, if he’s still in Surrey, BC, to get his take on it.
My question to you is this: since the article was written in 2016 and now that it’s almost 2025, would you still recommend the same bike, or would you consider something else? I’m aware of newer players like Kove motorcycles and would love to hear your updated thoughts.
Best regards,
Angel
P.S. If you ever find yourself in Vancouver, feel free to reach out. I’d be happy to organize a backcountry ride!
I have a 2015 KTM 500 set up for adv rides. For me the biggest difference between this bike and something like the Kove would be the weight. I can pull the 500 out of a ditch by myself. Couldn’t do that with the Kove 450 Rally, which is 50 kg heavier. If you don’t plan on tackling anything more challenging than dirt roads perhaps the Kove or something similar would work well for you.
Nice for information
How much have you spent in getting that bike, Bro? I know that even artificial intelligence cannot build that masterpiece.