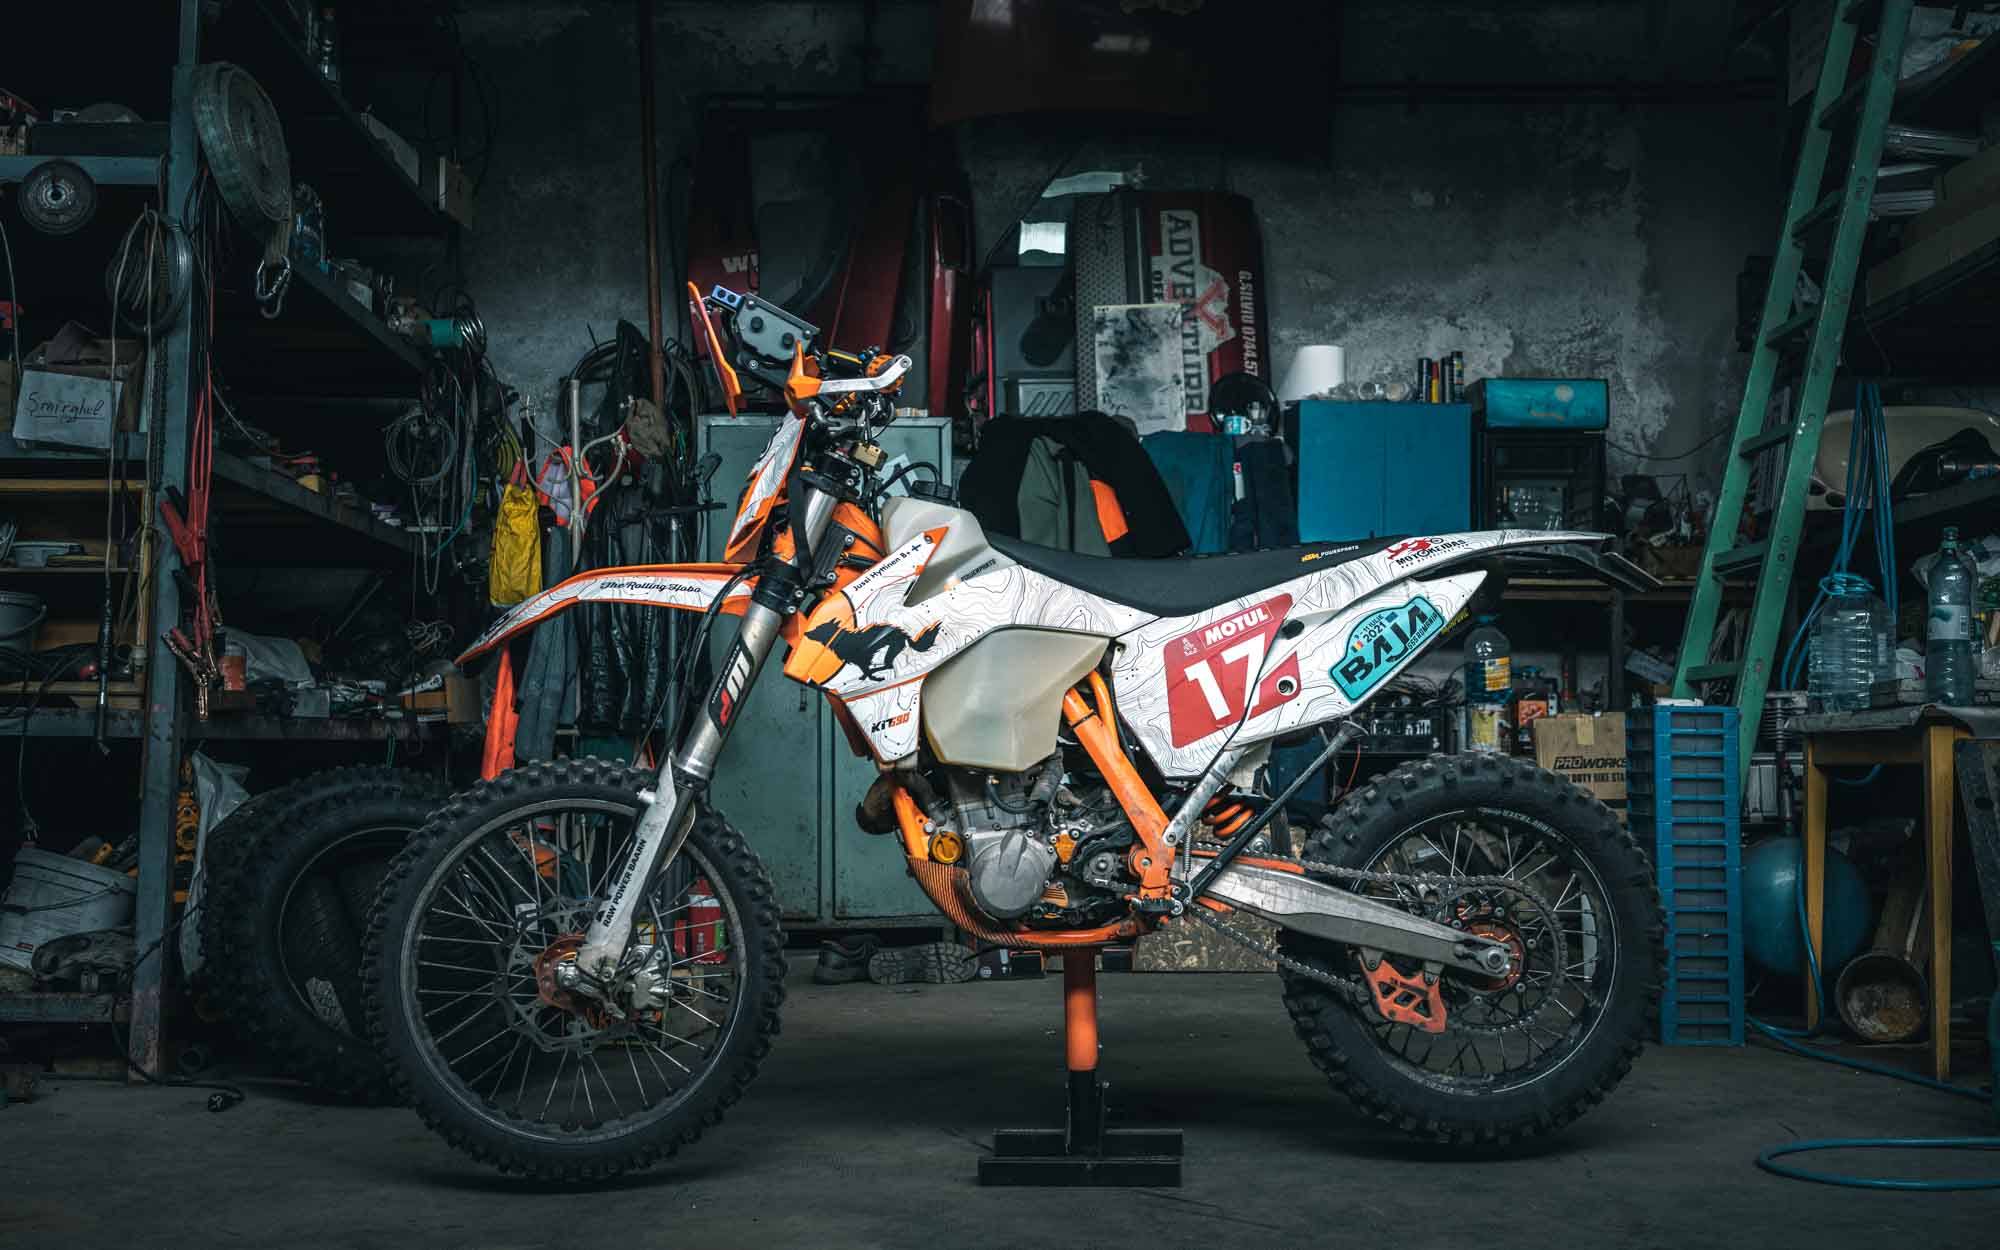
KTM 500 EXC ultralight
The previous build of my KTM 500 EXC ticked many boxes for adventure enduro, but it seemed that there were more levels to discover in ultralight adventure enduro.
Why the KTM 500 EXC?
Weight
The energy a rider spends on a difficult trail is directly proportional to the weight of the bike. The weight of the bike similarly affects the probability of spills and the energy spent on recovering from them and continuing the journey. Picking up bikes is energy consuming.
Suspension
The 500 EXC has great suspension already in stock form. It needs very little modification to work well in adventure enduro. The PDS design is very simple and has a minimal amount of bearings down low in harms way. The bikes with linkage suspension have many more bearings prone to dirt and water, which results in more maintenance and more spare parts to carry.
Engine
The 500 EXC has a good engine, producing enough power for adventure enduro. It has plenty of bottom end grunt for cruising and explosive power higher up for when you need it for obstacles and whatever. What’s best is that the engine doesn’t seem to be prone to stalling even with lower revs.
Gearbox
The 500 has an enduro gearbox, so the first gear is nice and short. It makes life a lot easier with tricky starts on steep technical terrain. The sixth gear is tall enough to keep a nice marching pace on transits, even with an enduro final drive gearing.
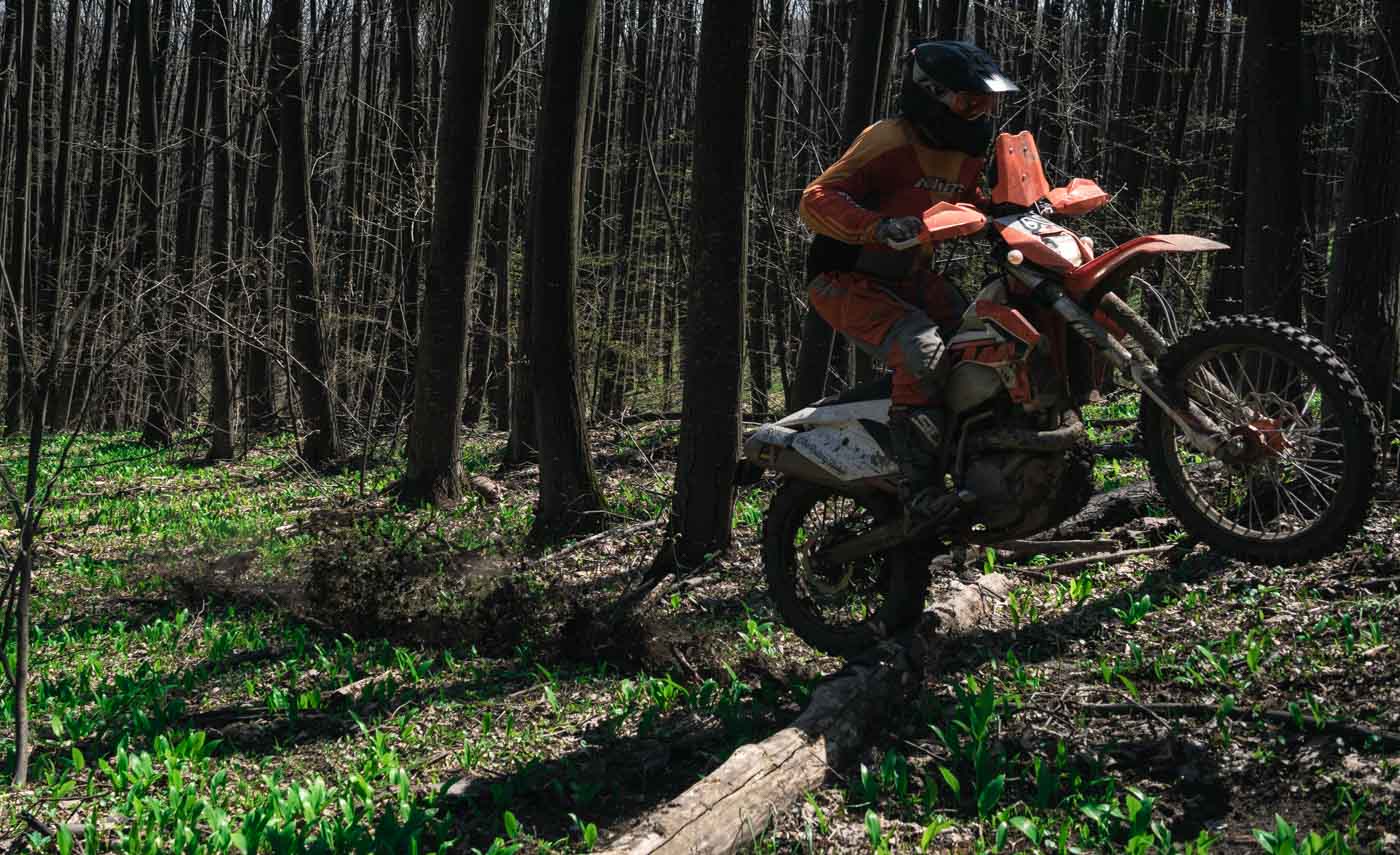
The Build
Handlebar
I prefer to use aluminium rail hand guards, instead of the OEM ones that are mounted from a single point. It’s not only for hand protection, but the rail also does a great job of protecting the handlebar, levers and throttle tube from damage in falls. The handlebar vibrates a lot, so instead of using the supplied sheet metal screws, I prefer to drill the mounting rail and bolt the deflector right through.
Even then I use Nyloc nuts or thread locker to make sure they don’t roll open in the vibration. I just cut the original closed grips to fit the rails, but a better option is to get a pair of dual compound open grips from KTM. I always use grip donuts, to avoid blisters on the outside of the thumb joints.


Levers
On the previous build I went with Midwest Mountain Engineering’s Clever Levers to ease the strain of clutch pull on the finger joints on long expeditions. However, I decided to go back to OEM versions, due to the fact that they’re cheap and do not need any adjustment in case they need to be replaced.

Pedals
I have a pretty narrow skid plate, which doesn’t offer much protection to the pedals. To give them a better chance of surviving small tumbles, I went with Hammerhead Designs pedals with titanium tips. The shifter is mounted on the engine with a single bolt, so it’s a good idea to make sure it doesn’t loosen and rotate off. Hammerhead produces a handy lock wire bolt for the shifter pedal which works like a charm. The brake pedal has the tendency to scoop trail debris between itself and the clutch cover. At worst, the jammed debris could break off the pedal. A security wire from the pedal to the frame will significantly reduce the risk of that happening.
Foot pegs
I use Paragon titanium foot pegs by Hammerhead. They’re very light, enduro profile and stay sharp. For a lower and wider platform, a great option in steel is the lowered rally pegs from KIT690.


CLUTCH
Apparently the brake lever tip teeth have a tendency of puncturing the clutch cover in falls. The P3 carbon clutch cover protector will prevent this from happening and also protects the cover from boots scratching it. Further back, the clutch slave cylinder guard should keep the clutch in working order after a snapped chain whiplashes though the front sprocket.


THROTTLE CABLES
The throttle cables are somewhat exposed on the top of the handlebar, and the KTM metal protector will give them a better chance of surviving a beating. To make sure the cables stay where they’re supposed to while fitting the tank, a set of bungees will do the trick. I run a strip of inner tube on both sides of the frame, from the tank’s top mount to its side supports.


SKID PLATE
I went with the P3 Carbon skid plate. Not only is it light and strong, but it has to be the most beautiful skid plate I’ve ever seen.

EXHAUST
The factory slip on silencer worked fine, but I decided to go with the Akrapovic titanium factory silencer and the Akrapovic titanium header. The silencer is lighter than the OEM can, which will make a difference as it sits high on the bike. It also adds a little torque and power throughout the entire rev range.
To keep my riding pants from melting, I fitted an SXS carbon exhaust guard. It was pretty small, so I upgraded to a P3 Carbon pipe guard, which is much longer and also protects the header section in addition to the pants. In the other end of the pipe I have a Giant Loop Hot Springs heat shield to keep my luggage from melting on the silencer


RADIATOR
The 2016 KTM 500 EXC had a radiator fan already fitted from stock. If it hadn’t, I would definitely have installed one. I used to run the plastic OEM radiator shields, but ended up investing in Bullet Proof Designs radiator guards. They are not exactly ultralight, but I appreciate the protection and they have performed extremely well, despite several crashes.
ENGINE TEMPERATURE SENSOR
I run a Trailtech engine temperature gauge on the radiator with the EZ-Install fin sensor, and the reduction in temperature is dramatic when the fan kicks in. It’s really handy for keeping an eye on how the engine is doing in steep, technical and slow terrain. It continuously shows the current engine temperature and regularly flashes the highest reached temperature from the last few minutes. Notice the ultralight ghetto zip tie installation to the handler. It turns out I’ve been wathcing Roadkill Garage way too much.


FUEL TANK
The original build had a single 19 litre KTM Powerparts fuel tank. Although its very convenient for long stretches without needing to refuel, I find it rather detrimental to body positioning. Also, it has a tendency to slosh around when around half way, and handling the bike when getting stuck or falling is of course more energy consuming with a full 19 litre tank. This build features the 11,5 litre tank from KTM Powerparts, and I’ll make up for the extra range when necessary, with a Giant Loop Gas Bag. The bike is much more nimble with the smaller tank, and I like the look of the OEM panels, which also offer an extra layer of protection to the tank.
I didn’t bother with putting an extra fuel filter or replacing the standard micro filter with a Golan or equivalent. Instead, I’ll keep an eye on the in-tank filter and do frequent changes of the micro filter. Every time the quick release is opened, the O-ring should be lubed with silicone grease before closing. If it gets too dry, the female connector will potentially catch on the O-ring an tear it, resulting in a fuel leak. I protected the the fuel tank quick release with a section of MTB inner tube. It’s tied in at the bottom, to prevent crud flying up into it. I left a small hole for draining water though.

AIR FILTER
I’ve upgraded the standard air filter bracket stud to the factory version to avoid any malfunctions on the trail. I use the standard TwinAir pre-oiled air filters. They can be washed out with normal dish washing liquid and then re-oiled. However, I prefer to carry several filters instead of washing and oiling one or two on the trail. This is because the weight of the liquids alone will be more than three filters. The preoiled filters are light and can easily be carried compressed into small ziplock bags. I run a dust cover on top the air filter to give a little more life on expeditions.
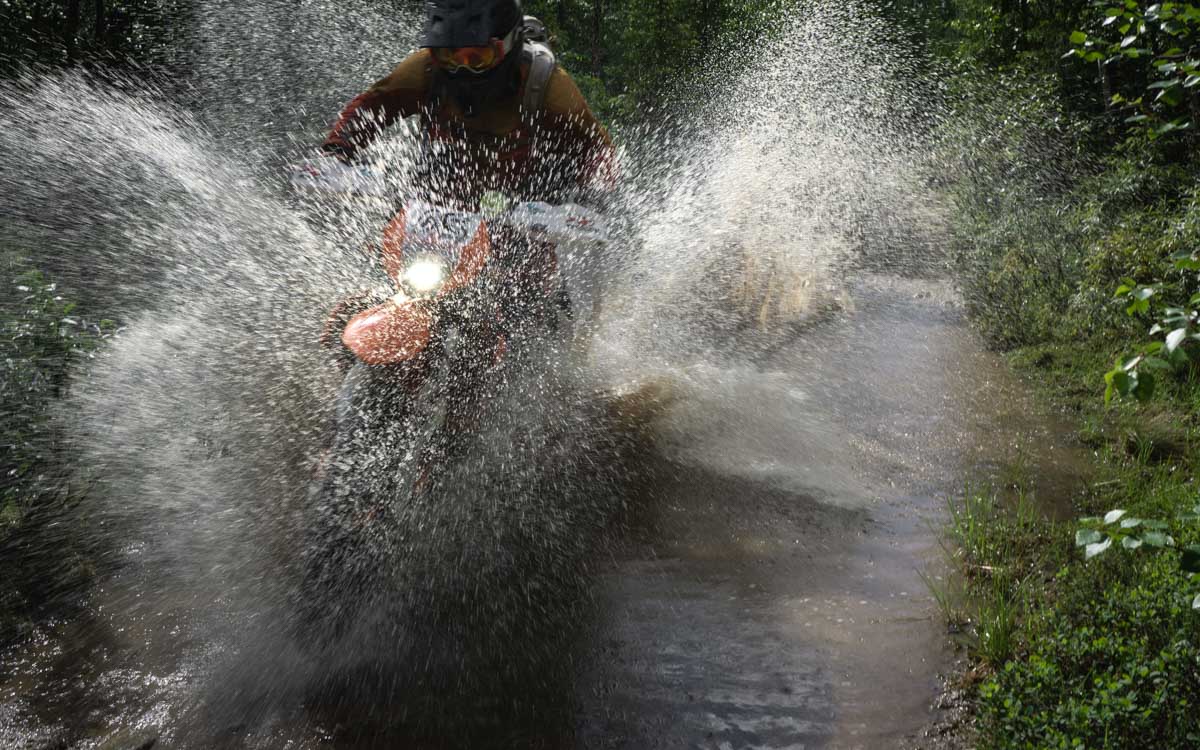
The airbox and intake sit very low on the bike, which will be a problem in deep water crossings. The airbox actually has a drain hole in the bottom, which will let water enter through it freely. I have yet to solve this puzzle, but I suppose the answer will be somewhere between waterproofing the airbox and building a temporary snorkel for the intake.


FINAL DRIVE
I prefer to run the standard enduro 13:50 gearing with SuperSprox Stealth sprockets. I also experimented with 14:50, and while it tops out at 150 km/h fully open, I found the first gear too tall for technical stuff. The 13:50 is fantastic on first gear technical ground and will still roll nicely at highway speeds up to 110 km/h. I suppose for rides with long sections of tarmac, carrying a 13T and 14T front sprockets might seem appealing, but I find it a little counter-productive.
I’d rather not carry the extra weight for weeks if I only need it for one or two days. Also, with the standard chain, the 14:50 gearing will bring some rear tyres too close to the swing arm and start wearing out the mud flap. I run the chain with a quick link, and a TMD chain guide with replaceable bottom slide. I don’t run a chain oiler, but use whatever oil I happen to find to lube the chain.


SUSPENSION
I’ve upgraded to a stiffer 80 N/mm spring in the shock to compensate for the luggage. I’ve also added a quick preload adjuster collar, to avoid having to carry a shock wrench to adjust it. The forks are in original form.

WHEELS
In stock form, the 500 has the rear sprocket bolted directly onto the hub. It’s fine on dirt, but on tarmac it may have serious consequences due to the lack of natural damping. The front sprocket may start to wear out the counter shaft, causing it to eventually fail. A damped rear hub will counter this problem and also ease out the impact throughout transmission in general. I originally had a KTM damped rear wheel, which works fine. However, I splurged on a set of Haan Wheels hubs with a damped rear and Excel 18/21 A60 rims.
I don’t run tubes any more, as I seem to be having a lot of punctures due to excessive heat in low pressure. I’ve instead opted for Michelin mousses on AC-10 tyres. They are of course anything but ultralight, but the upside is that there is no need to carry spare tubes. Either way, I will next look into going tubeless, just as on my mountain bikes.


BRAKES
I love a clean office and modified the front brake to run rally style between the headlight mask and front fender. It does not interfere with navigation equipment and thus far has never caught on anything on the trail. The modification can be done with the OEM brake hose, and needs nothing more than patience and a few zip ties.
The rear brake is fitted with a thicker closed brake disk, to reduce wear on the rear brake pads. With the standard open brake disks, I’ve gone through brake pads in a single day of riding in wet and sandy conditions.


ENGINE OIL
I replaced the standard oil plug with the factory version, for extra durability and a smaller chance of the plug loosening and falling out. Theoretically the factory oil pump cover cools the oil a little, but it’s in fact there because it looks cool. Same goes for the orange oil filter cap. Guilty as charged.
The oil volume of the 500EXC has been debated until exhaustion, with different volume expansion methods from high volume clutch covers to external oil coolers. In fact I have a Twin Air oil cooler sitting in my garage, and despite the fact that it will add oil volume and reduce temperature, I never got around to fitting it. The reason I left it out is that it adds weight and four wet connections i.e. fail points. It requires special oil filters that are hard to find even in Europe. Additionally, it adds complexity to the oil change procedure and requires verification of oil flow, which seems close to impossible to do without removing the tank. So in my view that’s a lot of extra hassle and risks for a little bit more of oil. I’d rather just do oil changes more frequently

IGNITION MAP SWITCH
The ignition map switch is there to facilitate the change between standard and soft ignition maps. Most of the time I run on standard, but the soft map may be useful in technical terrain and if fuel quality is dubious or low octane. At least that’s what I’ve heard, and to be honest, I don’t feel any difference between the maps.

Steering damper
The Öhlins/Scott steering damper is quite a revelation. It does make the bike track really nicely on soft or rocky terrain.

INDICATORS
I went with some tiny LED indicators and a soldered LED indicator relay for the correct timing of the blink. The bike vibrates a lot so the cables need to be secured to avoid them shaking and getting cut. Also ,special care should be taken to ensure a snug fit inside the wheel well, to avoid the rear tyre contacting the indicator wires.


IGNITION SWITCH
The 500 only has a steering lock, but it’s essentially a tiny bolt within the steering head, and snaps off just by trying to move the bike while it’s locked. So it offers virtually no protection. Adding an ignition lock does not offer much ore protection, as there is really nowhere safe to mount it, where the wires could not be accessed. So I didn’t bother with an ignition switch, but did install a hidden ignition on/off switch. No pics obviously.
HEADLIGHT
The OEM light has been replace by the Dual.5 LED light by ET Racing. I have yet to test the light in riding conditions, but there is a lot of output compared to OEM headlight. See this post on the installation.
Although the light is absolutely stunning au naturelle, it needed a little extra protection. A standard KTM PowerParts headlight protector did the trick.


MIRRORS
The 500 came with two static mirrors. I prefer a clean cockpit when riding offroad, so I replaced the mirrors with a single Acerbic left hand side folding mirror. It’s mostly tucked away behind the hand guard.
SIDE STAND
The stock side stand gave up the ghost during the Crimson Trail, and I’ve since replaced it with a Hammerhead Side Stand. Bomb proof.


NAVIGATION
The bike has a single Garmin Montana 600 navigator. It’s locked into a powered Garmin cradle, which is held on the handlebar with a RAM mount. I keep the RAM mount loose enough to easily switch back and forth between seated and attack positions without needing to adjust the tension bolt. Power is run directly from the bike’s battery with a small fuse under the seat. There’s an on/off switch for the navigator, mounted directly to a bunch of wires with zip ties; keeping it ghetto.
ACCESSORY POWER SUPPLY
I have a single KTM PowerParts 12V socket on the number panel in the back of the bike. I can plug in a 12V USB adapter and charge whatever needs to be charged during the night in camp.


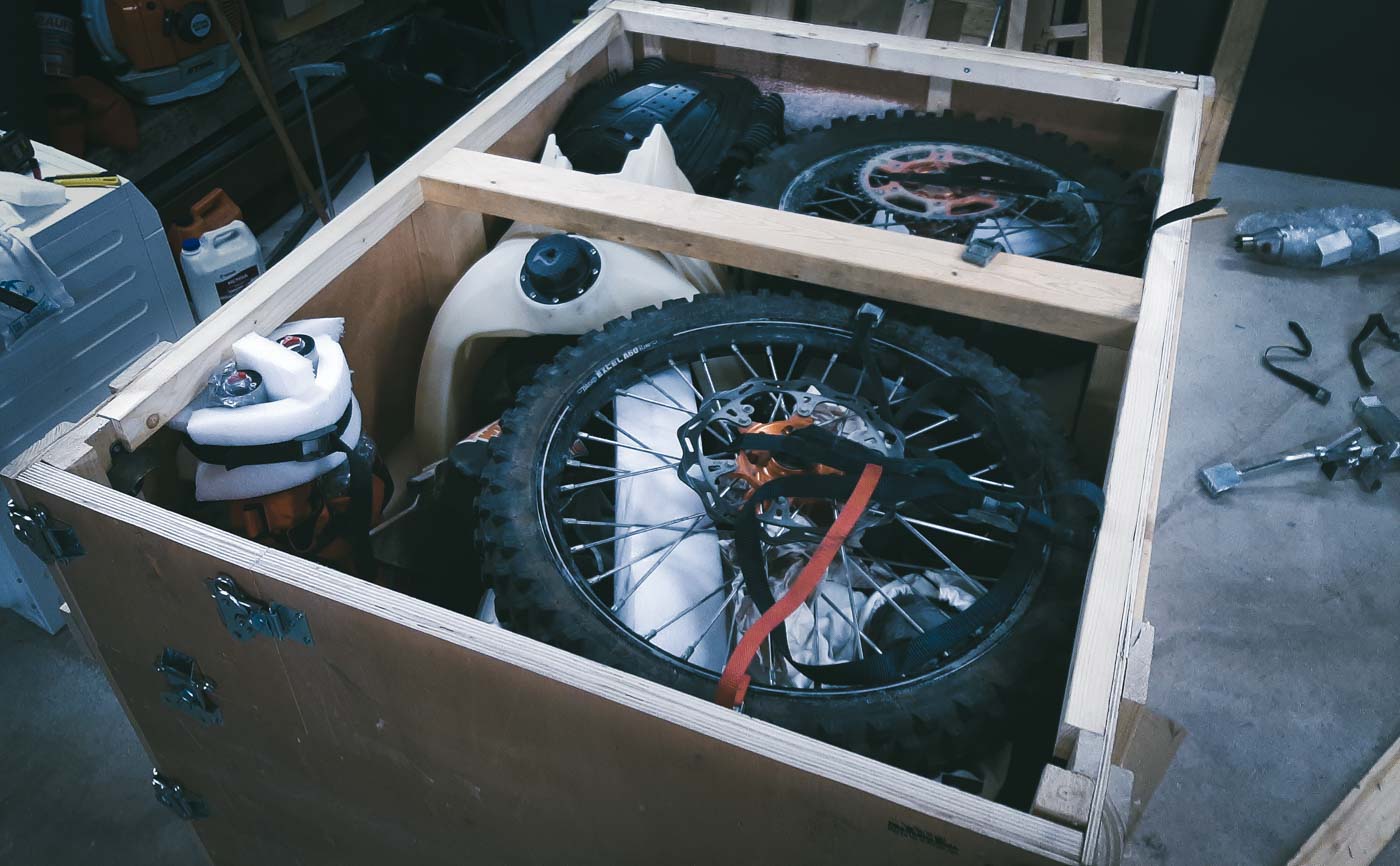
PANNIERS FOR EXPEDITIONS
I currently run with 2 x 10 litre XCountry custom Hobo version panniers and a Giant Loop ZigZag handlebar pouch. So a total volume of 20 litres for luggage.
The XCountry panniers mount on the bike without a rack, but need a tail mount point. I bolted some D-rings right on the tail fender with large washers, and so far they’ve been holding nicely. In the front the panniers are strapped right onto the frame.
After looking into several different pannier setups, I must say that the XCountry panniers tick all the essential boxes for me in ultralight expedition use. They’re light, waterproof, quick to open and close and sturdy. They are also easily expandable with the handy zigzag bungees on the outside. I regularly carry two 1.5 litre water bottles in the back at the end of the day before hitting camp.
The new version of the panniers also feature collapsible outside pockets, large enough to fit oil bottles. They are very handy for carrying liquids or other stuff that will potentially contaminate luggage.


PANNIERS FOR SHORT TRIPS
For one or two day trail riding outings, I prefer the ultra light Giant Loop Mojave saddle bag, and extend it with a Giant Loop Possibles roll top pouch when need be.


BOLTS
Many of the aftermarket stuff such as skid plates have different bolt head and types than the rest of the bike. I usually replace all after market bolts with high quality stainless steel hardware. I make sure the head is a Torx key size that I need to carry in my toolkit anyway.
HAUL LOOPS
The tail can be easily moved around from the luggage straps or just by grabbing the tail, so I only fit a haul loop in the front. It’s another ghetto edition, made from 25 mm webbing and some hardware. It does what it’s supposed to and tucks away nicely behind the headlight mask
Full service history
Check spoke tension Anti seize chain adjuster bolts Check radiator fan Oil and filter change Replace air filter Change oil and filter Secure tank breather hose Replace oil and filter Replace oil and filter Rear shock service and preload adjuster Adjust clutch and brake levers Check suspension settings Replace oil and filter Replace oil and filter Replace oil and filter Replace oil and filter
Replace oil and filter Shock service Replace tyres, Michelin AC10 Install EnduroTech light mask Replace engine oil Replace Oil and filter Replace oil and filter Replace oil and filter Replace rear silencer bolt
Check rim lock tension
Check valve nuts
Check coolant
Check steering limiters
Stabilize and protect wiring
Grease axles
Grease steering stem bearings
Adjust handlebar position
Anti seize brake pad pins front
Anti seize in triple clamp bolts
Align forks
Rear sprocket 50-T
Weigh bike
Anti seize brake pad pins rear
Grease kickstand bolts and spacers
Grease countershaft
Front sprocket 13-T
Stabilize throttle cables to frame by seat bungs
Change oil and filter 1
Change oil and filter 2
Check valve clearances
Check valve shim sizes
Check radiator hose clamps
Secure starter relay with ziptie
Secure fuel pump relay with ziptie
Replace fuel prefilter
Adjust idle speed
Loctite kickstarter bolt
Loctite sprocket bolt
Loctite shock bottom bolt
Loctite chain guide bolts
Grease PDS hem joint (outside only)
Grease swing arm bearing
Mitas C-02 rear tyre
Headlight alignment
Electrical spray on all connectors
Full bolt check
Protect frame abrasion areas & recheck wiring stability
Check fairing screws
Tank protector rollers to radiator shroud tabs
MTB inner tube over fuel line quick release
Rear shock spring 80N/MM
Align forks
Tune suspension
Air filter change
Replace Hammerhead brake pedal tip bolts
Check valve clearances
Replace valve shim EX RIGHT
Check valve clearance EX RIGHT
Replace fuel prefilter
Replace air filter
Adjust idle
Front sprocket 13-T
Lock wire shifter pedal bolt
Loctite luggage strap bolts
Loctite panel bolts
Metzeler Unicross tyres
Replace air filter
Replace fuel micro filter
Check valves
Replace rocker arms
Fork service
Maxxis tyres
Replace rear brake disc
Replace coolant
Replace clutch fluid
Replace front brake fluid
Replace rear brake fluid
Grease rear wheel bearings
Grease sprocket carrier bearings
Rear tyre mud flap
Check the front brake linings
Check the rear brake linings
Check the free travel of the foot brake lever
Check the radiator fan
Adjust throttle position sensor
Balance Haan wheels
Check the steering head bearing play and grease
Check and grease the swingarm bearing
Check shock bottom heim joint
Replace shock bottom heim joint
Replace rear sprocket 50T
Replace front tube
Replace rear tube
Check the spoke tension
Change spark plug
Replace chain
Check valves
Check clutch steel discs
Check clutch friction discs
Protect subframe abrasion
Check clutch pressure plate
Grease all moving parts
Check all hoses
Check cables for damage and protect routing
Full bolt check
Replace fuel filter
Replace air filter
Replace oil and filter
Replace power relay
Replace front sprocket 13T
Tune suspensions
Check electric problem 12 V USB outlet
Replace air filter
Replace fuel filter in tank
Check valves
Check timing chain: excellent condition
Replace front brake disk
Check steering head bearing
Check clutch
Replace air filter
Replace fuel microfilter
Install DIY kill switch
Replace front sprocket 13T
Wash air prefilter
Mitas C-02 rear tyre
Replace air filter
Replace fuel microfilter
Wash air prefilter
Replace air filter
Replace fuel microfilter
Wash air prefilter
Check and adjust valves
Replace rear brake pads
Replace front brake fluid
Replace grips
Replace foot peg cotter pins
Front sprocket 14t
Replace clutch master cylinder membrane
Full bolt check
Replace spark plug
Dunlop D606 tyres
Replace oil sieves and caps
Replace air filter
Replace fork seals
Clean forks
Replace fork oil
Fork Service
Replace spark plug
Replace spark plug connector
Replace rear shock bottom bearing
replace timing chain
Ignition cover gasket
Oil and filter
Replace brake fluid
Replace clutch fluid
Valve clearance check and adjustment
Remove navigation clamps
Short arm for Garmin cradle
Remove lower Garmin cradle
Remove Baja LED
Remove 12V outlet
Remove relay and reconnect headlight
Medium fuel tank
Replace in tank fuel filter
Fix sidestand
OEM plastic kit
Replace rear indicators
Clean fork seals
Lube fork dust covers
Reattach valve case breather hose
Relocate temperature gauge
Navigator to handlebar
Oil and filter
Remove navigation panel
Remove navigation clamps
Clutch lever, orange
Brake lever, orange
Factory oil filter cover
Install mousses
Stickers on rim holes
Replace air filter
Lithium Ion Battery
Hammerhead brake pedal
Hammerhead shifter pedal
Hammerhead titanium pegs
Hammerhead side stand
Full titanium Akrapovic system
Install horn
Check headlight alignment
Check brake fluid levels
Check clutch fluid level
Replace front wheel bearings
Replace rear wheel bearings
Replace sprocket carrier bearings
RAM mount for fat bar
Replace swing arm bearings
Replace swing arm chain slide orange
Replace chain slide
Replace chain
Replace 13T front sprocket
Replace air filter
Replace air filter dust cover
Replace fuel micro filter
Replace footpeg pins
Replace fork oil
Replace white hand guards
Replace side stand bolt and other parts
Rewire navigator
Protect clutch hose
Tighten LED bolts
Secure LED ballast
Install rear indicators
Secure rear indicator wires
White tail section
Orange frame protectors
Seal steering lock from water to steering head bearings
White side sections
12V power socket kit
12 V socket with cable
Replace mask rubber straps
50T rear sprocket
Oil and filter
Haul loop
Bolt reg plate
Lube mousses
Wash and oil air filter
Replace rear tyre, Metzeler Six Days Extreme
Lube mousse
Relube front mousse
Replace rear mousse. Metzeler
Wash and oil air filter
Replace speedo battery
Replace rear tyre, Metzeler Six Days Extreme
Replace front tyre, Michelin Starcross
Replace front sprocket 13t
Check valve clearance
Replace air filter
Replace air filter dust cover
Replace coolant
Replace engine oil and filter
Service steering damper
Replace brake fluids
Replace clutch fluid
Replace con rod
Replace piston
Replace clutch cover gasket
Replace SLIDING GEAR 3/4 G. 08
Replace SLIDING GEAR 6.G. 08
Replace IDLER GEAR 3.G. 08
Replace IDLER GEAR 4.G. 08
Replace IDLER GEAR 6. GEAR
Replace SHIFT DRUM LOCATING ALU CPL.
Replace TIMING CHAIN 114T 08
Replace crankshaft bearings and seals
Replace counter shaft bearings
Replace counter shaft o-ring
Replace main shaft bearings
Replace ignition cover gasket
Rebuild water pump
Replace spark plug
Replace clutch damper rubbers
Replace clutch slave cylinder gasket
Rebuild clutch master cylinder piston
Rebuild front brake master cylinder piston
Replace steering head bearings

Great looking bike. Looking locally, in Colombia, to purchase. Thanks for all the great info. Where did you get the small indicators? Do you recall?
Thanks Phil! The indicators are Shin-Yo Spark’s with a tinted lens. I bought them online at Louis. It’s my second pair, as the first pair died during the Crimson Trail 2017 due to vibration cutting the wires. I’ve secured them this time around, so hopefully they’ll survive…
Amazing build!
Thank you very muck for charing. You are a great source of inspiration. I see you have used differet tires such as Mitas CO2, Dunlop D606, Metzler Unicross, Michelin AC10. It would be nice if you could share your experience with these tyres as I am sure more than me are intreasted in this. Did the Mitas CO2 work out good?
Cheers from BelgardaBuddy (advrider)
Hey Jan, and thanks for your kind comments!
On the 690 I used the Mitas C-02’s almost exclusively, and really liked them. However, on the 500 EXC it was different story, and I never liked the feel. I guess they worked better on heavier bikes. The D606 is more of a rally tyre, which worked nicely on hardback, but lacked traction on soft stuff. A pretty decent all-round tyre I suppose, but I tend to prefer a knobbier tread. I absolutely hated the Metzler Unicross, although most people tend to like them. The AC-10 works pretty decently on the 690, but wears rather quickly. On the 500 EXC I currently have the AC-10 with mousses, but have only been riding on enduro trails. IT remains to be seen how the fare on expeditions.
Hi, was the rocker arms replacement at 6.5km part of the standard maintenance recommendation(s) or due to something else? I am so divided between the 690 and 500. Had two 690’s and every time a watch a video of a 690 in the dirt I remember exactly how heavy it felt hence the reason I’m seriously considering a 500.
Hi Gordon, I changed the rocker arms due to thinking I heard a strange noise from the engine. It turns out the noise was the normal KTM clutch rattle, and there was nothing wrong with the rockers. AFAIK the 500 doesn’t suffer from the same issues with the rocker arms as the earlier 690’s did. I’ve been super happy with the 500 and would not go back to a 690 as long as I’m riding enduro. Having said that, IMHO the 690 is a great build platform for rally type expeditions.
What’s that stand the bike’s on?
Do you happen to know the dimensions of the Xcountry panniers that you are using?
Hi Amar, the fifteen litres bags are 13x26x46 cm. The new ten litre bags are 11x22x40 cm
Hi there, another great build.
Would you have any more images of how you re-routed the front brake line and where you attached, cable ties or p-clips etc. About to do the same.
Hi Wilso, check out the 690 adventure build. It’s essentially the same, except on the 500 I just used zip ties to secure the brake hose on to the fender mount.
Just discovered your site today and what a wealth of information. As a commercial photographer, I recognize the effort put into the images as well, they are superb. Do you do them yourself? I’m, currently working to adventureize my (new) used 2012 500 EXC. I’m wondering if it’s smarter to upgrade the stock 8.5L tank with something like the Accerbis 20L behemoth or just. invest in something like the 20L Giant Loop Gas Bag? (Or maybe I split the difference?) The fact is, right now I spend most of my time on single track an hour out of town and won’t be doing more than a few week long trips per year. The long term goal is to go RTW. What are your thoughts on the fuel dilemma?
Hi Greg, thanks for your kind words. Yes, I shoot and post-produce all images myself, except for the odd shot by a team mate. I have a background in ad photography, and one of the reasons for starting this site was to have a creative outlet to counter balance the artificial world of advertising I was recreating for clients.
The fuel thing is a bit of a tricky question and depends on what you want to do. I currently have 9l, 11,5l and 19l front tanks, a 5l rear tank and a 3,5l GasBag. I mostly use the 11,5, and complement it with the GasBag when needed. IMHO it is the best solution for technical enduro with a requirement to do longer tracks every now and then.
For this winter I will go with 19l front tank, 5l rear tank and probably two Gas Bags to have 30 litres of fuel as we’re going where distances between inhabited areas are long and fuel is scarce.
IMHO the 20l GasBag is waaaaay to big and dangerous to put on a bike.
Either way, looking forward to hearing what you decide to go with.
Thanks for the feedback. Ultimately it sounds like lenses and camera bags, it all comes down to the task at hand. I ended up ordering the 20L which should get me far enough out into nowhere as I hone my adventure skills. If you ever make it up near Vancouver/Victoria lemme know and we can go hit some trails and if you’re interested I could include you in my Bike N Rider photo project: https://gregsamborski.com/the-bike-rider-project/
Hi Greg,
You seemed to have changed just about everything on this bike for an upgraded alternative.
Could you have not found a different bike that had stock equipment that fulfilled your needs ?
It just seems odd to buy a bike and then change everything, but what do I know ?
Hey John, not sure if you mistakenly switched my name for someone else’s, as compared to most I have made very few modifications!
I think a lot of people by this bike for the performance and reliability of the engine and chassis then go about customizing it to make it a perfect fit for their needs.
If you want to go far you need an upgraded tank, and most add a plusher seat and wind shield for comfort. If you wanna go hard maybe Upgrades suspension. Super moto is a whole different rabbit hole. I’ve heard many say you need $5,000 after purchase just to get the bike setup for your needs.
It seems there is no one bike out there that fits everyone’s needs or it would be a best seller.
That’s my two cents! Time to go install my new springs and sprockets!
Hi Jussi
After a lot of reading and consideration I just placed an order for a new 500 EXC Six days to be after delivery prepared as my lightweight adventure bike. Thank you for all the great information available on this site and the distilled experience of all the fellow adventurers.
Have you done any research on the issue of using tubeless tyres on your bike?
What is the requirement for the rims? Do Haan offer a tubeless solution for enduro use? Or someone else?
I did not find any information on their web page.
Trials bikes have been using tubeless tyres with low pressure for a long time.
I would really like to test tubeless. What tyres would be recommended?
Hi Erkki,
Congratulations on the new bike. May it serve you well!
I’ve not had the opportunity to mess about with the tubeless system. I’m still on mousses. TBH I don’t think going tubeless on an enduro is any different from with a mountain bike. I’m sure you’re familiar with the process with MTB’s as you’re a mountain biker too. I’m thinking the process for an enduro would be something like this:
-Remove old rim tape
-Clean the rim from grease and other crud
-Run wide MTB sealant tape over the spoke nipples a few times
-Install Schrader valve with O-ring on pressure side
-Fit tire on rim
-Fit rim lock with some kind of gasket to seal hole
-Pop tire bead on rim with compressed air
-Remove valve core
-Squirt in your favorite sealant (mine is Muck-Off No Puncture Hassle)
-Install valve core
-Inflate tire to pressure
-Tighten rim lock
-Spin to distribute sealant
-Check for leaks
-Roll
I’d just go with the Metzeler Six Days Extreme’s that you already will have on the new bike. It’s an excellent tyre.
What do you think? Did I miss something? If you end up trying this, I’d be very interested in how it goes.
Hi Jussi
Your straightforward action plan sounds good to me.
As I am not familiar with the rims on enduro bikes I have tried to find rims with a profile that is fit for tubeless tires.
I may have found a set of Excel Takasago rims.
One question is the lower end of air pressure this solution would allow to be used.
Once built I have an excellent opportunity to test the wheel set first on home turf in Finland next year.
Another topic:
Is there a reason to upgrade the clutch to eg. Rekluse?
I considered auto clutch but don’t want to loose engine braking.
Does anybody have experience of the effect?
Hi Erkki, looking forward to hearing about your experiences with the tubeless build. Please keep us updated on how it goes.
TBH I don’t know much about the Rekluse, as I decided against auto clutches after initially looking into them. The main reasons were that it is very expensive and spare parts are harder to find in the field if something goes wrong. Also, it makes bump starts impossible AFAIK. I use bump start a lot in the mountains, as I rarely have the engine running on long steep descents. Instead, I just have the gear in neutral and roll down DH style and pout it in gear and dump the clutch when I need the engine.
I’ve been running the TuBliss system for the last 4 months and love it. Installation was a little tricky for a guy who’d only ever put on 3 tires in his life – I didn’t use any sealant. I found the system has actually gotten better over time, the high pressure bladders have now stabilized. Yesterday I ran 4 in the rear and 6 in the front on balding tires and was kicking ass on the gnarly stuff and at high speed on the logging roads. If you have any questions feel free to reach out. I documented the process a little here: https://www.facebook.com/media/set/?vanity=GregSamborski&set=a.10158317185691007
Hi Greg, thanks for chiming in. Are you perhaps confusing tubeless with Tubliss, or merely stating that sealant is not necessary without tubes? I’d be interested in how much pressure creep you experience without sealant? What bike are you riding and with what kind of load, tires and pressure? Also, are you using a rim lock?
I got confused. I see now you are talking about truly tubeless systems where as I’m using TuBliss. I don’t use sealant with the TuBliss and haven’t had any issues. I’m on a 2012 500 EXC, using just the TuBliss rim lock, typically around 100kg when doing day trips, just ran 4psi in the back and 7psi in the front on the slimy Pacific North West single track yesterday and had so much traction, even on balding tires. I have only done one multi day adventure on this bike and I was about 140KG fully loaded running around 10psi on the logging roads. So far zero issues with the system.
Such low pressure is probably only doable with the Tubliss system. Must have epic traction. I did look into Tubliss way back, but always felt they were not ideal for long expeditions.
Any tips on carrying extra oil in your skid plate? Original idea.
Hi Dirk, I used to carry engine oil in the water reservoir that rally bash plates have. This was both on the 690 and the first build of the 500. I’ve since switched to a light bash plate and just carry oil in OEM bottles if I need to carry it, which is very seldom. In the end 4T engine oil is not hard to come by, so I don’t really worry too much about it. But if you decide to carry it in the bash plate, make sure the breather hole in the cap is sealed, or you’ll have emulsion, instead of oil after water crossings…
thank you for the article